Categories
Lifestyle

How to Remove Tan Overnight: 10 Quick Remedies for Radiant Skin

Do you love spending time outdoors but dread the stubborn tan that follows? Tanning is a common skin concern caused by prolonged exposure to the sun’s harmful UV rays. While natural tanning gives your skin a bronzed glow, excessive tanning can leave it looking uneven, dull, and tired.

If you’re looking for effective solutions to remove tan overnight, you’ve come to the right place! In this article, we’ll explore simple and safe remedies that work wonders—most of them using ingredients you already have at home. Whether it’s a quick DIY mask or a reliable skincare product, we’ve got you covered.

Ready to reclaim your glowing, even-toned skin? Let’s dive in!

Why Removing Tan Overnight Is Possible

The idea of completely removing tan overnight might sound too good to be true, but it’s not entirely impossible! While severe tanning may require a longer-term approach, there are certain remedies and products that can significantly reduce pigmentation, restore your skin’s natural glow, and improve its texture in just one night.

Here’s how it works:

  1. Exfoliation: Gentle scrubs help remove dead skin cells, which are often the most tanned layers of your skin.
  2. Natural Bleaching Agents: Ingredients like lemon, tomato, and potato contain natural acids and antioxidants that lighten pigmentation and brighten skin.
  3. Hydration and Soothing: Ingredients like aloe vera and cucumber calm inflammation caused by UV rays, reducing redness and improving skin tone.
  4. Active Ingredients in Skincare Products: Over-the-counter products like vitamin C serums or glycolic acid peels work overnight to brighten skin and even out complexion.

While these remedies don’t replace a long-term skincare routine, they are highly effective for quick, visible improvements.

Top 10 Remedies to Remove Tan Overnight

Here are the most effective remedies to help you wake up with visibly brighter and more even-toned skin. These remedies include natural ingredients and some quick product-based solutions for those looking for instant results.


Natural Remedies

1. Lemon and Honey Mask

Why It Works: Lemon is a powerhouse of natural citric acid and vitamin C, which help lighten pigmentation and reduce tan by exfoliating the top layer of skin. Honey acts as a humectant, locking in moisture while soothing and nourishing the skin, ensuring it stays hydrated and soft.

How to Use:

  1. Mix 1 tablespoon of fresh lemon juice with 1 tablespoon of raw, organic honey in a small bowl.
  2. Apply the mixture evenly to the tanned areas using a clean brush or your fingertips.
  3. Leave it on for 20 minutes to allow the ingredients to penetrate and work on the pigmentation.
  4. Rinse off gently with lukewarm water and pat dry.

Pro Tip:

  • Avoid direct sun exposure after using lemon-based remedies, as it can make your skin photosensitive.
  • For sensitive skin, dilute the lemon juice with water or skip it altogether to prevent irritation.

Frequency: Use this remedy 2-3 times a week for best results. Avoid daily application, as lemon’s acidity may dry out the skin over time.

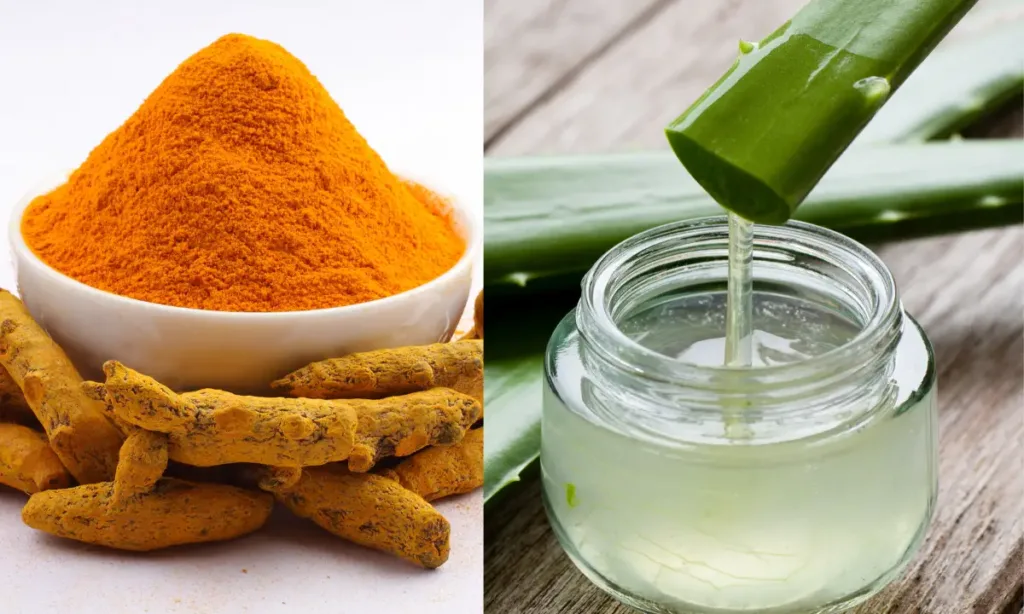
2. Aloe Vera Gel with Turmeric

Why It Works: Aloe vera is a powerhouse of hydration and healing, packed with vitamins and antioxidants that soothe sun-damaged skin and repair it overnight. Turmeric contains curcumin, a natural anti-inflammatory and brightening agent that reduces tan and promotes an even skin tone.

How to Use:

  1. Take 2 tablespoons of fresh or store-bought aloe vera gel (ensure it’s 100% pure without added chemicals).
  2. Add a pinch of turmeric powder and mix well to form a smooth, yellow-tinted gel.
  3. Apply the mixture generously to the tanned areas, focusing on affected spots.
  4. Leave it on overnight to allow your skin to absorb the nutrients fully.
  5. In the morning, rinse off with cool water and pat dry.

Pro Tip: If you’re concerned about turmeric staining your skin, use a very small quantity or opt for wild turmeric, which has reduced staining properties.

Frequency: Use this remedy nightly for 3-4 days in a row to see noticeable results.


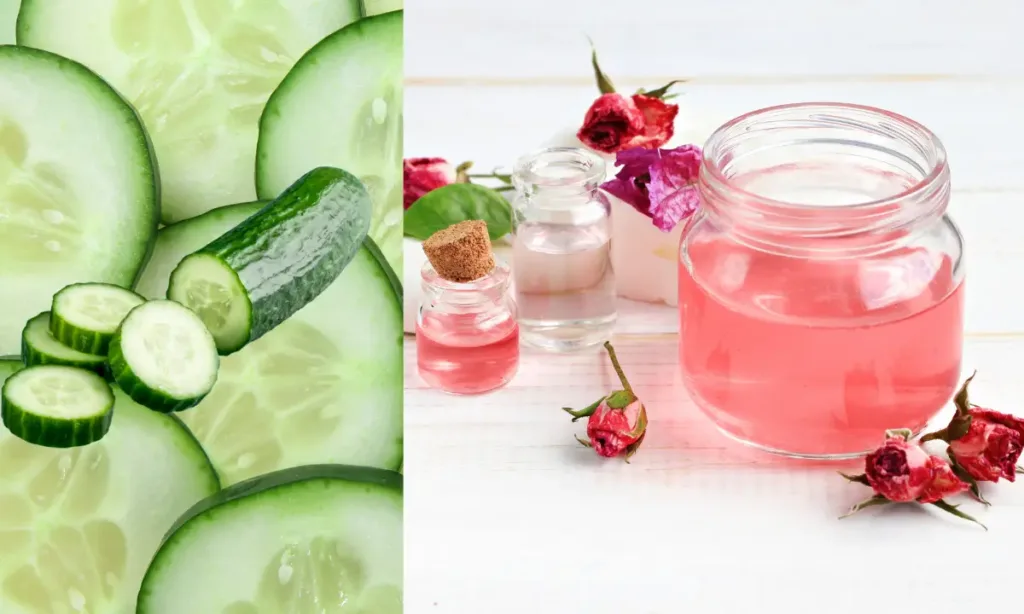
3. Cucumber and Rose Water Pack

Why It Works: Cucumber is packed with antioxidants and cooling properties that reduce inflammation, soothe sunburn, and hydrate the skin. Rose water acts as a natural toner, balancing the skin’s pH and providing a refreshing glow. Together, they help calm sun-damaged skin and reduce tan.

How to Use:

  1. Take half a cucumber, peel it, and grate it finely.
  2. Mix the grated cucumber with 2 tablespoons of rose water to create a watery paste.
  3. Chill the mixture in the refrigerator for 10-15 minutes for an extra cooling effect.
  4. Apply the mixture generously to the tanned areas using a cotton pad or clean fingers.
  5. Leave it on for 30 minutes to allow your skin to absorb the nutrients.
  6. Rinse off with cold water and gently pat dry.

Pro Tip: For added nourishment, mix a teaspoon of aloe vera gel into the pack. This will boost hydration and enhance the tan-removal process.

Frequency: Use daily for quick relief from tanning and a cooling effect during summer.


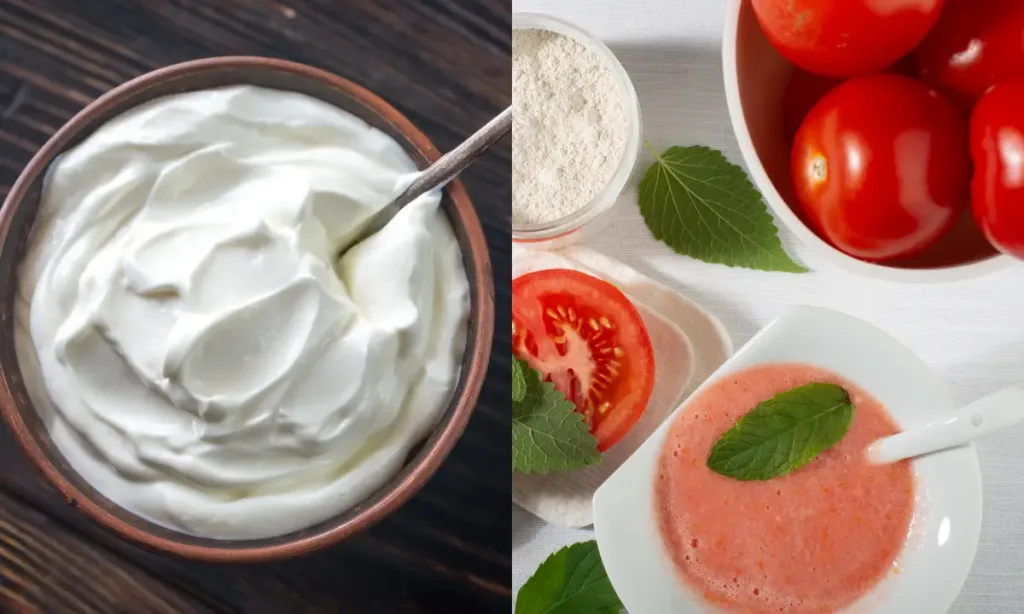
4. Tomato Pulp and Yogurt Mask

Why It Works: Tomatoes are rich in natural acids and antioxidants like lycopene, which help lighten pigmentation, reduce tan, and brighten the skin. Yogurt contains lactic acid that exfoliates gently while providing deep hydration, leaving the skin smooth and refreshed.

How to Use:

  1. Take one ripe tomato, wash it thoroughly, and blend it into a smooth pulp.
  2. Mix 1 tablespoon of plain yogurt (unsweetened and unflavored) into the tomato pulp until it forms a consistent paste.
  3. Apply the mixture evenly across the tanned areas of your skin.
  4. Let the mask sit for 20-25 minutes to allow the ingredients to penetrate and work on reducing pigmentation.
  5. Rinse off with lukewarm water and pat dry with a soft towel.

Pro Tip: If your skin is oily, add a few drops of lemon juice for an extra brightening effect. For sensitive skin, replace lemon with a pinch of turmeric for a soothing touch.

Frequency: Use this mask 2-3 times a week for noticeable results.


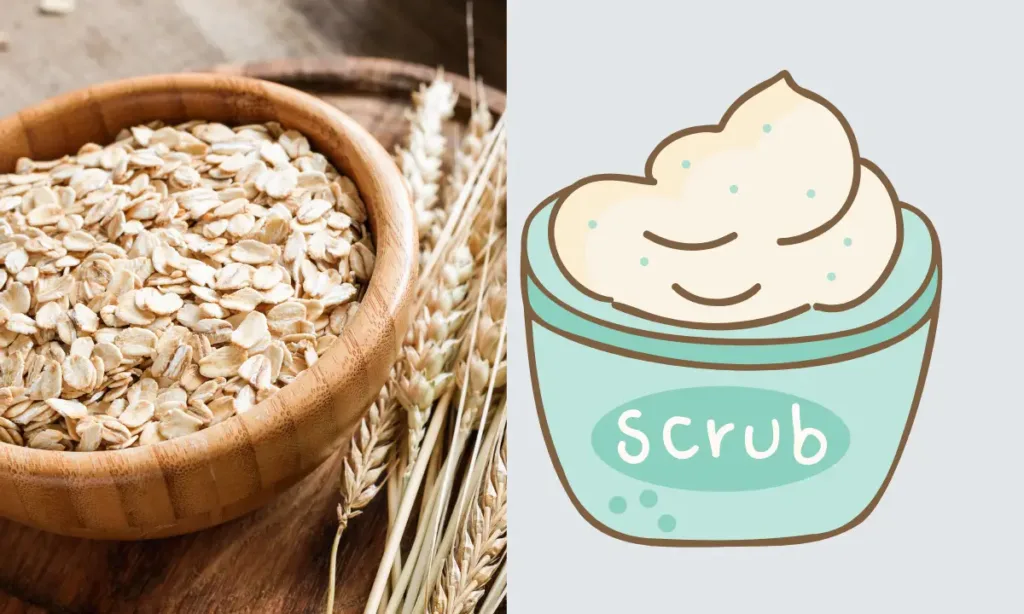
5. Oatmeal and Milk Scrub

Why It Works: Oatmeal acts as a natural exfoliant, gently removing dead skin cells and impurities, while milk contains lactic acid that brightens the skin and reduces tan by breaking down pigmented cells.

How to Use:

  1. Take 2 tablespoons of oatmeal in a bowl.
  2. Add enough milk to create a thick, spreadable paste.
  3. Apply the paste to your face or affected areas.
  4. Gently massage in circular motions for 2-3 minutes to exfoliate the skin.
  5. Let it sit for an additional 10 minutes to allow the lactic acid to work on the tan.
  6. Rinse off with lukewarm water and pat dry.

Pro Tip: For added hydration, mix in a teaspoon of honey to the scrub. Use this remedy 2-3 times a week for the best results.

Quick OTC (Over-the-Counter) Options

6. Tan Removal Creams

Why It Works: Tan removal creams are formulated with active ingredients like kojic acid, vitamin C, glycolic acid, or niacinamide, which target pigmentation and promote a brighter, even skin tone. These ingredients work by reducing melanin production and exfoliating the outer layer of tanned skin.

How to Choose:

  1. Look for creams labeled as “tan removal” or “brightening.”
  2. Check for active ingredients like kojic acid, alpha-arbutin, or licorice extract.
  3. Opt for creams that are paraben-free and dermatologically tested, especially if you have sensitive skin.

Recommended Use:

  1. Cleanse your face before applying the cream to ensure it absorbs effectively.
  2. Use a pea-sized amount and massage gently onto the tanned areas.
  3. For best results, apply at night and follow up with sunscreen the next morning to prevent further tanning.

Pro Tip: Consult a dermatologist for recommendations tailored to your skin type, especially if you have severe tanning or pigmentation issues.


7. Exfoliating Peels or Pads

Why It Works: Exfoliating peels or pads contain active ingredients like glycolic acid, lactic acid, or salicylic acid that work to gently dissolve dead skin cells and remove the outermost layer of tanned skin. This process reveals fresh, brighter, and more even-toned skin underneath while improving skin texture over time.

How to Use:

  1. Choose an exfoliating peel or pad that suits your skin type. Look for products with a low concentration of acids (5-10%) if you’re new to chemical exfoliation.
  2. At night, after cleansing your skin, apply the peel or swipe the pad gently across the tanned areas, avoiding the eye and lip areas.
  3. Allow it to work overnight. Do not rinse unless instructed on the product label.
  4. In the morning, wash your face with a gentle cleanser and apply a broad-spectrum sunscreen (SPF 30+), as exfoliation makes your skin more sensitive to the sun.

Pro Tip: Use 1-2 times a week to avoid over-exfoliation, which can lead to redness and irritation. For beginners, start with once a week and observe your skin’s reaction.

Precautions:

  • Avoid using physical scrubs or other exfoliating products on the same day to prevent skin damage.
  • Patch-test the product on a small area of your skin before full application, especially if you have sensitive skin.

8. Brightening Serums

Why It Works: Brightening serums are formulated with active ingredients like vitamin C, niacinamide, or alpha arbutin that work to reduce pigmentation, inhibit melanin production, and promote a more even skin tone. These serums are lightweight, penetrate deeply, and work overnight to leave your skin visibly brighter and refreshed by morning.

How to Use:

  1. Cleanse your face thoroughly to remove dirt and oil, ensuring your skin is prepared to absorb the serum.
  2. Take 2-3 drops of the serum and apply it evenly to your face or the affected areas using gentle tapping motions with your fingers.
  3. Follow up with a moisturizer to lock in hydration and enhance the effectiveness of the serum.
  4. Use at night for maximum results, as most brightening serums work best without exposure to sunlight.

Pro Tip: Always use sunscreen during the day after applying brightening serums the previous night, as active ingredients like vitamin C can make your skin more sensitive to the sun.

Precautions:

  • Avoid using serums with high concentrations (e.g., vitamin C >20%) if you’re new to active skincare to prevent irritation.
  • If combining with other products, avoid layering brightening serums with strong exfoliants or retinoids on the same night.

Frequency: Use once daily, preferably at night, and consistently for at least 2-4 weeks to see visible results.

Other Instant Tan Removal Techniques

9. Cold Compress with Milk

Why It Works: Milk is a natural source of lactic acid, which gently exfoliates and lightens pigmented skin, helping to reduce tan. Its cooling properties soothe irritation and inflammation caused by sun exposure, leaving your skin feeling refreshed and hydrated.

How to Use:

  1. Take a small bowl of chilled milk (preferably full-fat for extra hydration).
  2. Soak a clean cotton pad or soft cloth in the milk until fully saturated.
  3. Gently press the pad onto the tanned areas, ensuring full coverage.
  4. Leave it on for 15-20 minutes to allow the lactic acid to work on the pigmentation.
  5. Rinse off with cool water and pat dry with a soft towel.

Pro Tip: For added benefits, mix a teaspoon of rose water or a pinch of turmeric into the milk before soaking the cotton pad. This enhances hydration and adds a mild brightening effect.

Frequency: Use daily or every alternate day for best results, especially during summer when skin is prone to tanning.


10. Potato Juice

Why It Works: Potato is rich in catecholase, a natural enzyme known to reduce melanin production, which helps lighten pigmentation and tan. Its cooling properties also soothe sunburned or irritated skin, making it an excellent remedy for sun damage.

How to Use:

  1. Take a fresh, medium-sized raw potato and peel it.
  2. Grate or blend the potato, then strain the pulp through a clean cloth or sieve to extract the juice.
  3. Dip a cotton ball or pad into the juice and apply it generously to the tanned areas.
  4. Let it sit for 20-25 minutes, allowing the juice to absorb into your skin.
  5. Rinse off with cool water and gently pat dry.

Pro Tip: For extra hydration, mix the potato juice with a teaspoon of honey or cucumber juice before applying. This helps to prevent dryness and enhance the soothing effect.

Frequency: Use this remedy daily for noticeable results within a week.

These remedies are quick, easy, and effective for reducing tan overnight. For the best results, pick a method that suits your skin type and follow the instructions carefully.

Also Read: Best Body Lotions for Winter: Keep Your Skin Hydrated and Soft All Season.

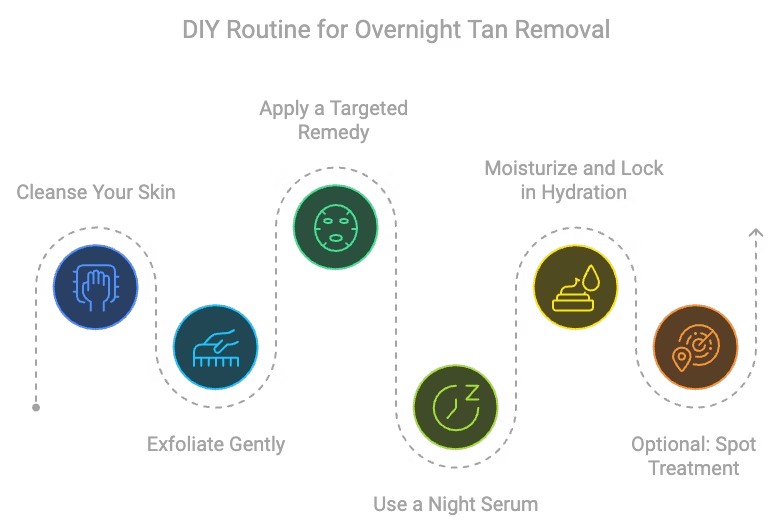
Step-by-Step DIY Routine for Overnight Tan Removal

If you’re looking for a quick and easy routine to remove tan overnight, follow this step-by-step guide. This routine combines the benefits of cleansing, targeted treatment, and hydration to ensure your skin looks radiant by morning.


1. Cleanse Your Skin

Cleansing is the foundation of any skincare routine. Start by using a mild cleanser to remove dirt, sweat, and excess oil that can block the absorption of remedies or products. A clean base ensures that your skin reaps the full benefits of the tan removal treatments you’ll apply later.

Steps to Cleanse:

  1. Wet your skin with lukewarm water to open up your pores gently.
  2. Take a small amount of cleanser and massage it onto your skin in gentle, circular motions.
  3. Focus on areas where you tend to sweat or have visible tan lines.
  4. Rinse thoroughly and pat dry with a soft towel—avoid rubbing to prevent irritation.

Pro Tip: Choose a cleanser with soothing ingredients like aloe vera or cucumber for extra hydration and to calm any redness or irritation caused by sun exposure.


2. Exfoliate Gently

Exfoliation is a crucial step to remove dead skin cells and prepare your skin for the tan-removal remedy. Choose a natural scrub like the Oatmeal and Milk Scrub for a DIY approach, or opt for a store-bought exfoliator with gentle ingredients suited to your skin type.

  • How to Exfoliate:
    1. Apply a small amount of the scrub or exfoliator to damp skin.
    2. Using your fingertips, gently massage the product onto the tanned areas in circular motions for 2-3 minutes. Avoid scrubbing too hard to prevent irritation.
    3. Rinse thoroughly with lukewarm water and pat your skin dry with a clean towel.
  • Pro Tip: If your skin feels sensitive, limit exfoliation to twice a week. For an extra soothing effect, choose scrubs with hydrating ingredients like honey or milk.

3. Apply a Targeted Remedy

Choose a remedy tailored to your skin type for the best results. This step ensures your skin receives the right care to reduce tan while addressing specific needs like hydration, oil control, or soothing irritation.

Remedy Options:

  • Normal to Dry Skin: Apply the Lemon and Honey Mask for a natural brightening effect and a boost of hydration. Mix 1 tablespoon each of lemon juice and honey, apply evenly, and leave it on for 20 minutes.
  • Oily Skin: Use the Tomato Pulp and Yogurt Mask to control excess oil and lighten pigmentation. Blend one ripe tomato into a pulp, mix it with 1 tablespoon of plain yogurt, and apply for 25 minutes.
  • Sensitive Skin: Opt for the Cucumber and Rose Water Pack to soothe irritation and cool the skin. Grate half a cucumber, mix it with 2 tablespoons of rose water, and leave it on for 30 minutes.

How to Apply:

  1. Ensure your skin is freshly cleansed and dry.
  2. Apply the chosen remedy evenly to the tanned areas using clean fingers or a brush.
  3. Leave it on for the recommended duration (15-30 minutes, depending on the remedy).
  4. Rinse off with lukewarm water and gently pat your skin dry.

Pro Tip: For enhanced results, use chilled ingredients to add a cooling effect and reduce inflammation.


4. Use a Night Serum

Night serums are packed with powerful active ingredients like vitamin C, niacinamide, or alpha arbutin that work wonders on your skin while you sleep. These ingredients target pigmentation, boost skin repair, and help brighten your complexion overnight.

How to Use:

  1. After cleansing your skin, take 2-3 drops of your chosen serum onto your fingertips.
  2. Gently pat or massage the serum into your skin, focusing on tanned areas.
  3. Wait a minute or two for the serum to fully absorb before applying your moisturizer.

Pro Tip: For added hydration and protection, follow up with a lightweight moisturizer or sleeping mask after applying the serum. Always apply sunscreen the next day to protect your skin, as serums can make it more sensitive to sunlight.


5. Moisturize and Lock in Hydration

Hydration is the final and most important step to ensure your skin feels soft, nourished, and ready to repair itself overnight. A good moisturizer creates a barrier that locks in the benefits of the serum or remedy you’ve applied, helping your skin stay hydrated and plump.

How to Moisturize:

  1. Take a small amount of moisturizer (about a pea-sized dollop) and warm it between your fingers.
  2. Gently apply it to your face and neck, focusing on any areas that feel dry or tight.
  3. Massage in upward motions to boost circulation and ensure even absorption.

What to Look For:

  • Dry Skin: Opt for moisturizers with rich ingredients like shea butter or ceramides.
  • Oily Skin: Choose a lightweight, gel-based moisturizer with non-comedogenic ingredients.
  • All Skin Types: Look for hydration-boosting ingredients like aloe vera, hyaluronic acid, or glycerin.

Pro Tip: For an extra hydration boost, apply a sleeping mask or gel-based moisturizer as the final step of your routine. This seals in moisture and gives your skin a dewy glow by morning.


Optional: Spot Treatment

If certain areas of your skin have stubborn tan lines or darker pigmentation, a targeted spot treatment can help lighten these patches more effectively. Use quick, natural remedies as the final step in your routine to address these specific concerns.

  • How to Spot Treat:
    1. Potato Juice: Dab freshly extracted potato juice onto the tanned spots using a cotton ball. Leave it on for 20 minutes or overnight for maximum effect, then rinse off in the morning.
    2. Cold Compress with Milk: Soak a cotton pad in chilled milk and press it onto the affected areas for 10-15 minutes. The lactic acid and cooling properties will help lighten the tan and calm any irritation.
  • Pro Tip: For added effectiveness, you can alternate between remedies on different nights or combine them by applying the potato juice first, letting it dry, and then following up with the milk compress.
  • When to Use: Perform spot treatments 2-3 times a week to avoid over-treating the skin while still addressing stubborn pigmentation.

This routine is easy to follow and highly effective when combined with the right remedies or products. You’ll wake up with brighter, healthier-looking skin that feels soft and refreshed.

Also Check Out: सबसे अच्छा फेस वॉश – सभी प्रकार के त्वचा लिए बेहतरीन सुझाव

Tips to Maximize Results

To ensure you get the best possible results from your overnight tan removal routine, follow these additional tips. These simple practices can enhance the effectiveness of your remedies and leave your skin looking even more radiant.

1. Stay Hydrated

Keeping your skin hydrated starts from within. Drinking enough water throughout the day not only helps flush out toxins but also supports skin repair and rejuvenation overnight. Hydrated skin is more resilient, making it less prone to dryness, dullness, or uneven tone caused by tanning.

How to Stay Hydrated:

  1. Aim for 8-10 glasses of water daily.
  2. Sip water consistently throughout the day instead of drinking large amounts all at once.
  3. Include hydrating foods like watermelon, cucumbers, and oranges in your diet.

Pro Tip: Add a slice of lemon, cucumber, or a few mint leaves to your water for a refreshing twist and additional skin-boosting benefits like vitamin C or antioxidants.


2. Avoid Harsh Chemicals

Using harsh products can do more harm than good, especially when your skin is already stressed from tanning. Soaps with strong detergents or alcohol-based toners can strip your skin of its natural oils, leaving it dry, irritated, and more susceptible to damage.

What to Avoid:

  • Harsh soaps that leave your skin feeling tight or squeaky clean.
  • Alcohol-based toners, which can dry out your skin and disrupt its natural barrier.

What to Use Instead:

  • Opt for gentle, pH-balanced cleansers and toners with soothing ingredients like rose water or chamomile.
  • Stick to natural or hypoallergenic products to maintain your skin’s moisture and health.

Pro Tip: Check product labels for common irritants like sulfates, parabens, and synthetic fragrances, and avoid these whenever possible.


3. Use Lukewarm Water

The temperature of the water you use to cleanse your skin plays a significant role in maintaining its health. Lukewarm water strikes the perfect balance—it’s gentle enough to prevent dryness and irritation, yet effective in removing products and remedies from your skin.

Why Lukewarm Water?:

  • Hot Water: Strips your skin of its natural oils, leaving it dry and prone to irritation.
  • Cold Water: Doesn’t cleanse as effectively, which may leave behind residue from remedies or products.

Pro Tip: After rinsing with lukewarm water, splash your face with cool water to tighten pores and refresh your skin.


4. Protect Your Skin Post-Treatment

Your skin is extra sensitive after an overnight tan-removal routine, so protecting it the next day is essential. Applying sunscreen acts as a shield, preventing further damage and helping your skin maintain its newfound glow.

How to Protect:

  • Use a broad-spectrum sunscreen with SPF 30 or higher, even if you’re indoors, as UV rays can penetrate windows.
  • Reapply every 2-3 hours if you’re outside or sweating to ensure consistent protection.

Pro Tip: Pair your sunscreen with protective accessories like wide-brimmed hats or scarves when heading out for extra defense against UV rays.


5. Maintain a Healthy Diet

What you eat has a direct impact on your skin’s ability to repair and renew itself. A diet rich in antioxidants and vitamins not only helps reduce tan but also promotes overall skin health, giving you a radiant, natural glow from within.

Skin-Loving Nutrients:

  • Antioxidants: Found in berries, spinach, and green tea, these fight free radicals caused by sun exposure, reducing skin damage.
  • Vitamin C: Boosts collagen production and brightens skin tone. Include citrus fruits, kiwi, and bell peppers.
  • Vitamin E: Hydrates and protects skin. Found in nuts, seeds, and avocados.

Pro Tip: Drink green tea daily for a double dose of antioxidants—great for both your skin and overall health.


6. Be Consistent

While these remedies show significant results overnight, consistency is key for maintaining long-term improvements. Incorporate these practices into your weekly skincare routine to keep tan at bay.

By following these tips, you’ll amplify the results of your tan removal remedies and enjoy long-lasting, glowing skin.

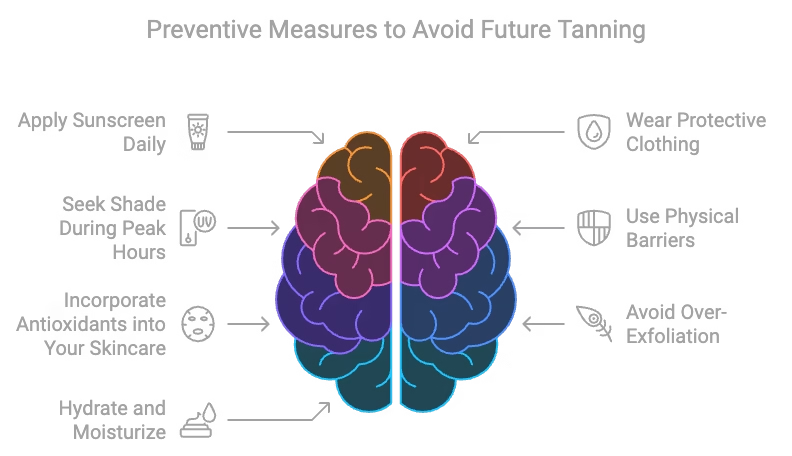
Preventive Measures to Avoid Future Tanning

While removing tan overnight can provide instant relief, the key to maintaining healthy, even-toned skin is prevention. Incorporate these tips into your daily routine to protect your skin from further tanning and damage.


1. Apply Sunscreen Daily

Sunscreen is your skin’s best defense against tanning and sun damage. A broad-spectrum sunscreen with SPF 30 or higher protects you from harmful UVA and UVB rays, reducing the risk of pigmentation, tanning, and premature aging.

How to Use:

  1. Apply sunscreen generously to all exposed areas of skin 15-20 minutes before stepping outside.
  2. Reapply every 2-3 hours, especially if you’re sweating or swimming, to maintain protection.
  3. Don’t forget often-missed spots like your ears, neck, and the back of your hands.

Pro Tip: Choose a lightweight, non-comedogenic sunscreen for daily use to avoid clogged pores and greasy skin. If you wear makeup, opt for a sunscreen that sits well under it or use a spray sunscreen for easy reapplication.


2. Wear Protective Clothing

Clothing is your first line of defense against harmful UV rays and tanning. Choosing the right outfits can shield your skin while keeping you comfortable, especially in sunny or hot conditions.

How to Protect with Clothing:

  1. Opt for long-sleeved tops, full-length pants, and wide-brimmed hats to cover exposed areas.
  2. Wear sunglasses with UV protection to safeguard your eyes and the delicate skin around them.
  3. Choose light, breathable fabrics like cotton or linen to stay cool while blocking out the sun.

Pro Tip: Look for clothing labeled with UPF (Ultraviolet Protection Factor) for added sun protection, especially if you spend long hours outdoors.


3. Seek Shade During Peak Hours

The sun’s UV rays are at their strongest between 10 a.m. and 4 p.m., making this the riskiest time for tanning and skin damage. Limiting your exposure during these hours can significantly reduce the chances of sunburn and tan.

How to Stay Safe:

  1. Plan outdoor activities for early morning or late afternoon when the sun is less intense.
  2. Use an umbrella or stay under shaded areas like trees or awnings if you need to be outside.
  3. Wear portable shade gear, like a wide-brimmed hat or UV-blocking scarf, for added protection.

Pro Tip: Check the UV index for your area before heading out. Apps and weather services often provide this information to help you plan your day wisely.


4. Use Physical Barriers

Adding an extra layer of protection with UV-blocking accessories is an easy and effective way to shield your skin from harmful rays. These barriers are especially useful for long drives or extended outdoor activities when sunscreen alone might not be enough.

How to Use Physical Barriers:

  1. Wear UV-blocking arm sleeves to protect your arms during outdoor activities or while driving.
  2. Use lightweight scarves or shawls to cover your neck, shoulders, and face without feeling overheated.
  3. Don gloves to protect your hands, which are often exposed to the sun and prone to pigmentation.

Pro Tip: Look for accessories made with UPF (Ultraviolet Protection Factor) fabric for maximum sun protection. They’re designed to block UV rays effectively while being breathable and comfortable.


5. Incorporate Antioxidants into Your Skincare

Antioxidants are your skin’s secret weapon against sun damage and tanning. They neutralize free radicals caused by UV rays, helping to repair damage, reduce pigmentation, and protect your skin from future harm.

How to Use Antioxidants:

  1. Look for serums or moisturizers containing powerful antioxidants like vitamin C, green tea extract, or niacinamide.
  2. Apply a vitamin C serum in the morning after cleansing to brighten skin and boost your sunscreen’s effectiveness.
  3. Use products with green tea or niacinamide at night to soothe and repair your skin as you sleep.

Pro Tip: Store vitamin C serums in a cool, dark place to preserve their potency, as they can degrade when exposed to light and heat.

Bonus Benefit: Regular use of antioxidant-rich products not only protects against tanning but also promotes an even skin tone and youthful glow.


6. Avoid Over-Exfoliation

Exfoliation is an effective way to remove tan and dead skin cells, but overdoing it can backfire. Excessive exfoliation can strip your skin’s natural barrier, making it more sensitive to UV rays and prone to irritation.

How to Exfoliate Safely:

1. Limit exfoliation to 2-3 times a week, depending on your skin type.

      • Oily Skin: Stick to 2-3 times a week.
      • Dry or Sensitive Skin: Reduce to once or twice a week.

      2. Use gentle exfoliants like oatmeal-based scrubs or mild chemical exfoliants containing lactic acid or PHA.

      3. Always follow up with a hydrating moisturizer to restore your skin’s natural barrier.

      Pro Tip: Avoid combining exfoliation with other strong treatments, like retinol or vitamin C, on the same day to prevent over-sensitizing your skin.

      Why It’s Important: Over-exfoliation can lead to redness, dryness, and an increased risk of UV damage—undoing all your efforts to remove tan and maintain healthy skin.


      7. Hydrate and Moisturize

      Hydration is the key to healthy, glowing, and resilient skin. Properly moisturized skin is better equipped to defend itself against sun damage, reduce dryness, and repair itself after exposure to UV rays.

      How to Keep Skin Hydrated:

      1. Use a lightweight moisturizer in the morning with hydrating ingredients like hyaluronic acid or glycerin to lock in moisture throughout the day.
      2. For nighttime, opt for richer formulations or products with aloe vera to soothe and heal the skin while you sleep.
      3. Consider using a hydrating mist or spray during the day to keep your skin fresh and plump, especially in hot or dry weather.

      Pro Tip: For maximum hydration, apply moisturizer while your skin is still slightly damp after cleansing. This helps trap water in the skin and boosts its hydrating effect.

      Bonus Benefit: Keeping your skin hydrated not only reduces sun damage but also helps maintain an even skin tone and a smoother, more youthful appearance.

      By adopting these preventive measures, you can significantly reduce the risk of tanning and maintain a radiant, even skin tone in the long term.

      FAQs About Tan Removal

      Here are answers to some of the most frequently asked questions about removing tan, ensuring you have all the information you need for effective results.

      1. Is it really possible to remove tan overnight?

      While severe tanning may not completely vanish overnight, many remedies and products can significantly reduce pigmentation and brighten your skin within hours. Consistency is key for lasting results.

      2. Are natural remedies better than store-bought products?

      Natural remedies are gentle and suitable for most skin types, especially if you’re looking for a chemical-free option. However, store-bought products with active ingredients like vitamin C, niacinamide, or glycolic acid often deliver faster results.

      3. How often can I use these remedies?

      Most natural remedies can be used 2-3 times a week, depending on your skin’s tolerance. Over-the-counter products should be used as per their instructions to avoid overuse or irritation.

      4. Can I remove tan completely?

      Yes, it’s possible to remove tan over time by following a consistent skincare routine. Severe tanning may take a few weeks of dedicated care, but regular exfoliation, hydration, and sunscreen use can restore your natural skin tone.

      5. What’s the fastest way to reduce tan for an event?

      Combine a brightening serum with a gentle exfoliating scrub, followed by a soothing mask like aloe vera and turmeric. Finish with a moisturizer for a fresh, glowing look.

      These FAQs cover everything you need to know about tackling tan effectively. If you have more questions, feel free to drop them in the comments section!

      Conclusion

      Sun tanning is a common concern, but with the right remedies and preventive measures, you can achieve radiant, even-toned skin overnight. From natural remedies like lemon and honey masks to quick fixes like brightening serums, there’s a solution for everyone. The key is to choose a method that suits your skin type and follow it consistently.

      Remember, while removing tan overnight is possible to some extent, long-term results require a combination of care and protection. Always use sunscreen, stay hydrated, and embrace a skincare routine that prioritizes your skin’s health.

      Now it’s your turn! Which remedy are you excited to try? Have a favorite tan removal trick of your own? Share it in the comments—we’d love to hear from you!

      Categories
      Blog

      विसर्ग संधि क्या है? परिभाषा, उदाहरण, और महत्व

      संस्कृत भाषा, जिसे दुनिया की सबसे प्राचीन भाषाओं में से एक माना जाता है, अपनी व्याकरणिक संरचना और नियमों के लिए प्रसिद्ध है। इस भाषा को समझने के लिए संधि का ज्ञान होना बहुत ज़रूरी है। और जब संधि की बात आती है, तो विसर्ग संधि एक ऐसा पहलू है, जिसे समझना आपके लिए बहुत मददगार होगा।

      तो चलिए, इस लेख में हम जानते हैं:

      • विसर्ग संधि किसे कहते हैं?
      • विसर्ग की परिभाषा क्या है?
      • विसर्ग संधि के उदाहरण क्या हैं?
      • और सबसे महत्वपूर्ण, यह आपके लिए क्यों ज़रूरी है?

      अगर आप संस्कृत के छात्र हैं, या भाषा के व्याकरणिक सौंदर्य को समझना चाहते हैं, तो यह लेख आपके लिए है। चलिए, सबसे पहले समझते हैं कि विसर्ग क्या होता है।

      विसर्ग किसे कहते हैं? इसे सरल भाषा में समझें

      विसर्ग संधि संस्कृत व्याकरण का एक नियम है जिसमें विसर्ग (ः) का संयोग अन्य ध्वनियों से होता है और उसका स्वरूप या उच्चारण बदल जाता है। उदाहरण के लिए, ‘रामः आगच्छति’ विसर्ग संधि के बाद ‘रामोऽगच्छति’ बनता है।

      संस्कृत में, विसर्ग (ः) एक विशेष ध्वनि है, जिसे आमतौर पर ‘ह’ के समान उच्चारित किया जाता है। यह ध्वनि मुख्य रूप से शब्दों के अंत में आती है और संस्कृत के व्याकरण में एक महत्वपूर्ण भूमिका निभाती है। इसे ‘विराम’ या ‘विश्राम’ का प्रतीक भी माना जा सकता है, क्योंकि यह एक प्रकार की “हल्की सांस” लेने का संकेत देता है।

      विसर्ग को पहचानें:

      • चिह्न: विसर्ग का प्रतीक होता है।
      • उदाहरण:
        • रामः → इसमें ‘राम’ के बाद विसर्ग का उपयोग हुआ है।
        • गजः → यहां भी ‘गज’ के अंत में विसर्ग लगाया गया है।
        • देवः → ‘देव’ के बाद विसर्ग लगा है।
        • धर्मः → ‘धर्म’ के अंत में विसर्ग है।

      विसर्ग का उपयोग क्यों होता है?

      विसर्ग शब्दों को जोड़ने और उनके उच्चारण में स्वाभाविकता लाने में मदद करता है। यह किसी वाक्य को लयबद्ध और स्पष्ट बनाने के लिए आवश्यक है। जब विसर्ग अन्य ध्वनियों या अक्षरों के साथ जुड़ता है, तो वह संधि का निर्माण करता है, जिसे हम विसर्ग संधि कहते हैं।

      विसर्ग के बारे में और अधिक उदाहरण:

      • नरः वनं गच्छति
        (अर्थ: नर जंगल में जाता है)
        → यहां ‘नरः’ शब्द में विसर्ग का प्रयोग हुआ है।
      • भवः सर्वत्र
        (अर्थ: ईश्वर हर जगह है)
        → ‘भवः’ में विसर्ग का सही उच्चारण दर्शाता है कि यह एक विराम का संकेत देता है।
      • सूर्यः उदयः
        (अर्थ: सूर्य का उदय)
        → दोनों शब्दों में विसर्ग का उपयोग यह स्पष्ट करता है कि दो वाक्यांश आपस में जुड़े हुए हैं।

      यह भी देखें: Upsarg in Hindi:  हिंदी में परिभाषा, प्रकार और उदाहरण जानें

      संधि क्या है? Sandhi Kya Hai

      संस्कृत व्याकरण में संधि एक बहुत ही रोचक और महत्वपूर्ण विषय है। यह उन नियमों का समूह है जो तब लागू होते हैं जब दो शब्द या ध्वनियाँ आपस में मिलती हैं। सरल शब्दों में, संधि का अर्थ है “जोड़ना” या “मिलाना”। यह न केवल शब्दों को जोड़ने में मदद करता है, बल्कि उनके उच्चारण को लयबद्ध और प्रवाहमय बनाता है।

      संधि की परिभाषा

      “जब दो अक्षर या ध्वनियाँ एक साथ आती हैं और उनके मेल से ध्वनि या स्वरूप में परिवर्तन होता है, तो उसे संधि कहते हैं।”

      उदाहरण के लिए:

      • रामः इतिराम इति
        यहां विसर्ग और स्वर के मेल से संधि हुई है।

      संधि के प्रकार Sandhi ke Prakar

      संस्कृत में मुख्य रूप से तीन प्रकार की संधियाँ होती हैं:

      1. स्वर संधि: जब दो स्वर (vowels) आपस में मिलते हैं।
        • उदाहरण: देव + इंद्रदेवेन्द्र
      2. व्यंजन संधि: जब दो व्यंजन (consonants) आपस में मिलते हैं।
        • उदाहरण: तत् + त्वम्तत्त्वम्
      3. विसर्ग संधि: जब विसर्ग (ः) के बाद स्वर या व्यंजन आते हैं।
        • उदाहरण: रामः आगच्छतिरामोऽगच्छति

      संधि क्यों महत्वपूर्ण है?

      • यह शब्दों को जोड़कर वाक्य को प्रवाहमय बनाता है।
      • प्राचीन संस्कृत श्लोकों और मंत्रों को सही ढंग से पढ़ने और समझने में मदद करता है।
      • यह व्याकरण को तार्किक और संरचनात्मक बनाता है।

      अब तक आपने समझा कि संधि क्या है और इसके प्रकार क्या हैं। अगले भाग में हम विसर्ग संधि की परिभाषा और उसके नियमों के बारे में विस्तार से चर्चा करेंगे।

      यह भी देखें: Ling Kise Kahte Hai? लिंग की परिभाषा, प्रकार, परिवर्तन के नियम और उदाहरण

      विसर्ग संधि की परिभाषा और नियम

      अब जब आपने विसर्ग और संधि का मूलभूत ज्ञान प्राप्त कर लिया है, चलिए विसर्ग संधि को गहराई से समझते हैं। यह संस्कृत व्याकरण का एक ऐसा हिस्सा है, जो शब्दों को जोड़ते समय ध्वनि परिवर्तन की प्रक्रिया का वर्णन करता है।

      विसर्ग संधि की परिभाषा

      “जब संस्कृत में विसर्ग (ः) का सामना किसी स्वर या व्यंजन से होता है और इसके परिणामस्वरूप विसर्ग में ध्वनि या स्वरूप का परिवर्तन होता है, तो इसे विसर्ग संधि कहते हैं।”

      विसर्ग संधि के नियम

      विसर्ग संधि के तहत निम्नलिखित नियम लागू होते हैं:

      1. विसर्ग का स्वर के साथ मेल:
        • यदि विसर्ग के बाद स्वर (a, i, u आदि) आता है, तो विसर्ग बदलकर ‘ओऽ’ या अन्य ध्वनि में परिवर्तित हो जाता है।
        • उदाहरण:
          • रामः आगच्छतिरामोऽगच्छति
          • गजः इवगजोऽव
      2. विसर्ग का व्यंजन के साथ मेल:
        • जब विसर्ग का सामना व्यंजन से होता है, तो विसर्ग अपरिवर्तित रहता है।
        • उदाहरण:
          • गजः गच्छतिगजः गच्छति
      3. विसर्ग के विशेष प्रयोग:
        • जब विसर्ग का सामना ‘र’ या ‘ल’ से होता है, तो इसे स्पष्ट रूप से उच्चारित किया जाता है।
        • उदाहरण:
          • देवः लोकःदेवः लोकः

      विसर्ग संधि के 20 उदाहरण

      मूल शब्द (Original Words)संधि के बाद (After Sandhi)
      रामः + आगच्छतिरामोऽगच्छति
      गजः + इवगजोऽव
      नरः + अश्वःनरोऽश्वः
      धर्मः + अर्थःधर्मोऽर्थः
      देवः + उपासनादेवोऽपासना
      सूर्यः + उदयःसूर्योऽदयः
      गृहः + अस्तिगृहोऽस्ति
      वानरः + अत्रवानरोऽत्र
      पुरुषः + अन्यःपुरुषोऽन्यः
      जगतः + उत्पत्तिजगतोऽत्पत्ति
      मुनिः + अस्मिमुनिरस्मि
      वनः + अन्नंवनोऽन्नं
      बालः + उत्तमःबालोऽत्तमः
      ज्ञः + इवज्ञोऽव
      विद्वानः + उपदेशःविद्वानोऽपदेशः
      श्रीः + आगच्छतिश्रीरागच्छति
      पतिः + अनुगच्छतिपतिरनुगच्छति
      तरुः + अधस्तात्तरुरधस्तात्
      वृक्षः + उत्कृष्टःवृक्षोऽत्कृष्टः
      सत्यमः + अन्यत्रसत्यमोऽन्यत्र

      इन उदाहरणों से आप देख सकते हैं कि कैसे विसर्ग का स्वर और व्यंजन के साथ मेल होने पर परिवर्तन होता है।

      विसर्ग संधि का महत्व और व्यावहारिक उपयोग

      अब तक आपने विसर्ग संधि की परिभाषा, नियम और कई उदाहरण देखे। लेकिन एक महत्वपूर्ण सवाल यह है—आखिर विसर्ग संधि को समझना इतना जरूरी क्यों है? इसका उत्तर संस्कृत की संरचना और इसके व्याकरण के महत्व में छिपा है। चलिए इसे विस्तार से समझते हैं।


      1. भाषा की स्पष्टता और प्रवाह:

      संस्कृत भाषा में विसर्ग संधि का उद्देश्य वाक्य के प्रवाह को सहज और स्वाभाविक बनाना है। जब वाक्य में विसर्ग (ः) का मेल किसी अन्य ध्वनि (स्वर या व्यंजन) से होता है, तो संधि नियम के अनुसार विसर्ग बदल जाता है। यह परिवर्तन वाक्य को अधिक लयबद्ध और सुनने में सुंदर बनाता है।

      कैसे लाता है प्रवाह?

      • बिना विसर्ग संधि के, वाक्य के शब्द अलग-अलग और असंबद्ध प्रतीत हो सकते हैं।
      • विसर्ग संधि के कारण शब्दों का उच्चारण एक साथ बहने वाले स्वरूप में होता है, जिससे वाक्य अधिक सहज लगता है।

      विस्तृत उदाहरण:

      1. उदाहरण 1:
        • रामः आगच्छति
          यहां ‘रामः’ और ‘आगच्छति’ दो अलग-अलग शब्द हैं।
          अगर इसे बिना संधि के पढ़ा जाए, तो यह वाक्य थोड़ा कटा-कटा प्रतीत होगा।
          संधि के बाद: रामोऽगच्छति
          अब यह वाक्य अधिक प्रवाहमय और लयबद्ध सुनाई देता है।
      2. उदाहरण 2:
        • गजः इव
          विसर्ग और स्वर ‘इ’ के बीच संधि होने पर:
          संधि के बाद: गजोऽव
          यह स्पष्ट और स्वाभाविक लगता है, जैसे एक ही शब्द का हिस्सा हो।
      3. उदाहरण 3:
        • सूर्यः उदयः
          बिना संधि के यह थोड़ा खिंचा हुआ लगता है।
          संधि के बाद: सूर्योऽदयः
          वाक्य अधिक प्रभावशाली और प्रवाहमय प्रतीत होता है।

      ध्वनि और सौंदर्य का प्रभाव:

      विसर्ग संधि न केवल वाक्य को जोड़ने में मदद करती है, बल्कि यह ध्वनियों के मेल से एक लयबद्धता और सौंदर्य उत्पन्न करती है।
      उदाहरण के तौर पर, रामोऽगच्छति में ‘रामः’ और ‘आगच्छति’ के बीच का जोड़ वाक्य को सुनने में आकर्षक बनाता है।


      2. संस्कृत श्लोक और ग्रंथों की समझ:

      संस्कृत के प्राचीन ग्रंथ और श्लोक जैसे श्रीमद्भगवद्गीता, रामायण, महाभारत और वेदों में विसर्ग संधि का व्यापक उपयोग हुआ है। इन ग्रंथों को सही तरीके से पढ़ने और उनका सही अर्थ समझने के लिए विसर्ग संधि के नियमों का ज्ञान होना अत्यंत आवश्यक है।

      विसर्ग संधि का उपयोग प्राचीन ग्रंथों में क्यों महत्वपूर्ण है?

      1. सटीक उच्चारण:
        प्राचीन श्लोकों और मंत्रों को सही उच्चारण के साथ पढ़ना बेहद जरूरी है। विसर्ग संधि का पालन न करने से ध्वनि, लय, और अर्थ प्रभावित हो सकते हैं।
        उदाहरण:
        • यत्र योगेश्वरः कृष्णः, यत्र पार्थो धनुर्धरः।
          यहां विसर्ग का सही उच्चारण ‘कृष्णः’ और ‘पार्थः’ में अर्थ स्पष्ट करता है।
      2. शब्दों का सही जोड़:
        विसर्ग संधि शब्दों को जोड़ने में मदद करती है, जिससे पाठ प्रवाहमय और समझने में आसान बनता है।
        उदाहरण:
        • धर्मः अर्थः कामः मोक्षःधर्मोऽर्थोऽकामोऽमोक्षः
          यहां विसर्ग संधि श्लोक को लयबद्ध और प्रभावी बनाती है।
      3. अर्थ में सटीकता:
        विसर्ग का गलत उपयोग अर्थ को बदल सकता है। उदाहरण के लिए:
        • नमोः नारायणाय को नमोनारायणाय में बदलने से यह अधिक प्रवाहमय और स्पष्ट हो जाता है।

      श्रीमद्भगवद्गीता से उदाहरण:

      गीता के श्लोकों में विसर्ग संधि बार-बार देखने को मिलती है। उदाहरण:

      • धर्मक्षेत्रे कुरुक्षेत्रे → यहां ‘धर्मः’ और ‘क्षेत्रे’ को जोड़ने में विसर्ग संधि का महत्वपूर्ण योगदान है।

      एक और श्लोक:

      • ममोऽपार्थ (अध्याय 2, श्लोक 47)
        विसर्ग संधि के बिना यह ‘ममः अपार्थ’ होगा, जो प्रवाह को तोड़ देता है।

      रामायण से उदाहरण:

      रामायण जैसे महाकाव्य में विसर्ग संधि की प्रमुखता देखते हैं:

      • रामः सीताम् अनुयातिरामोऽसीतामनुयाति
        विसर्ग संधि वाक्य को सुंदर और अर्थपूर्ण बनाती है।

      एक और उदाहरण:

      • सुग्रीवः धर्मराजःसुग्रीवोऽधर्मराजः
        यहां संधि का पालन किए बिना वाक्य का अर्थ अधूरा रह जाएगा।

      विसर्ग संधि क्यों अनिवार्य है ग्रंथों की समझ के लिए?

      1. प्रभावी पाठ: विसर्ग संधि से ग्रंथों को पढ़ना अधिक प्रभावशाली और लयबद्ध बनता है।
      2. अर्थ की गहराई: संधि के माध्यम से शब्दों का सही जोड़ पाठ के सही अर्थ को उभरने में मदद करता है।
      3. आध्यात्मिक महत्व: मंत्रों और श्लोकों का सही उच्चारण केवल व्याकरण नहीं, बल्कि आध्यात्मिक प्रभाव के लिए भी महत्वपूर्ण है।

      विसर्ग संधि के बिना संस्कृत ग्रंथों और श्लोकों को सही ढंग से पढ़ना और उनका अर्थ समझना लगभग असंभव है। यह न केवल भाषा की लय और सौंदर्य को बढ़ाती है, बल्कि अर्थ को भी स्पष्ट और गहन बनाती है।


      3. शुद्ध उच्चारण के लिए आवश्यक:

      संस्कृत भाषा को उसकी सटीकता और शुद्धता के लिए जाना जाता है। शुद्ध उच्चारण इस भाषा का आधार है, क्योंकि संस्कृत के हर शब्द और ध्वनि का एक विशेष अर्थ और आध्यात्मिक प्रभाव होता है। विसर्ग संधि के नियमों का सही ढंग से पालन करना शुद्ध उच्चारण के लिए अनिवार्य है, खासकर जब हम मंत्रों, श्लोकों, या प्राचीन ग्रंथों का पाठ करते हैं।

      शुद्ध उच्चारण क्यों जरूरी है?

      1. अर्थ को बनाए रखना:
        • संस्कृत में हर ध्वनि का एक विशिष्ट अर्थ होता है। विसर्ग का गलत उच्चारण वाक्य के अर्थ को बदल सकता है या इसे अस्पष्ट बना सकता है।
        • उदाहरण:
          • ॐ नमः शिवाय → यहां ‘नमः’ को सही ढंग से उच्चारित करना जरूरी है। यदि इसे ‘नम’ कहा जाए, तो अर्थ अधूरा रह जाएगा।
      2. आध्यात्मिक प्रभाव:
        • मंत्रों और श्लोकों में शुद्ध उच्चारण का आध्यात्मिक महत्व है। सही उच्चारण से ध्वनि तरंगें संतुलित और प्रभावशाली बनती हैं।
        • उदाहरण:
          • सर्वेभ्यः नमः → यहां ‘नमः’ का विसर्ग सही तरीके से उच्चारित न करने से मंत्र का प्रभाव कम हो सकता है।
      3. लय और सौंदर्य:
        • विसर्ग संधि से वाक्य प्रवाहमय और लयबद्ध बनते हैं, जो सुनने में अधिक आकर्षक लगते हैं। यह विशेष रूप से श्लोक और काव्य में महत्वपूर्ण है।
        • उदाहरण:
          • रामः सीतायाः → यदि इसे गलत उच्चारित किया जाए, तो लयभंग हो सकता है।

      उदाहरणों के माध्यम से समझें:

      1. मंत्र:
        • ॐ नमः शिवाय
          विसर्ग का सही उच्चारण ‘नमः’ में शुद्धता लाता है।
        • गलत: ॐ नम शिवाय (यह अधूरा और गलत है।)
      2. श्लोक:
        • शिवः शंकरः शंभुः → सही उच्चारण में ‘शिवः’ और ‘शंकरः’ का विसर्ग स्पष्ट सुनाई देता है।
        • गलत उच्चारण: शिव शंकर शंभु (लय और शुद्धता खो जाती है।)
      3. गायत्री मंत्र:
        • ॐ भूर्भुवः स्वः
          यहां ‘भुवः’ का विसर्ग स्पष्ट होना चाहिए, ताकि मंत्र सही प्रभाव उत्पन्न कर सके।

      विसर्ग और उच्चारण अभ्यास:

      प्रैक्टिस टिप्स:

      • शब्दों को धीरे-धीरे पढ़ें और विसर्ग के बाद की ध्वनि पर ध्यान दें।
      • प्राचीन श्लोकों या मंत्रों को पढ़ते समय सही लय और प्रवाह बनाए रखें।
      • ऑडियो रिकॉर्डिंग का उपयोग करके अपने उच्चारण की जांच करें।

      विसर्ग संधि के नियमों का पालन करने से न केवल सही उच्चारण संभव होता है, बल्कि यह संस्कृत के सौंदर्य और प्रभाव को बनाए रखने में भी मदद करता है। खासकर जब हम मंत्रों और श्लोकों का पाठ करते हैं, तो विसर्ग का शुद्ध उच्चारण भाषा की सटीकता और उसके आध्यात्मिक प्रभाव को और बढ़ाता है।


      4. भाषा सीखने वालों के लिए उपयोगी:

      संस्कृत सीखना जितना रोचक है, उतना ही गहराई से समझने का विषय भी है। विसर्ग संधि संस्कृत व्याकरण का एक ऐसा हिस्सा है, जिसे समझकर आप न केवल भाषा की संरचना को बेहतर ढंग से समझ पाएंगे, बल्कि इसका व्यावहारिक उपयोग भी कर सकेंगे। यह विशेष रूप से उन छात्रों और भाषा प्रेमियों के लिए महत्वपूर्ण है, जो संस्कृत को आत्मसात करना चाहते हैं।

      विसर्ग संधि क्यों है उपयोगी?

      1. व्याकरण की बुनियाद मजबूत करती है:
        • संस्कृत व्याकरण में संधि नियमों का सही ज्ञान आपकी भाषा की नींव को मजबूत करता है।
        • विसर्ग संधि इन नियमों का एक अभिन्न हिस्सा है, जो शब्दों के सही जोड़ और ध्वनि परिवर्तन को समझने में मदद करता है।
      2. ग्रंथों और श्लोकों का सही अध्ययन:
        • यदि आप संस्कृत ग्रंथों, वेदों, और श्लोकों को पढ़ने या उनका अर्थ निकालने की कोशिश कर रहे हैं, तो विसर्ग संधि को समझना आवश्यक है। यह शब्दों और उनके अर्थ को जोड़ने में मदद करता है।
      3. प्रभावशाली पाठ और उच्चारण:
        • विसर्ग संधि का सही उपयोग आपके उच्चारण और पाठ को बेहतर बनाता है, जिससे आप श्लोकों और मंत्रों को अधिक आत्मविश्वास के साथ पढ़ सकते हैं।

      सीखने वालों के लिए फायदे:

      1. उदाहरण-आधारित सीखना:
        • रामः आगच्छति → रामोऽगच्छति
          इस प्रकार के सरल उदाहरणों से आप विसर्ग संधि को आसानी से समझ सकते हैं और इसे वाक्यों में लागू कर सकते हैं।
      2. पाठ को लयबद्ध बनाना:
        • विसर्ग संधि के नियमों को जानने से आपके पाठ को लयबद्धता मिलती है, जो सुनने में भी सुंदर लगता है।
      3. भाषा की गहराई को समझना:
        • संस्कृत की हर ध्वनि का एक अर्थ होता है। विसर्ग संधि इस गहराई को उजागर करती है और आपको भाषा की जड़ों तक ले जाती है।

      शुरुआत कैसे करें?

      1. सरल नियमों से शुरुआत करें:
        • सबसे पहले स्वर और व्यंजन के साथ विसर्ग के जोड़ को समझें।
          उदाहरण:
          • गजः इव → गजोऽव
          • सूर्यः उदयः → सूर्योऽदयः
      2. ग्रंथों और श्लोकों का अभ्यास करें:
        • छोटे-छोटे श्लोकों को पढ़कर विसर्ग संधि को समझने का प्रयास करें।
          उदाहरण:
          • धर्मः अर्थः → धर्मोऽर्थः
      3. ऑडियो और वीडियो स्रोतों का उपयोग करें:
        • सही उच्चारण और प्रवाह के लिए संस्कृत विशेषज्ञों द्वारा रचित ऑडियो या वीडियो सामग्री का सहारा लें।

      विसर्ग संधि और भाषा दक्षता:

      यदि आप विसर्ग संधि को सही ढंग से समझ लेते हैं, तो यह आपके संस्कृत सीखने के सफर में एक मजबूत आधार बनेगी। यह आपको:

      • संस्कृत ग्रंथों और श्लोकों का गहन अध्ययन करने का आत्मविश्वास देगी।
      • भाषा को व्यावहारिक रूप से उपयोग करने में सक्षम बनाएगी।

      विसर्ग संधि केवल एक व्याकरणिक नियम नहीं है, बल्कि यह संस्कृत भाषा को सीखने और समझने की दिशा में एक महत्वपूर्ण कदम है। इसे समझकर आप न केवल भाषा की संरचना में माहिर बन सकते हैं, बल्कि संस्कृत की गहराई और सुंदरता का आनंद भी ले सकते हैं।


      5. आधुनिक संदर्भ में उपयोग:

      संस्कृत भाषा, जो प्राचीन भारत की संस्कृति और ज्ञान का आधार है, आज भी अपनी प्रासंगिकता बनाए हुए है। चाहे योग हो, ध्यान हो, या आध्यात्मिक अध्ययन—संस्कृत भाषा का उपयोग इन क्षेत्रों में व्यापक रूप से होता है। विसर्ग संधि का ज्ञान इन सभी क्षेत्रों में आपके अभ्यास और अध्ययन को अधिक गहन और प्रभावशाली बना सकता है।


      आधुनिक संदर्भ में संस्कृत का महत्व:

      1. योग और ध्यान में उपयोग:
        • योग और ध्यान में उपयोग किए जाने वाले अधिकतर मंत्र संस्कृत में हैं। विसर्ग संधि का सही उच्चारण इन मंत्रों के प्रभाव को और अधिक शक्तिशाली बनाता है।
        • उदाहरण:
          • ॐ नमः शिवाय
            विसर्ग का सही उच्चारण मंत्र के लय और ध्वनि को सटीक बनाता है, जो ध्यान के दौरान मानसिक शांति और ध्यान की गहराई को बढ़ाता है।
      2. आध्यात्मिक पाठ और प्रार्थनाएँ:
        • प्रार्थनाएँ और श्लोक जैसे शांति मंत्र या गायत्री मंत्र में विसर्ग संधि का स्पष्ट पालन अनिवार्य है।
        • उदाहरण:
          • ॐ भूर्भुवः स्वः → विसर्ग का सही उच्चारण मंत्र को प्रभावी बनाता है।
      3. धार्मिक और सांस्कृतिक आयोजन:
        • धार्मिक अनुष्ठानों में संस्कृत मंत्रों का सही उच्चारण जरूरी है। विसर्ग संधि इन मंत्रों की सटीकता बनाए रखने में मदद करती है।
          उदाहरण:
          • यज्ञः क्रियते धर्माय → सही संधि का उपयोग वाक्य को प्रवाहमय और अर्थपूर्ण बनाता है।

      विसर्ग संधि और आधुनिक अध्ययन:

      1. शिक्षा और अनुसंधान:
        • कई शिक्षण संस्थानों और विश्वविद्यालयों में संस्कृत को पुनः पढ़ाया जा रहा है। विसर्ग संधि को समझना भाषा शिक्षार्थियों के लिए अनिवार्य है।
        • यह व्याकरण और साहित्य दोनों के अध्ययन में मदद करता है।
      2. वैज्ञानिक और चिकित्सा ग्रंथों में उपयोग:
        • आयुर्वेद और अन्य प्राचीन विज्ञानों के ग्रंथ संस्कृत में लिखे गए हैं। विसर्ग संधि के ज्ञान से इन ग्रंथों को बेहतर ढंग से समझा और व्याख्या किया जा सकता है।
          उदाहरण:
          • रोगः नाशःरोगोऽनाशः
      3. संस्कृत के डिजिटल और तकनीकी उपयोग:
        • आज डिजिटल प्लेटफॉर्म पर संस्कृत सामग्री तेजी से बढ़ रही है। ऐप्स, वेबसाइट्स, और ऑनलाइन कोर्स में विसर्ग संधि के नियमों को जानना उपयोगी हो सकता है।

      कैसे बनाए यह अध्ययन प्रभावी?

      गीता, उपनिषद, और अन्य ग्रंथों के पाठ में विसर्ग संधि को ढूंढें और उसका अध्ययन करें।

      मंत्रों का सही उच्चारण सीखें:

      उदाहरण के साथ विसर्ग संधि के अभ्यास से मंत्रों का पाठ अधिक प्रभावशाली बनता है।
      उदाहरण:

      सर्वेभ्यः नमः → सही उच्चारण मंत्र के भाव को गहरा करता है।

      ऑडियो-वीडियो सामग्री का उपयोग:

      योग और ध्यान से संबंधित संस्कृत सामग्री सुनें और विसर्ग संधि को समझने का अभ्यास करें।

      प्राचीन ग्रंथों का अध्ययन:

      गीता, उपनिषद, और अन्य ग्रंथों के पाठ में विसर्ग संधि को ढूंढें और उसका अध्ययन करें।

      विसर्ग संधि केवल एक व्याकरणिक नियम नहीं, बल्कि एक ऐसा उपकरण है जो आधुनिक संदर्भ में संस्कृत के उपयोग को और भी गहरा और अर्थपूर्ण बनाता है। योग, ध्यान, और आध्यात्मिक अभ्यास में इसके सही उपयोग से आप न केवल अपनी भाषा की समझ को सुधार सकते हैं, बल्कि अपने आध्यात्मिक अनुभव को भी समृद्ध कर सकते हैं।

      विसर्ग संधि क्यों जरूरी है?

      विसर्ग संधि न केवल व्याकरण का एक नियम है, बल्कि यह संस्कृत भाषा की सुंदरता और गहराई को दर्शाने वाला एक महत्वपूर्ण पहलू है। इसे समझने से आप न केवल वाक्यों को सही ढंग से जोड़ सकते हैं, बल्कि संस्कृत के मूल सौंदर्य को भी महसूस कर सकते हैं।

      संक्षेप और सामान्य प्रश्न (FAQs)

      अब तक आपने विसर्ग संधि के हर पहलू को विस्तार से समझा। चलिए इसे संक्षेप में दोहराते हैं और कुछ सामान्य प्रश्नों के उत्तर देते हैं जो अक्सर पाठकों के मन में आते हैं।

      संक्षेप (Summary):

      1. विसर्ग (ः) एक विशेष ध्वनि है, जो संस्कृत शब्दों के अंत में पाई जाती है।
      2. संधि का अर्थ है ध्वनियों या शब्दों का मिलन, और विसर्ग संधि वह प्रक्रिया है जिसमें विसर्ग अन्य ध्वनियों से जुड़ता है और उसका रूप या उच्चारण बदलता है।
      3. विसर्ग संधि के नियम:
        • स्वर के साथ मेल होने पर विसर्ग बदल जाता है (जैसे, रामः आगच्छतिरामोऽगच्छति).
        • व्यंजन के साथ विसर्ग अपरिवर्तित रहता है।
      4. इसका महत्व:
        • यह संस्कृत भाषा को प्रवाहमय बनाता है।
        • प्राचीन ग्रंथों और श्लोकों को सही तरीके से समझने और उच्चारित करने के लिए यह जरूरी है।

      सामान्य प्रश्न (FAQs):

      विसर्ग संधि किसे कहते हैं?

      जब विसर्ग (ः) का संयोग किसी स्वर या व्यंजन से होता है और ध्वनि परिवर्तन होता है, तो उसे विसर्ग संधि कहते हैं। यह संस्कृत व्याकरण का एक महत्वपूर्ण नियम है।

      विसर्ग का उपयोग कहां होता है?

      विसर्ग का उपयोग मुख्यतः संस्कृत के शब्दों के अंत में या दो शब्दों को जोड़ने के लिए किया जाता है। यह ध्वनियों को स्पष्ट और लयबद्ध बनाता है।

      क्या विसर्ग संधि केवल संस्कृत में होती है?

      हां, विसर्ग संधि संस्कृत व्याकरण का नियम है। यह अन्य भाषाओं में नहीं पाया जाता क्योंकि विसर्ग (ः) विशेष रूप से संस्कृत भाषा की एक ध्वनि है।

      विसर्ग संधि सीखने का सबसे आसान तरीका क्या है?

      विसर्ग संधि को सीखने के लिए:

      नियमों को अच्छी तरह समझें।
      नियमित रूप से अभ्यास करें और अधिक उदाहरणों को पढ़ें।
      संस्कृत श्लोकों और ग्रंथों का अध्ययन करें।

      अंतिम शब्द

      विसर्ग संधि संस्कृत भाषा की गहराई और सुंदरता को दर्शाती है। इसे समझना न केवल भाषा के प्रति आपकी रुचि को बढ़ाएगा, बल्कि आपको प्राचीन ग्रंथों और मंत्रों का सही उच्चारण करने में भी मदद करेगा।

      Categories
      Lifestyle

      The Origins, Benefits, and Fascinating Story Behind the Name of Kiwi Fruit

      Have you ever wondered where that fuzzy little green fruit, kiwi, actually comes from? Or maybe you’ve heard about its health benefits and are curious if they live up to the hype. Kiwi fruit has made quite a name for itself as a nutritious powerhouse, with a surprising history and a unique name that’s also a bit of a story. Today, we’re peeling back the layers on kiwi fruit—from its fascinating journey across continents to the health benefits that make it so popular, and, yes, even the quirky story behind its name.

      Let’s dive into where kiwi fruit comes from and why it’s captured attention worldwide.

      Where Does Kiwi Fruit Come From?

      Kiwi fruit originated in the mountains of southern China, where it was known as ‘Yang Tao’ or ‘Chinese gooseberry.’ Later, it was cultivated and popularized in New Zealand, which helped it become a global favorite.

      You might be surprised to learn that kiwi fruit didn’t actually originate in New Zealand, despite its strong association with the country. Kiwi fruit’s true roots trace back to the rugged mountain regions of southern China, where it was known as “Yang Tao” or “Chinese Gooseberry.” People in China have been enjoying this little fruit for centuries, using it not only for food but also for traditional medicine. It was valued for its cooling properties and high nutritional value, long before it became a global health trend.

      The Journey to New Zealand

      The story of kiwi fruit really takes a turn in the early 20th century, when seeds of the fruit were brought from China to New Zealand. In 1904, a teacher named Isabel Fraser returned from her trip to China with a handful of these seeds, and it wasn’t long before New Zealand horticulturists saw potential in cultivating this unusual fruit. They carefully tended and crossbred the plants, creating a larger, sweeter version that was distinct from the original Chinese fruit.

      New Zealand growers quickly realized they had something special, and by the mid-20th century, they were exporting kiwi to other countries. New Zealand played such a pivotal role in popularizing the fruit that many people mistakenly think that’s where kiwi originally came from.

      A Global Favorite

      From there, kiwi spread to other parts of the world, including California and Italy, where the climate was ideal for growing it. Today, kiwi is enjoyed in countless countries, appreciated for its unique taste, vibrant color, and, of course, impressive health benefits.

      10 Benefits of Kiwi Fruit

      Kiwi fruit isn’t just a delicious and exotic-looking addition to your fruit bowl; it’s also packed with nutrients that can do wonders for your health. Here are 10 impressive benefits of kiwi fruit, and why adding it to your diet could be a great choice.

      1. High in Vitamin C

      Did you know that kiwi fruit has more vitamin C than an orange? Vitamin C is essential for a strong immune system, helping your body fight off illnesses and recover faster. Plus, it’s great for your skin, as it supports collagen production, keeping your skin firm and glowing.

      2. Digestive Aid

      If you’ve ever noticed kiwi’s unique texture, you’re actually seeing one of its digestive superpowers in action. Kiwi contains a natural enzyme called actinidin, which helps break down proteins, making it easier for your body to digest foods. This is why kiwi is often recommended as a natural remedy for digestive discomfort.

      3. Heart Health

      Kiwi is heart-healthy, too! Packed with fiber and potassium, it helps maintain healthy blood pressure levels and reduce the risk of cardiovascular issues. Fiber keeps your cholesterol in check, while potassium works to balance out sodium levels, keeping your heart in top shape.

      4. Rich in Antioxidants

      Kiwi is loaded with antioxidants like vitamin E and polyphenols, which help protect your cells from damage. Antioxidants fight off free radicals—unstable molecules that can damage cells and lead to aging and diseases. Including kiwi in your diet helps your body combat oxidative stress.

      5. Supports Eye Health

      Kiwi contains lutein and zeaxanthin, two compounds known for supporting eye health. These nutrients help filter out harmful blue light and reduce the risk of age-related eye issues, making kiwi a great choice for long-term eye care.

      6. Blood Pressure Regulation

      Consuming kiwi regularly can contribute to lower blood pressure. Thanks to its high potassium content, kiwi helps relax blood vessels and counteracts the effects of salt, balancing out blood pressure naturally. Studies have shown that eating a few kiwis a day can even help lower blood pressure levels over time.

      7. Skin Hydration and Glow

      Kiwi is not only delicious but hydrating, too! Its water content, combined with vitamin C and antioxidants, helps keep your skin looking fresh and hydrated. Adding kiwi to your diet or skincare routine can give your skin a natural glow.

      8. Anti-Inflammatory Properties

      The antioxidants and vitamin C in kiwi also have anti-inflammatory effects. If you experience inflammation-related conditions or just want to support your body’s natural recovery process, kiwi can be a tasty way to help reduce inflammation.

      9. Supports Weight Management

      With its low calorie count and high fiber content, kiwi is an ideal snack for anyone looking to manage their weight. The fiber helps you feel full for longer, reducing the chances of overeating, while the low sugar and calorie count make it a guilt-free treat.

      10. Good for Pregnancy

      For expecting mothers, kiwi is a fantastic source of folate, a vitamin that’s crucial for fetal development. Folate helps prevent birth defects and supports healthy brain development in the baby, making kiwi a nutritious choice during pregnancy.

      With all these incredible benefits, it’s no wonder kiwi fruit has earned its reputation as a superfood. Whether you’re boosting your immune system, supporting digestion, or simply keeping your skin glowing, kiwi has something to offer everyone. Adding a few slices of this vibrant fruit to your day might just be one of the tastiest and easiest ways to improve your overall health.

      Also Check Out: Best Body Lotions for Winter: Keep Your Skin Hydrated and Soft All Season.

      Why Is Kiwi Fruit Called “Kiwi”?

      Kiwi fruit was named after the kiwi bird, New Zealand’s national symbol, due to its brown, fuzzy skin resembling the bird. New Zealand growers rebranded it from ‘Chinese gooseberry’ to ‘kiwi’ to make it more marketable internationally.

      The name “kiwi” is as unique as the fruit itself, but it wasn’t always called that. Originally known as “Chinese gooseberry,” kiwi fruit received its current name thanks to some clever branding and a nod to New Zealand’s national symbol.

      The Name’s Origin

      In the 1950s, as New Zealand began to export the fruit on a larger scale, growers felt that “Chinese gooseberry” wasn’t exactly a catchy or marketable name, especially for international sales. They wanted a name that would appeal to consumers abroad and set the fruit apart from others in the market.

      Inspired by the Kiwi Bird

      The solution? New Zealanders decided to name the fruit after the country’s iconic bird—the kiwi. The kiwi bird is small, brown, and a little fuzzy, just like the fruit, and it’s also an enduring symbol of New Zealand’s unique wildlife. The name was catchy, memorable, and it evoked a sense of national pride.

      How the Name Caught On

      The rebranding worked wonders, and soon enough, “kiwi fruit” became a hit in global markets. By the 1970s, it was widely recognized and accepted as the name of the fruit, with New Zealand exporting millions of kiwis to countries around the world. Over time, “kiwi” became synonymous with the fruit itself, and now, most of us think of the fruit first when we hear the name!

      So, the next time you enjoy a kiwi, you’re not only tasting a delicious fruit but also a little piece of New Zealand’s heritage. This quirky name has helped kiwi fruit become a global favorite, connecting its origins, benefits, and unique identity all in one.

      Also Check Out: Top 10 Makeup Bags for Travel: Space-Saving and Organized Options for Every Trip.

      Conclusion

      Kiwi fruit is truly a remarkable little powerhouse with a fascinating story. From its origins in the mountains of China to its journey to New Zealand and its eventual rise to global fame, kiwi has a history as rich as its flavor. With impressive health benefits—from boosting immunity and supporting digestion to promoting heart health and skin glow—there’s plenty of reason to make kiwi a regular part of your diet. And now, when you hear “kiwi,” you’ll know the fun story behind its name, inspired by New Zealand’s beloved kiwi bird.

      So next time you slice into this vibrant green fruit, remember—you’re enjoying not just a tasty treat, but also a superfood with a heritage as unique as its flavor!

      Frequently Asked Questions About Kiwi Fruit

      Can you eat the skin of a kiwi fruit?

      Yes, the skin of a kiwi fruit is edible and contains additional fiber and nutrients. However, some people may find its texture unappealing. If you choose to eat the skin, ensure it’s thoroughly washed to remove any pesticides or residues.

      Are there different varieties of kiwi fruit?

      Yes, there are several varieties, including the common green-fleshed kiwi and the golden kiwi, which has a smoother skin and a sweeter taste.

      Is kiwi fruit safe for everyone to eat?

      While kiwi is nutritious, some individuals may be allergic to it, experiencing symptoms like itching or swelling. If you have a known allergy to latex or certain fruits, consult with a healthcare professional before consuming kiwi.

      Categories
      Lifestyle

      Best Body Lotions for Winter: Keep Your Skin Hydrated and Soft All Season

      Winter can be a magical time of the year, with chilly breezes, cozy sweaters, and warm drinks. But for your skin, it’s often the start of a season-long battle with dryness and discomfort. Finding the right body lotion can make a huge difference, especially if you struggle with dry or sensitive skin.

      In this guide, we’ll dive into the top body lotions that are trending this season. Whether you’re looking for the best body lotion for winter for dry skin, something specifically for babies, or even dermatologist-recommended options, we’ve got you covered. Let’s get started with an overview of why choosing the right body lotion is so essential.

      Why Choosing the Right Body Lotion Is Essential for Winter

      When temperatures drop, the air naturally becomes drier, pulling moisture from your skin. This loss of hydration can lead to irritation, flaky skin, and even itching. A good body lotion serves as a barrier, locking in moisture and keeping your skin supple, smooth, and soft.

      A few essential benefits of using a quality body lotion in winter include:

      • Hydration: Body lotions help lock in moisture and prevent skin dehydration.
      • Skin Repair: Winter-specific lotions often contain ingredients like cocoa butter, shea butter, and ceramides, which help repair and protect the skin barrier.
      • Comfort: Lotions prevent that itchy, uncomfortable feeling caused by dryness.

      As we explore the top-rated body lotions, consider what will best meet your skin’s needs in winter.

      Top Body Lotions for Winter Dry Skin: Overview of Popular Choices

      When it comes to winter body care, the market offers many options to suit different needs, skin types, and preferences. We’ve rounded up some of the best body lotions that are perfect for keeping your skin hydrated during the colder months. From budget-friendly options to specialized dermatologist-recommended lotions, here’s a look at some of the most popular choices this season.

      1. Vaseline Body Lotions

      Vaseline is a popular and trusted name in skincare, offering lotions that are rich, nourishing, and ideal for winter. Whether you’re looking for a specific scent or a size for long-lasting use, there are plenty of options:

      ProductSizeKey Features
      Vaseline Chocolate Body LotionVarious sizesContains cocoa for deep hydration and a pleasant fragrance
      Vaseline Cocoa Body Lotion400mlIdeal for deep moisturization and a rich cocoa scent
      Vaseline Body Lotion 100ml100mlPerfect for travel or trying out before buying larger sizes
      Vaseline Body Lotion 600ml600mlFamily-size option for long-lasting use
      Vaseline Body Lotions

      These lotions are enriched with cocoa butter, which is known for its intensive moisturizing properties. The scent options like cocoa and chocolate add a warm, comforting fragrance, ideal for the winter season.

      2. Parachute Body Lotions

      Parachute body lotions are also well-suited for dry skin and are widely available in India. Known for their light yet nourishing formula, Parachute lotions are especially popular among those with sensitive or easily irritated skin.

      ProductSizePrice Range
      Parachute Body Lotion 400ml400mlBudget-friendly price for daily use
      Parachute Body Lotions

      With a smooth and non-greasy texture, Parachute lotions absorb quickly, leaving skin soft without a sticky residue. The brand’s 400ml size offers good value for frequent use throughout winter.

      3. Just Herbs and Sirona Body Lotions

      If you prefer natural ingredients, Just Herbs and Sirona body lotions are worth exploring. They use Ayurvedic and plant-based ingredients, making them gentle on sensitive skin while delivering deep hydration.

      • Just Herbs Body Lotion: Known for its herb-based formula, ideal for people looking for natural skincare.
      • Sirona Body Lotion: Uses botanical extracts, great for soothing dry skin.

      These lotions are particularly popular among those who want effective skincare without synthetic additives, providing a blend of natural oils and extracts that nourish and hydrate.

      4. Himalaya Cocoa Butter Intensive Body Lotion

      Himalaya’s Cocoa Butter lotion is another great choice for winter. Known for its rich texture and deep moisturization, it’s especially useful for extremely dry or rough skin.

      • Size: Available in various sizes, perfect for both trial and long-term use.
      • Key Ingredients: Cocoa butter and natural emollients that leave skin feeling soft and hydrated.

      These products make up just a few of the top choices available to keep your skin moisturized during winter. From Vaseline’s extensive range to the natural formulations by Just Herbs and Sirona, there’s something for everyone.

      Also Read: Top 10 Makeup Bags for Travel: Space-Saving and Organized Options for Every Trip.

      Product Reviews by Brand and Product Size

      Now that we’ve covered the popular choices for winter body lotions, let’s take a closer look at each brand and product size. Whether you’re looking for a small bottle to try out or a family-size lotion for everyone to use, here’s a breakdown of what each brand offers and how they meet specific skincare needs.

      1. Vaseline Body Lotions: Hydrating Formulas with a Hint of Fragrance

      Vaseline is renowned for its extensive line of body lotions that cater to various skin needs, especially during winter. Their products contain petroleum jelly micro-droplets that create a moisture barrier, locking hydration into the skin. Here are some of the trending options:

      ProductSizeIdeal ForPrice Range
      Vaseline Chocolate Body Lotion100ml, 400ml, 600mlDeep hydration with a chocolate scent₹150-₹450
      Vaseline Cocoa Body Lotion 400ml400mlAll-day moisturization with cocoa fragrance₹350-₹400
      Vaseline Body Lotion 100ml100mlTravel-friendly size for winter₹50-₹70
      Vaseline Body Lotion 600ml600mlFamily size, long-lasting use₹450-₹500
      Vaseline Body Lotions

      These lotions offer a variety of sizes and scents, catering to individual preferences. The larger sizes, such as the 600ml, are convenient for family use, while the 100ml option is perfect for on-the-go hydration.

      2. Parachute Body Lotions: Light and Non-Greasy

      Parachute body lotions are formulated for people looking for quick absorption without a greasy finish. This brand is especially popular in India and provides an affordable option for effective winter skincare.

      ProductSizeKey FeaturePrice
      Parachute Body Lotion 400ml400mlNon-greasy formula, quick absorption₹250-₹300
      Parachute Body Lotions

      The 400ml Parachute body lotion provides enough product to last throughout winter, making it a cost-effective option. Its lightweight formula is suitable for daily use, especially for those who don’t want a heavy lotion on their skin.

      3. Just Herbs and Sirona: Natural and Botanical Ingredients

      If you’re interested in natural skincare, Just Herbs and Sirona are great choices. Both brands use Ayurvedic ingredients and plant-based extracts, making their lotions gentle and nourishing.

      • Just Herbs Body Lotion: Features natural oils and extracts, making it ideal for sensitive skin.
      • Sirona Body Lotion: Contains botanical ingredients that offer a calming effect on dry or irritated skin.

      These lotions are perfect for anyone looking to avoid synthetic ingredients while still getting the moisturizing benefits needed during winter.

      4. Himalaya Cocoa Butter Intensive Body Lotion: Ultra Moisturizing

      Himalaya’s Cocoa Butter Intensive Body Lotion is a winter favorite due to its thick, creamy texture and intensive hydrating properties. It’s designed to tackle the driest of skin, making it a top choice for people in colder climates.

      ProductSizeKey IngredientsPrice
      Himalaya Cocoa Butter Intensive Body Lotion200ml, 400mlCocoa butter, wheat germ oil₹200-₹350
      Himalaya Cocoa Butter Intensive Body Lotion

      The key ingredients, cocoa butter and wheat germ oil, help nourish and soften the skin, providing a rich, creamy consistency that’s ideal for locking in moisture.

      This breakdown helps you find the best product based on size, budget, and specific winter skincare needs. In the next section, we’ll go over special recommendations for different skin types, including dermatologist-recommended lotions and options for babies.

      Also Check Out: What is the color of the hottest fire?

      Special Recommendations for Different Skin Needs

      When it comes to winter skincare, different skin types and specific needs call for specialized products. Let’s look at some tailored recommendations for sensitive skin, babies, and dermatologist-approved options for dry skin, so you can make the best choice for your unique requirements.

      1. For Babies: The Best Body Lotions for Gentle, Hydrated Skin

      Babies have delicate skin that is more prone to dryness, especially in winter. It’s crucial to use a lotion that is both nourishing and gentle on their sensitive skin. Look for options that are free from harsh chemicals and fragrances.

      Recommended Lotions for Babies:

      • Johnson’s Baby Lotion: A classic, hypoallergenic formula, free from parabens and dyes.
      • Aveeno Baby Daily Moisture Lotion: Contains colloidal oatmeal, ideal for sensitive skin.
      • Mamaearth Body Lotion for Babies: Made with plant-based ingredients, great for dry skin.

      These lotions are mild, hydrating, and specifically formulated to keep babies’ skin soft without causing irritation.

      2. Dermatologist-Recommended Lotions for Dry Skin

      For adults with extremely dry skin, dermatologist-recommended lotions can provide the deep hydration necessary during winter. Many dermatologists recommend products that contain ingredients like hyaluronic acid, ceramides, and glycerin, which lock in moisture and help restore the skin barrier.

      Top Picks for Dermatologist-Recommended Body Lotions:

      • CeraVe Moisturizing Lotion: Contains ceramides and hyaluronic acid for long-lasting hydration.
      • Eucerin Advanced Repair Lotion: Known for its urea-based formula that exfoliates and hydrates.
      • Cetaphil Moisturizing Lotion: A lightweight option that soothes and hydrates without clogging pores.

      These lotions are ideal for people with sensitive, dry skin or anyone experiencing winter-induced dryness.

      3. Natural and Botanical Options for Sensitive Skin

      If you prefer lotions that use natural ingredients, there are several plant-based options that provide excellent hydration. Just Herbs, Sirona, and Himalaya offer lotions formulated with botanical extracts, suitable for people with skin sensitivities or those avoiding synthetic chemicals.

      • Just Herbs Body Lotion: Combines Ayurvedic ingredients, ideal for calming irritated skin.
      • Sirona Body Lotion: Botanical extracts provide soothing moisture.
      • Himalaya Cocoa Butter Intensive Body Lotion: Natural cocoa butter deeply hydrates and soothes dry skin.

      Natural body lotions can be a great alternative for anyone looking to nourish their skin while avoiding synthetic ingredients.

      By choosing lotions based on your specific skin needs, you can enjoy maximum benefits throughout the winter. In the next section, we’ll cover some tips to help you select the best lotion based on skin type and climate to ensure optimal results.

      How to Choose the Right Body Lotion Based on Skin Type and Climate

      With so many options on the market, picking the best body lotion for your skin type and local climate can feel overwhelming. Choosing the right formula ensures that your skin gets the specific hydration and protection it needs, especially during winter. Here’s a simple guide to help you decide.

      1. Know Your Skin Type

      Different skin types require different types of moisturization. Here’s a quick breakdown to help you identify what works best for your skin:

      • Normal Skin: If your skin isn’t too dry or oily, you’re in luck! Most lotions will work well for you, but look for something lightweight that still provides hydration, such as Parachute’s non-greasy lotions.
      • Dry Skin: For dry skin, especially in winter, choose richer, more emollient lotions. Products containing ingredients like cocoa butter, shea butter, and ceramides, such as Vaseline Cocoa Body Lotion and Himalaya Cocoa Butter Intensive Lotion, are excellent choices.
      • Sensitive Skin: Sensitive skin needs gentle, fragrance-free options. Natural and plant-based lotions from brands like Just Herbs or dermatologist-recommended products like Cetaphil are often safe and effective.
      • Oily Skin: While you may not feel the need for heavy moisturizers, winter can still dry out oily skin. Go for a lightweight, fast-absorbing lotion like Parachute Body Lotion or Aveeno, which won’t clog pores.

      2. Consider the Climate

      • Cold and Dry Climates: In extremely cold and dry environments, opt for thick, creamy lotions with ingredients that form a protective barrier. Cocoa butter and shea butter-based lotions, such as Vaseline Cocoa or Himalaya Cocoa Butter Intensive, can work wonders.
      • Mild Winter Climates: If your winter is more mild, you may only need a lighter lotion. Products like Parachute or Sirona body lotions, which are light yet hydrating, might be all you need.
      • High Altitude or Windy Conditions: In high altitudes or windy areas, skin tends to lose moisture faster. Opt for thicker formulas that lock in hydration, like Eucerin Advanced Repair or Vaseline’s 600ml options, which provide long-lasting moisture.

      3. Key Ingredients to Look For

      • Hyaluronic Acid: Known for its ability to hold up to 1,000 times its weight in water, hyaluronic acid is a star ingredient for hydration.
      • Ceramides: These are great for rebuilding the skin barrier and locking in moisture, especially helpful for people with dry or sensitive skin.
      • Natural Butters (Cocoa, Shea): These are rich in essential fatty acids and are excellent for deep hydration, making them a great choice for winter.

      4. Don’t Forget the SPF!

      It’s easy to forget that SPF is still important in winter. If you’re spending time outside, consider using a lotion with SPF or applying sunscreen over your body lotion to protect against harmful UV rays, which can still damage skin even in colder months.

      By taking into account your skin type, local climate, and essential ingredients, you can select a lotion that will keep your skin hydrated and healthy all season long.

      Winter Skin Care Tips Beyond Body Lotions

      Using a good body lotion is essential, but a well-rounded skincare routine will help you keep your skin soft, hydrated, and comfortable all winter long. Here are some additional tips to maximize the benefits of your body lotion and keep dryness at bay.

      1. Hydrate from the Inside Out

      Cold weather can make you feel less thirsty, but staying hydrated is just as important in winter as it is in summer. Drinking enough water helps your skin retain moisture and look plump. Herbal teas and warm water with lemon are great alternatives to cold drinks if you’re looking for something to warm you up.

      2. Avoid Hot Showers

      It’s tempting to take hot showers in winter, but hot water strips your skin of its natural oils, leading to even more dryness. Try using lukewarm water instead, and limit your shower time to 10-15 minutes.

      After your shower, pat your skin dry (avoid rubbing) and apply your body lotion while your skin is still slightly damp. This helps lock in moisture and keeps your skin hydrated for longer.

      3. Exfoliate Gently

      Exfoliating is important to remove dead skin cells, allowing your lotion to absorb better. However, winter calls for a gentle exfoliator to avoid over-stripping your skin. Use a mild body scrub or a loofah once a week, focusing on rough areas like elbows and knees.

      4. Use a Humidifier

      Indoor heating can make the air dry, which can further dry out your skin. Using a humidifier helps to maintain moisture in the air, keeping your skin from drying out as quickly. Place a humidifier in your bedroom to help keep your skin hydrated while you sleep.

      5. Wear Protective Clothing

      Winter winds can be harsh on exposed skin, so bundle up when you go outside. Use scarves and gloves to protect your face and hands from the cold air. Materials like cotton and wool also help insulate, keeping your skin warm and less prone to dryness.

      6. Keep a Travel-Size Lotion Handy

      Having a travel-size lotion in your bag is a lifesaver for moments when your skin feels tight or dry throughout the day. A small, convenient option like the Vaseline Body Lotion 100ml or Parachute Body Lotion 100ml allows you to keep your skin moisturized even on the go.

      7. Don’t Forget Your Lips and Hands

      In winter, hands and lips tend to become dry and chapped due to frequent exposure. Use a hand cream regularly and apply a lip balm with moisturizing ingredients like shea butter or beeswax.

      By combining a good body lotion with these simple winter skincare tips, you can keep your skin soft, healthy, and glowing all season long. Remember, hydration and protection are key!

      Categories
      Blog

      सबसे गर्म आग का रंग कौन सा होता है? जानिए आग के रंग और उनके तापमान के बारे में!

      क्या आपने कभी सोचा है कि आग का रंग अलग-अलग क्यों होता है? हम अक्सर देखते हैं कि कभी आग लाल दिखती है, कभी पीली, और कभी नीली। लेकिन क्या आपको पता है कि आग का रंग उसकी गर्मी और तापमान के बारे में बहुत कुछ बताता है? आज हम इस आर्टिकल में जानेंगे कि “सबसे गर्म आग का रंग कौन सा होता है” और आखिर क्यों रंगों का यह अंतर होता है। तो चलिए, शुरुआत करते हैं!

      आग का सबसे गर्म रंग नीला होता है, जो लगभग 1400°C से 1650°C तक तापमान दर्शाता है। नीली आग उच्च ऑक्सीजन के साथ पूर्ण दहन के कारण बनती है और इसे वेल्डिंग, ग्लास ब्लोइंग, और रसोई के गैस स्टोव में उपयोग किया जाता है। तापमान के अनुसार आग के रंग बदलते हैं – लाल (525-1000°C), नारंगी (1000-1200°C), पीला (1200-1400°C) और सबसे गर्म नीला। आग के रंग को समझने से न केवल सुरक्षा में मदद मिलती है, बल्कि विभिन्न उद्योगों में भी इसका व्यावहारिक उपयोग होता है।

      आग का रंग कैसे बदलता है? (How Does Fire Color Change?)

      आग का रंग सिर्फ देखने में ही नहीं बल्कि वैज्ञानिक दृष्टिकोण से भी बेहद खास होता है। इसका रंग बदलता है उसकी तापमान और उसमें मौजूद तत्वों (elements) के आधार पर। जब कोई चीज जलती है, तो उसकी ऊर्जा और तापमान उस आग के रंग को प्रभावित करते हैं।

      उदाहरण के तौर पर, जब तापमान कम होता है, तो आग का रंग लाल या नारंगी हो सकता है। जैसे-जैसे तापमान बढ़ता है, यह रंग पीले और फिर नीले में बदल सकता है। इस बदलाव का कारण यह है कि अलग-अलग तापमान पर जलने वाली वस्तुएं अलग-अलग रंग की ऊर्जा (energy) छोड़ती हैं। सरल शब्दों में कहें, तो जितना ज्यादा तापमान, उतना ही गहरा और चमकदार रंग।

      इसलिए, जब आप किसी आग को देखते हैं, तो उसका रंग देखकर आप अनुमान लगा सकते हैं कि वह कितनी गर्म है। यह बदलाव न केवल देखने में दिलचस्प है बल्कि आग के विज्ञान को समझने में भी मदद करता है।

      आग के विभिन्न रंग और उनके तापमान (Fire Colors and Their Temperatures)

      अब हम समझते हैं कि आग का रंग किस तरह से तापमान के अनुसार बदलता है। हर रंग अपने आप में एक खास तापमान को दर्शाता है, और इसे समझने से आप आग की गर्मी का अनुमान लगा सकते हैं। यह ध्यान देना भी ज़रूरी है कि अलग-अलग प्रकार के ईंधन (fuels) और जलने की परिस्थितियाँ इन तापमानों में थोड़े बदलाव ला सकती हैं। चलिए देखते हैं कौन-कौन से रंग और उनके तापमान क्या होते हैं:

      • Red (लाल आग): लाल रंग की आग सबसे कम तापमान वाली होती है। आमतौर पर, इसका तापमान 525°C से लेकर 1000°C के बीच होता है। यह रंग अक्सर लकड़ी, कोयले या ऐसे अन्य ईंधनों के जलने पर बनता है जो धीमी गति से जलते हैं और कम ऊर्जा छोड़ते हैं।
      • Orange (नारंगी आग): जैसे-जैसे तापमान बढ़ता है, आग नारंगी रंग की हो जाती है, जिसका तापमान लगभग 1000°C से 1200°C तक हो सकता है। यह रंग आमतौर पर सामान्य जलती हुई लकड़ी या पेड़ की शाखाओं में दिखाई देता है, जहां तापमान थोड़ी अधिक गर्मी उत्पन्न करता है।
      • Yellow (पीली आग): इससे भी ज्यादा गर्म आग पीले रंग की होती है, जिसका तापमान लगभग 1200°C से 1400°C के बीच होता है। यह रंग अक्सर मोमबत्ती (candle flame) और गैस स्टोव की आग में दिखाई देता है। यहाँ, ऊर्जा और तापमान काफी अधिक होते हैं, लेकिन यह पूरी तरह से ऑक्सीजन की अधिकतम मात्रा में नहीं जलता है।
      • Blue (नीली आग): नीली आग सबसे ज्यादा गर्म होती है और इसका तापमान लगभग 1400°C से 1650°C तक हो सकता है। इस रंग की आग तभी बनती है जब जलन पूरी तरह से हो, और पर्याप्त ऑक्सीजन उपलब्ध हो। नीला रंग इसलिए सबसे अधिक ऊर्जा वाली और सबसे गर्म माना जाता है। ध्यान दें कि यह तापमान बहुत उच्च ऊर्जा वाले ईंधनों, जैसे गैस और कुछ औद्योगिक प्रक्रियाओं, में अधिक पाया जाता है।

      यह ध्यान रखना महत्वपूर्ण है कि ये तापमान रेंज केवल एक सामान्य दिशानिर्देश हैं और विशेष परिस्थितियों, जैसे कि ईंधन का प्रकार और जलने की स्थिति, के अनुसार थोड़ा भिन्न हो सकते हैं।

      तो, अगली बार जब आप आग का रंग देखेंगे, तो अब आपको उसका तापमान समझने में मदद मिलेगी। अब तक हमने जाना कि नीला रंग सबसे गर्म आग का प्रतीक है और इस आग को अक्सर सबसे शक्तिशाली माना जाता है।

      Also Check Out: अलमारी शब्द किस भाषा का है? जानिए इस आम शब्द का अनोखा इतिहास.

      सबसे गर्म रंग कौन सा होता है? (Which is the Hottest Color of Fire?)

      जब बात आग के रंग की आती है, तो नीला रंग सबसे अधिक गर्म माना जाता है। लेकिन ऐसा क्यों? इसका कारण यह है कि नीली आग का रंग तभी बनता है जब ईंधन को जलाने के लिए पर्याप्त ऑक्सीजन होती है और जलन पूरी तरह से होती है। इस प्रक्रिया को पूर्ण दहन (complete combustion) कहा जाता है, जिसमें अधिकतम ऊर्जा उत्पन्न होती है और आग का तापमान अपने उच्चतम स्तर पर पहुँच जाता है।

      नीली आग का रंग इतनी उच्च ऊर्जा को दर्शाता है कि इसका उपयोग औद्योगिक और वैज्ञानिक प्रयोगों में भी किया जाता है। उदाहरण के लिए, वेल्डिंग में नीली आग का उपयोग इसलिए होता है क्योंकि इसे उच्च तापमान की आवश्यकता होती है, जो धातुओं को आसानी से पिघला सकता है। इसके अलावा, नीली आग की एक अन्य विशेषता यह है कि यह साफ़ और अधिक कुशल होती है, क्योंकि इसमें ईंधन कम बर्बाद होता है और धुआं या काले कार्बन कण बहुत कम निकलते हैं।

      नीली आग की तुलना में लाल, नारंगी, और पीली आग कम तापमान की होती हैं और इनका उपयोग साधारण कामों में किया जाता है, जैसे लकड़ी जलाना या खाना पकाना। इसलिए, जब अगली बार आप नीली आग देखें, तो समझ जाएँ कि यह सबसे गर्म रंग है और इसकी ऊर्जा और तापमान किसी भी अन्य रंग की आग से कहीं अधिक है।

      क्यों महत्वपूर्ण है आग का रंग जानना? (Why is Understanding Fire Colors Important?)

      आग के रंग को समझना केवल वैज्ञानिक ज्ञान ही नहीं, बल्कि रोज़मर्रा के जीवन में भी उपयोगी हो सकता है। आइए देखते हैं, किन कारणों से यह जानकारी महत्वपूर्ण है:

      • Safety Knowledge (सुरक्षा ज्ञान): आग का रंग देखकर उसकी गर्मी और शक्ति का अंदाज़ा लगाया जा सकता है। उदाहरण के लिए, नीली आग, जो बहुत गर्म होती है, से हमेशा दूरी बनाए रखना चाहिए, खासकर अगर आप गैस स्टोव का उपयोग कर रहे हों। इसी तरह, यदि आप वेल्डिंग या अन्य गर्मी से जुड़े कार्य कर रहे हैं, तो यह समझना ज़रूरी है कि किस रंग की आग सबसे अधिक जोखिम भरी हो सकती है।
      • Educational Aspect (शैक्षिक पहलू): छात्रों और ज्ञान के शौकीनों के लिए आग के रंगों को समझना विज्ञान के एक मज़ेदार और महत्वपूर्ण हिस्से को उजागर करता है। इसे सरल तरीके से समझने से बच्चों में विज्ञान के प्रति रुचि बढ़ सकती है और वे समझ सकते हैं कि कैसे तापमान और ऑक्सीजन आग के रंग को प्रभावित करते हैं।
      • Practical Applications (व्यावहारिक उपयोग): विभिन्न उद्योगों में, जैसे कि धातु निर्माण, वेल्डिंग, और ग्लास ब्लोइंग, आग के रंग का उपयोग यह सुनिश्चित करने के लिए किया जाता है कि सही तापमान पर काम किया जा रहा है। नीली आग का उपयोग खासकर तब किया जाता है जब उच्च तापमान की आवश्यकता होती है। इससे यह सुनिश्चित होता है कि कार्य कुशलता और सुरक्षा दोनों को बनाए रखा जा सके।

      आग के रंगों के बारे में समझ होने से न केवल रोजमर्रा के जीवन में सावधानी बरतने में मदद मिलती है, बल्कि यह वैज्ञानिक और औद्योगिक क्षेत्रों में भी बेहद उपयोगी साबित होता है।

      Also Read Top 10 Makeup Bags for Travel: Space-Saving and Organized Options for Every Trip.

      रंग और तापमान की वैज्ञानिक व्याख्या (Scientific Explanation of Color and Temperature)

      अब तक हमने देखा कि आग का रंग और तापमान कैसे जुड़े होते हैं। चलिए अब इसके पीछे की विज्ञान को थोड़ा गहराई से समझते हैं। आग का रंग और तापमान इस बात पर निर्भर करता है कि किस प्रकार के अणु और परमाणु (atoms and molecules) उस समय ऊर्जा छोड़ रहे हैं और किस तीव्रता से वे कंपन कर रहे हैं।

      Blackbody Radiation (ब्लैकबॉडी विकिरण)

      यह सिद्धांत समझने में मदद करता है कि किसी वस्तु का रंग कैसे उसकी गर्मी को प्रदर्शित करता है। जब कोई वस्तु गर्म होती है, तो वह ऊर्जा को रंग के रूप में छोड़ती है। यह रंग इस बात पर निर्भर करता है कि उस वस्तु का तापमान कितना है। यही कारण है कि जैसे-जैसे आग का तापमान बढ़ता है, उसका रंग लाल से लेकर नीले तक बदलता है। इस प्रक्रिया को ब्लैकबॉडी विकिरण कहते हैं।

      Color Emission and Chemical Reactions (रंग उत्सर्जन और रासायनिक प्रतिक्रियाएँ)

      हर प्रकार के ईंधन में अलग-अलग तत्व और अणु होते हैं। जब ये जलते हैं, तो वे अपने विशिष्ट रंगों को छोड़ते हैं। उदाहरण के लिए:

      • सोडियम (Na) जलने पर पीला रंग देता है।
      • तांबा (Copper) हरा या नीला रंग देता है।
      • कैल्शियम (Calcium) नारंगी रंग उत्सर्जित करता है।

      इन रासायनिक प्रतिक्रियाओं की वजह से हम आग के अलग-अलग रंग देख पाते हैं। नीली आग का रंग तब दिखाई देता है जब ईंधन और ऑक्सीजन की मात्रा सही अनुपात में होती है, जिससे जलन पूर्ण होती है और ऊर्जा अधिकतम उत्सर्जित होती है।

      Temperature and Molecular Movement (तापमान और आणविक गति)

      जैसे-जैसे तापमान बढ़ता है, अणु तेजी से गति करते हैं और अधिक ऊर्जा का उत्सर्जन करते हैं। यही कारण है कि नीली आग का तापमान सबसे अधिक होता है, क्योंकि इसमें अणुओं की गति तेज होती है और उनके द्वारा उत्पन्न ऊर्जा भी अधिक होती है।

      इस तरह, तापमान और रंग का यह रिश्ता हमें आग के विज्ञान को समझने में मदद करता है और यह बताता है कि एक साधारण सी दिखने वाली आग कितनी विविधता से भरी होती है।

      आग का सबसे गर्म रंग किस क्षेत्र में उपयोगी है? (Applications of the Hottest Fire Color)

      अब जब हमें पता है कि नीली आग सबसे गर्म होती है, तो चलिए देखते हैं कि इसे किन क्षेत्रों में और कैसे उपयोग में लाया जाता है। नीली आग की उच्च तापमान और पूर्ण दहन की विशेषताओं की वजह से इसे कई औद्योगिक और वैज्ञानिक कार्यों में महत्वपूर्ण माना जाता है।

      • Welding (वेल्डिंग): वेल्डिंग में धातुओं को जोड़ने के लिए अत्यधिक गर्मी की आवश्यकता होती है, ताकि धातु पिघल सके और जुड़ सके। नीली आग का उपयोग इसलिए किया जाता है क्योंकि इसका तापमान इतना अधिक होता है कि यह धातु को जल्दी पिघला सकता है। वेल्डिंग में अक्सर गैस की टॉर्च से नीली आग का उत्पादन किया जाता है, जो अधिक कुशल और मजबूत जोड़ सुनिश्चित करती है।
      • Glassblowing (काँच बनाने में): काँच को आकार देने के लिए भी उच्च तापमान की आवश्यकता होती है, और इसके लिए नीली आग सबसे उपयुक्त मानी जाती है। यह तापमान इतना होता है कि काँच को आसानी से पिघलाकर मनचाहा आकार दिया जा सके। ग्लासब्लोइंग में नीली आग का उपयोग इसलिए किया जाता है ताकि काँच के साथ काम करते समय उच्चतम तापमान पर पूरी दक्षता प्राप्त हो सके।
      • Laboratory Use (प्रयोगशाला में उपयोग): प्रयोगशालाओं में, वैज्ञानिक अक्सर नीली आग का उपयोग रासायनिक प्रयोगों में करते हैं, क्योंकि यह कम प्रदूषण पैदा करती है और नियंत्रित तापमान प्रदान करती है। नीली आग से विभिन्न तत्वों का विश्लेषण किया जा सकता है, जैसे कि फ्लेम टेस्ट में विभिन्न धातुओं की पहचान करना।
      • Domestic Applications (घरेलू उपयोग): रसोई में गैस स्टोव में नीली आग का उपयोग किया जाता है क्योंकि यह भोजन को जल्दी और कुशलता से पकाती है। नीली आग का यह फायदा है कि यह पूरी तरह से जलती है और इसमें धुएं और अन्य अवांछित पदार्थों का निर्माण नहीं होता है।

      नीली आग का उपयोग ऐसे सभी क्षेत्रों में होता है जहाँ उच्च तापमान की आवश्यकता होती है, और इसकी उच्च ऊर्जा और कुशलता इसे एक आदर्श विकल्प बनाती हैं। इसलिए, यह जानना कि नीली आग सबसे अधिक गर्म है, न केवल वैज्ञानिक रूप से महत्वपूर्ण है, बल्कि इसके व्यावहारिक उपयोग में भी सहायक है।

      Frequently Asked Questions (FAQs)

      सबसे ठंडी आग का रंग क्या होता है?

      सबसे ठंडी आग का रंग आमतौर पर लाल होता है, जिसका तापमान लगभग 525°C से शुरू होता है। यह रंग कम ऊर्जा वाले दहन को दर्शाता है।

      नीली आग इतनी गर्म क्यों होती है?

      नीली आग उच्च तापमान पर जलने के कारण सबसे गर्म होती है। इसमें पर्याप्त ऑक्सीजन और पूर्ण दहन होता है, जिससे अधिक ऊर्जा उत्पन्न होती है।

      क्या नीली आग हमेशा सबसे गर्म होती है?

      हाँ, सामान्य परिस्थितियों में नीली आग सबसे गर्म मानी जाती है, लेकिन कुछ विशेष गैसें और तत्व अधिक तापमान पर भी जल सकते हैं।

      क्या अलग-अलग रंग की आग का अलग-अलग उपयोग होता है?

      हाँ, विभिन्न रंगों के आग का उपयोग अलग-अलग कार्यों में किया जाता है। जैसे नीली आग वेल्डिंग और ग्लासब्लोइंग में उपयोग होती है क्योंकि यह सबसे अधिक गर्म होती है।

      आग का रंग कैसे बदलता है?

      आग का रंग तापमान और उसमें जलने वाले तत्वों के आधार पर बदलता है। जैसे-जैसे तापमान बढ़ता है, रंग लाल से नीला होता जाता है।

      Categories
      Travel

      Top 10 Makeup Bags for Travel: Space-Saving and Organized Options for Every Trip

      Traveling with your makeup essentials can sometimes feel like a juggling act. From broken powders to messy spills, keeping everything in place can be challenging. The solution? A reliable makeup bag designed specifically for travel. With the right makeup bag for travel, you’ll not only save space but also keep your favorite products organized and secure, no matter where you’re headed.

      In this article, we’ll dive into the top 10 travel-friendly makeup bags that balance compact design, organization, and durability. Whether you’re a frequent flyer, a weekend getaway enthusiast, or someone who likes to keep their beauty essentials minimal, there’s a perfect option for you.

      Criteria for the Best Travel Makeup Bags

      When it comes to choosing the best makeup bag for travel, there are a few essential criteria to consider. The right bag does more than just hold your products—it protects, organizes, and makes packing easier. Here’s what to look for:

      Compact Design

      A travel-friendly makeup bag should be compact enough to fit easily into your carry-on or luggage without taking up too much space. Look for bags that maximize space efficiency while still holding your essentials.

      Organization Features

      Compartments, pockets, and dividers are key to keeping everything in its place. Bags with multiple sections can separate different types of products, like brushes, liquid foundations, and powders, preventing mess and making it easy to access what you need on the go.

      Durability and Material

      Durability is crucial, especially if you travel often. Opt for bags made from spill-proof, easy-to-clean materials like nylon or PVC. Many travelers also prefer a bag with a sturdy zipper and secure closure to avoid any accidental leaks or spills.

      Style Options

      Your travel makeup bag can be an extension of your personal style! From sleek minimalist designs to more luxurious options, there are choices for every style preference. Finding a bag that suits your aesthetic will make it a pleasure to use on every trip.

      With these factors in mind, let’s explore the top 10 makeup bags for travel that check all the right boxes.

      Top 10 Travel Makeup Bags (Product Reviews)

      Finding the perfect makeup bag for travel can transform your packing routine, keeping your beauty essentials organized, protected, and easy to access. From compact, stylish pouches to spacious, customizable cases, the following selections cater to a variety of needs and preferences. Here’s our top 10 list, featuring makeup bags that excel in durability, design, and functionality, making them ideal companions for any trip.

      Comparison Table: Top 10 Travel Makeup Bags

      To help you find the best makeup bag for travel suited to your needs, here’s a quick comparison of the top 10 options. This table highlights key features such as size, material, compartments, and best-suited uses, making it easy to choose the ideal travel makeup bag for you.

      Product NameSize (cm)MaterialCompartmentsSpecial FeaturesIdeal ForPrice
      ZARPA Floral Cosmetic Pouch24 x 19 x 10Water-resistant OxfordRemovable dividersFloral pattern, spaciousBudget-friendly choice₹289
      FASTUNBOX Striped Cosmetic Pouch18 cm300D Oxford clothSingle compartmentStriped pattern, portableEveryday, light use₹299
      Xelvix Clear Makeup Pouch Set3 sizes includedTransparent PVC3 sizesWaterproof, TSA-compliantOrganized packing₹330
      FLYNGO Clear Makeup Pouch Set3 sizes includedPVC3 sizesTransparent, waterproofTSA-friendly, versatile₹395
      PETRICE Toiletry Bag with Hook27.9 x 11.4 x 22.9NylonMultiple pocketsHanging hook, waterproofComprehensive toiletry kit₹399
      INOVERA Makeup Organizer26 x 23 x 9Nylon with PVCAdjustable dividersRose gold, brush slotStylish, customizable₹1,050
      BAGSMART Makeup Bag Set8.7 x 5.5 x 1.6Water-repellent fabric2 small pouchesCompact, stylish designMinimalist travelers₹2,742
      Herschel Supply Co. Chapter Kit24.13 x 11.43 x 15.24PolyesterSingle compartmentDurable, lightweightCompact toiletries₹5,139
      Lay-n-Go Cosmo Cosmetic Bag20” diameterWater-resistant fabricOpen layoutDrawstring closure, lays flatQuick, no-fuss packing₹6,495
      Relavel Extra Large Makeup Case40 x 30 x 15Oxford fabric2 layersAdjustable dividers, lockable zipsProfessional makeup kits₹19,869
      Comparison Table: Top 10 Travel Makeup Bags

      1. ZARPA Floral Cosmetic Pouch

      Price: ₹289 (Original M.R.P.: ₹699)
      Rating: 4.2 out of 5 stars

      The ZARPA Floral Cosmetic Pouch is an affordable and stylish option for travelers looking for a compact yet spacious makeup organizer. With its floral design, this pouch is both fashionable and functional, offering a large capacity within a small form factor. It features a water-resistant exterior, making it durable and easy to maintain, and is equipped with removable partitions and mesh pockets to keep essentials organized.

      Top Features for Versatile Use

      • Expandable and Spacious: At 24 x 19 x 10 cm, this pouch provides ample space to store a variety of travel essentials, from cosmetics and toiletries to small accessories like jewelry and even electronics.
      • Removable Partitions and Mesh Pockets: The interior compartments can be customized with removable dividers, allowing users to arrange items based on their needs. Mesh pockets provide additional organization, keeping items in place during travel.
      • Portable and Lightweight: Despite its spacious design, the pouch is lightweight and foldable, making it easy to pack in luggage or a carry-on bag.

      Why It’s Great for Travel

      • Water-Resistant Material: Ideal for travel, the water-resistant material protects contents from spills and is easy to wipe down.
      • Multi-Functionality: This bag can be used as a makeup organizer, toiletry bag, or storage pouch for small travel essentials like chargers or skincare items.
      • Stylish Floral Design: The vibrant floral pattern adds a touch of style, making it a fashionable accessory for both travel and daily use.

      Pros:

      • Budget-friendly price
      • Customizable compartments with removable dividers
      • Compact yet spacious design

      Cons:

      • Limited durability compared to premium bags
      • Single zipper closure may not be as secure as double-zip options

      The ZARPA Floral Cosmetic Pouch is a practical and stylish choice for those seeking a budget-friendly makeup bag for travel. Its customizable compartments, water-resistant material, and large capacity make it a versatile travel companion for organizing a wide range of items, all at an excellent value.

      2. FASTUNBOX Striped Cosmetic Pouch

      Price: ₹299 (Original M.R.P.: ₹599)
      Rating: 4.2 out of 5 stars

      The FASTUNBOX Striped Cosmetic Pouch is a compact and versatile bag designed for convenient, everyday use. With its cute, striped design and strong portable construction, this pouch is a go-to choice for anyone looking for a simple yet functional makeup bag for travel. Made from durable 300D Oxford cloth, it’s both water-resistant and easy to maintain, offering protection from moisture while keeping contents organized.

      Key Features for Reliable Travel Storage

      • Durable and Water-Resistant Material: Crafted from high-quality 300D Oxford cloth, this pouch is resistant to moisture and durable, making it ideal for travel environments. The interior mesh design helps keep items secure and protected.
      • Compact but Multifunctional: With its small yet spacious design, this pouch can be used for a variety of purposes, from storing cosmetics and toiletries to small travel essentials like brushes, razors, or electronic accessories.
      • Stylish Striped Pattern: The striped design with an added cute sheep pattern gives it a fun and trendy look, appealing to users who enjoy stylish travel accessories.

      Why It’s Great for Travel

      • Lightweight and Portable: This pouch is easy to pack and carry, with an internal fixed strap to keep items secure, allowing you to store essentials without adding bulk.
      • Multi-Purpose Design: Beyond cosmetics, this bag can also serve as a toiletries bag, travel bag, or even a gift for friends or family who love travel accessories.
      • Easy to Clean and Maintain: The durable fabric makes it resistant to stains, and any spills can be wiped off easily, keeping it fresh for longer trips.

      Pros:

      • Compact and lightweight for easy packing
      • Water-resistant material for better protection
      • Fun and stylish design with versatile uses

      Cons:

      • Limited internal compartments for organizing larger items
      • Best suited for light packers rather than extensive makeup collections

      The FASTUNBOX Striped Cosmetic Pouch is perfect for travelers who want a simple, budget-friendly makeup bag that’s stylish, durable, and versatile enough for a range of uses. Its water-resistant material and compact design make it a practical option for keeping essentials organized during travel.

      3. Xelvix Makeup Pouch Travel Toiletries Organizer

      Price: ₹330 (Original M.R.P.: ₹999)
      Rating: 4.5 out of 5 stars

      The Xelvix Makeup Pouch Travel Toiletries Organizer Set is a versatile, affordable, and travel-friendly solution for keeping cosmetics and toiletries organized. This set includes three clear pouches in varying sizes—ideal for organizing items based on their size and purpose. Made from durable PVC material, these bags are transparent and waterproof, allowing you to quickly locate your essentials while protecting them from moisture and spills.

      Key Features for Convenient Travel Organization

      • Clear, Transparent Design: The see-through material makes it easy to find items at a glance, saving time and minimizing rummaging. Perfect for organizing makeup, toiletries, and even beach essentials.
      • Three Different Sizes: The set includes three pouches of different dimensions—30x20x11 cm, 26x16x9 cm, and 22x12x7 cm—which cater to a range of needs, from storing full-size toiletries to smaller cosmetics and accessories.
      • Waterproof and Easy to Clean: Made from thickened PVC material, these bags are water-resistant and protect items from moisture, making them ideal for use at the beach, gym, or poolside. Simply wipe clean to maintain hygiene.

      Why It’s Great for Travel

      • Maximized Space and Minimal Mess: These pouches keep everything in order and allow for efficient packing, helping maximize luggage space.
      • Multi-Use for Home and Travel: Beyond makeup, these pouches are suitable for storing a variety of items like electronic devices, perfumes, lotions, and even wet swimsuits. Their versatility makes them useful both on the road and at home.
      • Durable and Stylish: The pouches are made from environmentally-friendly, wear-resistant materials, with sturdy zippers that ensure durability for long-term use.

      Pros:

      • Excellent value with three versatile pouches in different sizes
      • Waterproof and easy to clean
      • Transparent design for quick access and TSA-compliant

      Cons:

      • Limited internal organization or dividers
      • Basic design may not appeal to those seeking a more luxurious look

      The Xelvix Makeup Pouch Travel Toiletries Organizer Set is perfect for travelers looking for a waterproof, transparent makeup bag for travel that’s budget-friendly and versatile. Its space-saving design and ease of use make it a practical choice for a wide range of needs, from cosmetics to swimwear.

      4. FLYNGO Clear Makeup Pouch Set

      Price: ₹395 (Original M.R.P.: ₹999)
      Rating: 4.5 out of 5 stars

      The FLYNGO Clear Makeup Pouch Set is a practical and stylish choice for travelers who want a versatile, transparent makeup bag for travel. This set of three light pink pouches is made from durable, waterproof PU and PVC material, providing excellent protection against moisture. The clear design allows you to quickly find what you need, while still offering a touch of privacy.

      Key Features for Everyday and Travel Use

      • Transparent, Waterproof Design: These bags are waterproof and easy to clean, protecting items from spills and keeping them free from moisture. The translucent material makes it easy to locate essentials while offering a sleek, stylish look.
      • Set of Three Sizes: The pouches come in three sizes, with the largest measuring 30 x 21 x 10 cm. This variety allows users to categorize items based on their needs—ideal for storing cosmetics, toiletries, or even small accessories.
      • Comfortable Hand Strap: The reinforced hand strap provides ease of carrying, reducing pressure and allowing you to hang or carry the bags comfortably.

      Why It’s Great for Travel

      • Space-Saving Organization: This set allows for clear and efficient organization, making it easier to keep toiletries, cosmetics, and other essentials separated and accessible.
      • TSA-Friendly: The transparent design complies with TSA requirements, making it convenient for airport security checks.
      • Wide Application: These pouches are versatile enough for storing not just makeup, but also travel essentials like chargers, small gadgets, stationery, or toiletries, making them ideal for vacations, business travel, or gym visits.

      Pros:

      • Waterproof and easy to clean
      • Set of three pouches in different sizes for flexibility
      • Transparent design for easy access and TSA compliance

      Cons:

      • Limited compartments; items may shift during travel
      • Basic design without specific organizational pockets

      The FLYNGO Clear Makeup Pouch Set is ideal for travelers seeking a budget-friendly, waterproof travel pouch set that combines style and functionality. With multiple sizes and a transparent, waterproof design, it’s a reliable choice for anyone who values convenience and organization on the go.

      The Lay-n-Go COSMO Cosmetic Bag is ideal for travelers looking for a quick, no-fuss solution to keep their makeup essentials organized and ready for use. This is a must-have travel accessory for anyone who values convenience and style in one package.

      5. PETRICE Toiletry Bag for Women

      Price: ₹399 (Original M.R.P.: ₹999)
      Rating: 4.4 out of 5 stars

      The PETRICE Toiletry Bag for Women is a versatile and stylish makeup pouch for travel that combines durability, spaciousness, and ease of use. Designed with travelers in mind, this bag offers ample room for organizing makeup, toiletries, and grooming essentials. Its waterproof material and thoughtful compartments make it a reliable companion for both quick getaways and extended trips.

      Key Features for a Seamless Travel Experience

      • Waterproof and Durable Material: Made from waterproof nylon and cushioned with pearl cotton, this bag keeps items safe from spills and water exposure, making it perfect for bathroom or shower use.
      • Compact Yet Spacious Design: With dimensions of 27.9 x 11.4 x 22.9 cm, this bag offers enough space for a variety of items, including cosmetics, skincare products, and toiletries, without taking up excessive room in your luggage.
      • Built-In Hook for Hanging: The bag includes a sturdy hook for hanging in hotel bathrooms, gyms, or shared spaces, saving counter space and providing easy access to essentials.

      Why It’s Great for Travel

      • Organized and Accessible: Multiple compartments and pockets keep items neatly arranged, ensuring your beauty products and toiletries are easy to find.
      • Easy to Carry: Its compact size and lightweight design make it easy to pack into any suitcase or backpack, allowing for effortless transportation.
      • Stylish and Functional: The vibrant green color adds a touch of style, making it a fashionable addition to your travel accessories.

      Pros:

      • Waterproof and durable construction
      • Ample storage space with multiple compartments
      • Hook for convenient hanging in various settings

      Cons:

      • May be bulkier compared to minimalist pouches
      • Limited color options for those seeking variety

      The PETRICE Toiletry Bag for Women is perfect for travelers seeking a multifunctional and waterproof makeup bag that can handle all grooming essentials. Its spacious, organized design and practical features like the hanging hook make it a great choice for staying organized and prepared on any trip.

      6. INOVERA Nylon Makeup Organizer Bag

      Price: ₹1,050 (Original M.R.P.: ₹1,449)
      Rating: 4.4 out of 5 stars

      The INOVERA Nylon Makeup Organizer Bag is a luxurious and functional travel cosmetic kit designed for women who prioritize style and organization. This elegant rose gold bag combines practicality with a modern aesthetic, featuring adjustable compartments that can be customized to fit various makeup items. Ideal for brides, travelers, or beauty enthusiasts, it offers a secure and organized space for cosmetics, ensuring they stay intact during travel.

      Key Features for Elegant and Practical Organization

      • Customizable Compartments: With adjustable padded dividers, this bag allows you to design your own internal layout, ensuring cosmetics are securely stored and protected from damage.
      • Dedicated Makeup Brush Slots: Elastic pockets fit a range of brush sizes, and the PVC-coated section is easy to clean, preventing makeup residue from staining the bag.
      • Compact Yet Spacious Design: With dimensions of 26 x 23 x 9 cm, this bag is compact enough to fit into luggage while still providing ample space for makeup essentials, toiletries, and even small accessories.

      Why It’s Great for Travel

      • DIY Compartment Arrangement: Tailor the interior to your specific needs, keeping items organized and secure, which is especially helpful when dealing with fragile products.
      • Easy to Clean and Maintain: The smooth, waterproof PVC-coated brush area is simple to wipe down, making it convenient to maintain.
      • Sophisticated Look: The rose gold color adds an elegant touch, making this bag a beautiful choice for any occasion, from daily use to special trips.

      Pros:

      • Adjustable compartments for customizable storage
      • Elegant and durable rose gold design
      • Dedicated, easy-to-clean area for makeup brushes

      Cons:

      • Limited space for larger collections
      • Primarily designed for cosmetics; less suited for bulkier toiletries

      The INOVERA Nylon Makeup Organizer Bag is perfect for travelers who need a stylish and functional makeup organizer that can be customized to their needs. With its chic rose gold finish and adaptable design, it’s an ideal travel accessory for those who want to stay organized and look fabulous on the go.

      The Herschel Supply Co. Chapter Travel Kit is a top pick for travelers who want a reliable and stylish makeup bag for travel that’s compact, lightweight, and built to last. Its simple design and high functionality make it a go-to choice for those who appreciate quality and ease of use.

      7. BAGSMART Makeup Bag Travel Cosmetic Bag

      Price: ₹2,742 (Original M.R.P.: ₹14,699)
      Rating: 4.7 out of 5 stars

      The BAGSMART Travel Cosmetic Bag is a stylish and practical choice for those seeking a compact makeup bag for travel. This set includes two small pouches—a black and a pink one—offering flexibility for organizing essentials. With dimensions of 8.7″ x 5.5″ x 1.6″, these bags fit perfectly in larger purses or carry-ons, helping keep your items separated and easily accessible on the go.

      Top Features for the Organized Traveler

      • High-Quality Materials: Made from water-repellent peach-skin fabric, these bags are soft to the touch yet highly durable. The quality stitching and zippers add to their longevity, ensuring they withstand frequent use.
      • Compact, Travel-Friendly Size: These pouches are the perfect size for travel, allowing you to keep personal items organized in your purse without taking up too much space. They work especially well for organizing items within a larger travel bag or suitcase.
      • Stylish and Discreet Design: The textured fabric and tassel detail give these bags a modern, high-end look that doesn’t attract too much attention, making them ideal for keeping personal items discreetly stored.

      Why It’s Great for Travel

      • Easy Organization: The two bags allow you to categorize items, such as makeup in one pouch and personal essentials in the other, for quick access.
      • Versatile Use: Not only are these bags perfect for makeup and toiletries, but they can also hold essentials like credit cards, keys, and travel documents. They even make a great gift bag alternative for small presents.
      • Durable and Water-Repellent: The water-resistant material is easy to clean, ensuring your items stay protected from spills or leaks.

      Pros:

      • Compact and versatile for a range of uses
      • High-quality materials and elegant design
      • Great value with two bags included

      Cons:

      • Limited space for larger cosmetic collections
      • Not ideal for storing bulkier items or makeup tools

      The BAGSMART Makeup Bag Set is perfect for travelers who prefer a minimalist approach to their beauty essentials. With its chic design, durable materials, and compact size, it’s an ideal choice for anyone looking to keep their makeup and personal items organized without taking up much space.

      8. Herschel Supply Co. Chapter Travel Kit

      Price: ₹5,139
      Rating: 4.8 out of 5 stars

      The Herschel Supply Co. Chapter Travel Kit is a classic choice for travelers who appreciate a minimalist yet functional design. Known for its durability and stylish aesthetic, this travel kit is perfect for holding essential toiletries and makeup items. Compact and lightweight at 180 grams, it easily fits into luggage while still offering ample space for everyday items.

      Key Features for a Reliable Travel Companion

      • Thoughtful Dimensions: Measuring 24.13 x 11.43 x 15.24 cm, this kit provides just the right amount of space for travel essentials without being bulky. It’s ideal for travelers who want a no-fuss makeup bag that won’t take up too much room.
      • Durable Build: Made by Herschel, a brand known for quality, the Chapter Travel Kit is designed to last. It’s crafted from durable materials with a sturdy zipper, ensuring that it can handle the demands of frequent travel.
      • Simple, Stylish Design: This kit has a timeless, unisex look, making it suitable for both men and women. It’s perfect for anyone who prefers a sleek, understated design over flashier cosmetic bags.

      Why It’s Great for Travel

      • Compact yet Spacious: While compact, this bag is spacious enough to hold makeup basics, toiletries, and grooming items, making it a versatile option for light packers.
      • Easy to Carry and Pack: Lightweight and easy to fit into larger bags, it’s designed with a side handle that makes it easy to grab on the go or hang up in a hotel bathroom.
      • High Quality and Reliable: With its high-quality materials and construction, this travel kit will likely last for years, making it a smart investment for frequent travelers.

      Pros:

      • Durable and lightweight
      • Simple, timeless design suitable for all genders
      • Easy to clean and maintain

      Cons:

      • Limited internal organization; lacks multiple compartments
      • Not ideal for those who need to carry a lot of makeup or larger beauty tools

      9. Lay-n-Go Cosmo Cosmetic Bag

      Price: ₹6,495 (Original M.R.P.: ₹7,499)
      Rating: 4.3 out of 5 stars

      The Lay-n-Go COSMO (20″) is a game-changer in the world of travel makeup bags. Originally launched as an innovative cosmetic solution, it quickly gained popularity and was even named one of the top “Gifts To Give Your Girlfriends” by NBC’s Today Show. The COSMO bag stands out for its unique drawstring design, which lays flat when opened, allowing you to see all your cosmetics at once. No more digging around to find your essentials!

      The design also makes it incredibly easy to pack and unpack, as you can simply pull the drawstring to close it and secure everything inside. This feature is particularly convenient for frequent travelers or anyone who needs to organize on the go.

      Why It’s Great for Travel

      • Quick Access and Easy Packing: The flat, open design allows you to see everything at a glance, making it perfect for quick touch-ups or last-minute packing.
      • Durable and Easy to Clean: Made from high-quality materials, the COSMO bag is easy to wipe down, ensuring your bag stays clean even with makeup residue.
      • Space-Saving Design: Once packed up, the COSMO bag is compact and fits easily into a carry-on or suitcase.

      Pros:

      • Effortless access to all items when opened
      • Lightweight and easy to clean
      • Stylish, innovative design recognized in the industry

      Cons:

      • Limited compartments, which may not suit those who prefer separate sections for organization
      • Slightly on the higher end of the price range for a makeup bag

      10. Relavel Extra Large Makeup Train Case (Super Large, Black)

      Price: ₹19,869 (Original M.R.P.: ₹46,300)
      Rating: 4.5 out of 5 stars

      For professional makeup artists and beauty enthusiasts alike, the Relavel Extra Large Makeup Train Case offers an impressive amount of space and organization options. This super-sized black makeup case is designed with high-quality Oxford fabric and a nylon lining, providing both durability and style. Ideal for those who need a robust solution to carry a large assortment of cosmetics, tools, and accessories, it stands out as one of the most spacious options on the market.

      Top Features for the Traveling Makeup Artist

      • Roomy, Multi-Compartment Design: The bag features two large layers with dedicated sections. The first layer includes 3 elastic pockets, 2 zippered mesh pockets, and a large mesh bag, ideal for storing items like hair curlers, brushes, makeup tools, and palettes. The second layer holds up to 40 makeup brushes in specially designed slots with a protective cover, keeping all brushes safe and organized.
      • Versatile Carrying Options: Equipped with an adjustable shoulder strap, this case can be carried as a backpack or shoulder bag. It even has a lockable metal zipper and a trolley sleeve, making it easy to secure atop a suitcase handle.
      • Premium Material: Constructed from high-quality Oxford fabric, this bag is durable and water-resistant, ensuring it holds up well under frequent use.

      Why It’s Perfect for Travel

      • Professional-Grade Capacity: Unlike most makeup bags, this case is built for large collections and diverse product types, making it ideal for makeup artists or those with extensive cosmetic kits.
      • Organized and Accessible: With so many compartments and brush slots, everything stays organized and accessible, eliminating the hassle of digging through products.
      • Multifunctional Use: Not only can it be used as a professional artist’s kit, but it also doubles as a personal organizer or a trolley case, adaptable to any travel or work situation.

      Pros:

      • Unmatched storage capacity for comprehensive collections
      • Multiple carrying options for added convenience
      • Durable materials with secure, lockable zippers

      Cons:

      • Bulkier than standard travel bags, so it’s best suited for extensive travel or professional use
      • Pricey, though it often goes on sale

      The Relavel Extra Large Makeup Train Case is perfect for those who need an extra-large makeup bag for travel with all the organization and durability necessary for professional work. This case meets the demands of a busy makeup artist or anyone with a sizable collection of beauty essentials.

      Also Check Out: Travel Agency in Pune: Your Guide to Hassle-Free Trips.

      Honorable Mentions

      While our top 10 list covers some of the best makeup bags for travel, there are a few more that deserve recognition for their unique features and versatility. Here are a few honorable mentions to consider:

      1. Tartan + Twine Dual Zip Organizer

      • Why It Stands Out: This dual-zip makeup bag offers a compact yet organized design with two separate compartments, making it ideal for keeping makeup and skincare products divided.
      • Ideal For: Light packers who appreciate a slim, easily packable makeup bag with distinct sections.

      2. CALPAK Clear Cosmetics Case

      • Why It Stands Out: Made from transparent, TSA-friendly PVC material, this bag is designed for travelers who need quick access during airport security. Its clear design is complemented by a durable build and chic details.
      • Ideal For: Travelers looking for a stylish, TSA-compliant makeup bag that also works well as a beach or gym bag.

      3. Sephora Collection Pack It All Organizer

      • Why It Stands Out: With multiple zippered compartments and a sleek design, this organizer from Sephora provides ample space for all types of beauty essentials while maintaining a compact profile.
      • Ideal For: Makeup enthusiasts who like a dedicated spot for each item, especially for longer trips where a larger selection of products is needed.

      These honorable mentions provide additional options based on specific needs and preferences, whether you prioritize TSA compliance, compact organization, or a stylish statement bag.

      Also Check Out: Historical Temples in India: A Journey Through Time and Spirituality.

      Quick Tips to Pack Your Makeup Bag for Travel

      Packing your makeup bag for travel doesn’t need to be complicated. Here are a few quick tips to ensure you’re organized, spill-free, and ready to go:

      1. Choose Travel-Sized Products – Keep it compact by picking mini versions or transferring essentials into small containers.
      2. Bring Multi-Use Items – Products that do double duty, like tinted moisturizer or lip and cheek tints, save space.
      3. Cushion Fragile Items – Slip a cotton pad inside powder compacts to prevent shattering.
      4. Use Ziplock Bags for Liquids – Keep liquid items in ziplock bags to protect against spills.
      5. Organize Brushes with Guards – Use brush guards or dedicated slots to keep bristles intact and prevent mess.
      6. Tailor to Your Trip – Customize based on your destination; for example, pack sunscreen for beach trips or versatile basics for city visits.

      Conclusion: Finding Your Perfect Travel Makeup Bag

      Choosing the right makeup bag for travel can make all the difference between a smooth, organized journey and a chaotic packing experience. With options that range from compact pouches to customizable train cases, there’s a perfect solution for every traveler’s needs. Whether you prioritize space-saving design, easy access, or maximum storage, this guide provides options that keep your beauty essentials secure and organized.

      As you plan your next trip, remember to consider your personal style, the specific features that will make packing easier, and the organization options that suit your collection. With the right travel makeup bag, you’ll be able to keep all your essentials in one place, allowing you to focus on enjoying your adventure, looking great, and feeling prepared!

      Frequently Asked Questions (FAQs) About Travel Makeup Bags

      What size makeup bag is best for travel?

      The ideal size depends on the type and amount of products you bring. For weekend trips, a small or medium-sized pouch is usually enough. For longer trips or if you carry a wide range of products, a larger or multi-compartment bag is recommended.

      Can I carry liquid makeup in my travel makeup bag?

      Yes, but be mindful of TSA regulations if you’re flying. Liquids must be in containers of 100ml or less and stored in a clear, quart-sized bag. Consider placing liquid items in a separate ziplock bag to prevent spills.

      How can I protect fragile makeup items during travel?

      Use cotton pads inside compacts or wrap delicate items in soft cloths. Opt for makeup bags with padding or dividers to keep items secure and prevent breakage.

      How do I pack a makeup bag for travel?

      To pack a makeup bag for travel, start with travel-sized products and multi-use items to save space. Organize by category (e.g., liquids, powders) and use cotton pads to cushion fragile items. Store liquids in a resealable bag to prevent leaks, and keep brushes in protective slots or covers. This setup keeps everything organized and secure.

      Categories
      Travel

      Travel Agency in Pune: Your Guide to Hassle-Free Trips

      Pune, with its vibrant culture and proximity to some of India’s best travel destinations, is a fantastic place for travel enthusiasts. Whether you’re planning a weekend getaway to the hills or an international vacation, there’s a lot a well-connected travel agency in Pune can do to simplify your trip. With expertise in organizing trips, managing bookings, and handling all the fine details, travel agencies make planning easier than ever.

      In this article, we’ll walk you through why travel agencies in Pune are a great choice, introduce some of the best options in the city, and offer tips for picking the right one for your needs.

      Why Use a Travel Agency in Pune?

      Using a travel agency in Pune offers benefits like expert local knowledge, convenient trip planning, and access to special deals and discounts. Whether you’re traveling within India or abroad, Pune-based agencies provide personalized itineraries and hassle-free arrangements.

      When it comes to travel planning, especially if you’re short on time or need personalized options, a travel agency in Pune can be a game-changer. Here are some of the main reasons why people choose local agencies:

      • Local Knowledge: Travel agencies in Pune are familiar with nearby destinations, hidden gems, and ideal travel times. Whether you want to explore scenic spots like Lonavala, go for a spiritual retreat, or experience unique cultural festivals, they know the best times and ways to make it happen.
      • Convenience and Customization: Instead of juggling multiple bookings, a travel agency can create a customized itinerary just for you. From choosing flights to booking hotels, managing transportation, and planning activities, they handle it all, saving you time and stress.
      • Deals and Discounts: Pune travel agencies often have special deals or partnerships with hotels, airlines, and local attractions. This can mean more value for your money, as agencies can pass on savings or perks they receive.

      Using a travel agency in Pune isn’t just about convenience—it’s about enhancing your travel experience and taking the hassle out of planning.

      Also Read: Historical Temples in India: A Journey Through Time and Spirituality.

      Top 5 Travel Agencies in Pune

      To help you get started with finding the right travel agency in Pune, here’s a list of some of the most popular and highly recommended options in the city. Each offers unique services and specialties, so you can find the perfect fit for your travel needs.

      Top 5 Travel Agencies in Pune

      • Pune Tours & Travels
      • Sundar Travels
      • Dream Destinations
      • Exotic Pune Travels
      • FlyHigh Pune

      Pune Tours & Travels

      • Overview: Known for their prompt service and extensive packages, Pune Tours & Travels is a go-to agency for both domestic and international trips.
      • Services Offered: Package tours, honeymoon trips, corporate travel, and ticketing services.
      • Customer Reviews: Rated highly for its friendly staff and quick response time.

      Sundar Travels

      • Overview: With a focus on customer satisfaction, Sundar Travels offers personalized travel packages, especially popular among families and corporate groups.
      • Services Offered: Customized itineraries, adventure tourism, and eco-tour packages.
      • Client Testimonials: Many clients praise them for hassle-free bookings and knowledgeable staff.

      Dream Destinations

      • Overview: Specializes in international travel, providing end-to-end support for trips to Europe, the US, and Southeast Asia.
      • Services Offered: International travel packages, visa and documentation assistance, and luxury vacations.
      • Reviews: Known for smooth planning and assistance with complex visa processes.

      Exotic Pune Travels

      • Overview: Focuses on nearby destinations and off-the-beaten-path experiences in and around Maharashtra.
      • Services Offered: Local guided tours, weekend getaways, and adventure travel.
      • Client Feedback: Appreciated for offering unique, lesser-known destinations.

      FlyHigh Pune

      • Overview: A well-rounded travel agency providing both budget and premium travel options for domestic and international travelers.
      • Services Offered: Group tours, family packages, flight and hotel bookings, and car rentals.
      • Customer Satisfaction: Praised for competitive pricing and reliable service.

      Each of these agencies brings something unique to the table. Depending on your travel goals, you can choose an agency that aligns with your budget, destination, and specific travel preferences.

      Also Check out: Best Resort to Stay in Maldives: Top Picks for Every Traveler.

      Types of Services Offered by Pune Travel Agencies

      Travel agencies in Pune offer a wide range of services to cater to different travel needs and preferences. Here’s a look at some of the most common services you can expect:

      • Domestic and International Packages: Whether you’re exploring destinations within India or planning an international trip, travel agencies provide curated packages that include accommodations, sightseeing, and transport options. Popular international destinations like Europe and Southeast Asia are frequently available in customizable packages.
      • Customized Itineraries: Many agencies in Pune specialize in creating tailored itineraries to suit different travel styles—whether you’re a solo traveler, a family on vacation, or a group of friends. Customized trips ensure that you get exactly what you’re looking for in a travel experience.
      • Corporate Travel Solutions: For business travelers, agencies offer corporate travel packages that include hotel bookings, transportation, and other logistics needed for a smooth business trip. These packages are designed to provide comfort and convenience for business professionals.
      • Adventure and Eco-Tourism Packages: If you’re looking for adventure, Pune travel agencies often organize eco-friendly tourism options such as trekking, camping, and wildlife safaris. These packages are ideal for those wanting to experience nature and adventure activities in and around Pune.
      • Visa and Documentation Assistance: One of the biggest perks of using a travel agency is the support with visas, passports, and other travel documentation. For international travel, agencies handle the paperwork and guide you through the visa process, making it a hassle-free experience.

      By choosing a travel agency in Pune, you’re gaining access to services that simplify every part of your journey, from itinerary planning to documentation, allowing you to focus on enjoying the experience.

      Also Read: Harsil Valley, Uttarakhand: Your Guide to “Mini Switzerland”!

      How to Choose the Right Travel Agency in Pune

      Selecting the right travel agency in Pune can make a huge difference in your overall experience. Here are some tips to help you make the best choice:

      • Define Your Needs: Start by identifying what you need from a travel agency. Are you looking for a full-service agency to handle everything from flights to accommodations, or do you just need help with booking specific activities? Being clear about your needs will help narrow down the options.
      • Check Reviews and Testimonials: Look at reviews and testimonials from previous clients to gauge the agency’s reliability and quality of service. Websites like Google Reviews and travel forums can give you honest feedback on an agency’s strengths and weaknesses.
      • Compare Packages and Pricing: Don’t settle for the first agency you find. Compare packages and prices across multiple agencies to ensure you’re getting the best value for your budget. Remember, the cheapest option may not always be the best—focus on finding a balance between cost and quality.
      • Ask About Local Partnerships: Agencies with strong local partnerships often have better deals on accommodations, transportation, and activities. These partnerships can mean added perks for you, like discounted rates, room upgrades, or exclusive experiences.

      Choosing a travel agency that aligns with your needs, budget, and travel style will set the stage for a smooth and enjoyable trip, allowing you to travel with confidence.

      Also Check Out: Best Places for Team Outings in Hyderabad.

      Popular Destinations from Pune

      Popular destinations from Pune include Lonavala and Khandala for scenic hill stations, Mahabaleshwar for nature and strawberry farms, Goa for beach relaxation, and Alibaug for coastal views. These spots are ideal for quick getaways with convenient travel options from Pune.

      Pune’s location makes it an ideal starting point for exploring some of India’s most beautiful and diverse destinations. Here are a few popular travel spots that Pune travel agencies can help you explore:

      • Lonavala and Khandala: Just a couple of hours from Pune, these hill stations are famous for their lush landscapes, waterfalls, and misty hills. Perfect for a quick weekend getaway, Lonavala and Khandala offer scenic views and plenty of adventure options like trekking and camping.
      • Mahabaleshwar: Known for its strawberries, pleasant weather, and stunning viewpoints, Mahabaleshwar is a favorite for nature lovers. Many Pune travel agencies offer weekend packages that include sightseeing spots like Wilson Point, Pratapgad Fort, and the popular Mapro Garden.
      • Goa: For those looking to relax by the beach, Goa is a classic choice. Pune travel agencies often provide convenient packages to Goa, including transportation, accommodation, and guided tours to top beaches and cultural spots.
      • Alibaug: Known for its pristine beaches and historic forts, Alibaug is a popular coastal destination accessible from Pune. Travel agencies can arrange beachside stays, water sports, and local tours, making it an easy escape for sea lovers.
      • Ajanta and Ellora Caves: A UNESCO World Heritage Site, these ancient caves feature intricate carvings and stunning rock-cut architecture. Pune agencies can help organize tours to these historic sites, providing guided insights into the area’s rich history and cultural significance.

      These destinations showcase just a glimpse of what’s within reach from Pune. With the help of a travel agency, you can enjoy the best experiences without the hassle of planning.

      Also Check Out: 10 Best Monsoon Destinations of Rajasthan You Must Visit.

      Tips for a Hassle-Free Travel Experience

      Working with a travel agency in Pune can make your journey smoother, but there are a few tips that can further enhance your experience:

      • Book Early: If you’re traveling during peak seasons or holidays, booking well in advance ensures you get the best options for flights, accommodations, and tours. Early bookings also help you avoid last-minute price hikes and availability issues.
      • Communicate Your Preferences Clearly: Be upfront about your budget, preferred travel style, and any special requirements, such as dietary preferences or accessibility needs. This helps the agency customize the trip to your liking.
      • Prepare a Checklist: Create a checklist of documents and essentials you’ll need for the trip. This can include things like passports, visas, travel insurance, and any special clothing or equipment needed for activities.
      • Stay Open to Recommendations: Travel agencies often have local insights that can add value to your trip. They might suggest lesser-known spots or unique activities that aren’t in the typical tourist guidebook.
      • Review Your Itinerary Before Departure: Before you set off, go through the entire itinerary to make sure all bookings, connections, and activities align with your expectations. Clarify any questions you have with the agency to avoid surprises on the road.

      By following these tips and working closely with your travel agency, you can set yourself up for a smooth, memorable, and enjoyable journey.

      Conclusion

      Using a travel agency in Pune is one of the best ways to enjoy a well-organized, stress-free trip, whether you’re exploring local gems or traveling internationally. With expert knowledge of destinations, tailored itineraries, and the ability to handle all the logistics, travel agencies can transform your travel experience. From finding the right agency and choosing the ideal package to understanding popular destinations and getting a few insider tips, planning your trip has never been easier.

      So, if you’re looking to make your next journey enjoyable and hassle-free, consider reaching out to a reliable travel agency in Pune. They’re ready to help you discover new places, enjoy exciting activities, and create unforgettable memories.

      Categories
      Desi

      अलमारी शब्द किस भाषा का है? जानिए इस आम शब्द का अनोखा इतिहास

      In almost every Indian household, you’ll find an “अलमारी” filled with essentials—clothes, books, old photographs, or even cherished letters. It’s not just a piece of furniture; it’s a place that holds memories, a silent keeper of everything precious. But have you ever wondered, अलमारी किस भाषा का शब्द है? It’s fascinating to realize that many words we use daily in Hindi actually come from different languages, and “अलमारी” is one of them. This article will take you through the journey of this word, exploring its origins and why it has become such a big part of our lives.

      Historical Background of the Word “अलमारी”

      अलमारी शब्द किस भाषा से आया है?

      The word “अलमारी” originates from the Portuguese term “almario,” introduced during Portuguese colonial influence in India. Over time, “almario” was adapted into Hindi as “अलमारी,” referring to a storage cabinet or wardrobe commonly found in Indian households.

      To answer the question, अलमारी शब्द किस भाषा से आया है? let’s take a trip back in time. The word “अलमारी” actually has its roots in the Portuguese language, where it’s called “almario.” When the Portuguese came to India for trade and exploration, they brought not only their goods but also their language. Just like trade items, words started to exchange hands, becoming woven into the everyday vocabulary of people in India.

      Portuguese influence is present in many Hindi words we use today. “अलमारी” is just one of the many examples; words like “साबुन” (from the Portuguese word “sabão” for soap), “तौलिया” (from “toalha” for towel), and even “पैजामा” (from “pijama”) have similar origins. Over time, these foreign words were adapted to fit the needs and sounds of Hindi, creating a blend of cultures that we rarely think about when we speak.

      Also Read: Biped Slang Meaning: Understanding the Evolution and Use of “Biped” in Modern Slang.

      The Evolution of Meaning and Usage

      Originally, in Portuguese, the word “almario” was used to describe a cabinet or a place to store sacred items, but as it entered the Hindi language, “अलमारी” took on a more practical meaning. In India, it became a commonly used term for any cupboard or wardrobe where people store everyday essentials like clothes, utensils, or important documents. Over the years, the word “अलमारी” became deeply embedded in the Indian household vocabulary.

      Today, “अलमारी” is more than just a storage unit; it’s a symbol of organization and security within the home. It’s where families keep cherished items and valuable possessions, sometimes even hidden treasures from previous generations. This evolution from a simple cabinet to a beloved household staple reflects how the term “अलमारी” has found a unique place in our lives, bridging practicality with sentimentality.

      Cultural and Literary Significance

      The word “अलमारी” holds a special place not only in our homes but also in our hearts. In Indian culture, an अलमारी isn’t just about storing things—it’s about preserving memories. It’s a familiar piece of furniture, often passed down from generation to generation, filled with sentimental items like old letters, faded photos, or a grandparent’s belongings. For many, opening an अलमारी feels like opening a small time capsule of family history.

      In Hindi literature and poetry, the word “अलमारी” has often been used to convey nostalgia and memory. For instance, in one of मुनव्वर राना’s famous couplets, the अलमारी becomes a keeper of old love letters and forgotten trinkets:

      “अलमारी से ख़त उसके पुराने निकल आए,
      फिर से मिरे चेहरे पे ये दाने निकल आए।”

      This imagery of the अलमारी filled with memories is something many of us relate to, as it beautifully represents the deep emotional value it holds in our lives.

      Also read: Historical Temples in India: A Journey Through Time and Spirituality.

      The Broader Linguistic Impact

      The story of the word “अलमारी” is more than just an interesting piece of trivia; it’s a testament to how languages evolve and influence each other. Words like “अलमारी” remind us of a time when cultures met, exchanged, and left a lasting impact. Language is a bridge that connects us across centuries and continents, blending influences into something unique.

      When we use a word like “अलमारी,” we’re unknowingly celebrating this blend of cultures and linguistic exchange. Many of the foreign-origin words in Hindi have adapted not only in pronunciation but also in meaning, giving them a local flavor that makes them feel like they’ve always been part of the language. This transformation shows the adaptability of Hindi, making it a language that grows and changes while preserving its history.

      Conclusion

      So, अलमारी किस भाषा का शब्द है? The answer is Portuguese, but its journey is uniquely Indian. From “almario” to “अलमारी,” this word has traveled across continents, adapted to new meanings, and found a permanent home in our daily vocabulary. It’s more than just a borrowed term; it’s a symbol of the rich cultural exchanges that have shaped our language and, ultimately, our lives.

      Next time you open your अलमारी, remember that it’s not just a storage space but a piece of history and a reminder of how languages and cultures blend together. Words like “अलमारी” remind us to cherish the diversity of our language and to appreciate the unexpected ways history is preserved in the words we use every day.

      Frequently Asked Questions (FAQ) about ‘अलमारी’

      अलमारी किस भाषा का शब्द है?

      “अलमारी” शब्द पुर्तगाली भाषा से आया है, जहाँ इसे “almario” कहा जाता है। यह शब्द हिंदी में समाहित होकर कपड़े, बर्तन, या अन्य वस्तुएं रखने के लिए उपयोग होने वाले फर्नीचर को दर्शाता है।

      अलमारी का अंग्रेजी में क्या अर्थ है?

      अंग्रेजी में “अलमारी” को “cupboard,” “cabinet,” या “wardrobe” कहा जाता है, जो वस्त्र या अन्य सामान रखने के लिए उपयोग किए जाते हैं।

      अलमारी का बहुवचन क्या है?

      “अलमारी” का बहुवचन “अलमारियाँ” होता है, जो एक से अधिक अलमारियों को दर्शाता है।

      क्या अन्य भाषाओं में भी ‘अलमारी’ शब्द का उपयोग होता है?

      “अलमारी” शब्द का उपयोग मुख्यतः हिंदी और कुछ अन्य भारतीय भाषाओं में होता है। हालांकि, इसके मूल पुर्तगाली शब्द “almario” का उपयोग पुर्तगाली भाषा में किया जाता है।

      Categories
      Lifestyle

      Biped Meaning Explained: Literal vs Slang Usage

      “Biped” literally means any creature that walks on two legs — like humans.
      But in modern internet slang, it’s often used sarcastically to describe humans in a humorous or critical way, especially in memes and online forums. In this article, we break down both the scientific meaning of biped and how it’s evolved into modern-day slang, often reflecting on human behavior and quirks.

      Origin and Literal Definition of “Biped”

      Wondering what “biped” means? Learn the literal and slang meanings of biped, with simple examples and real-world usage.

      To fully understand the biped slang meaning, it helps to start with the word’s origins and its formal definition. Derived from Latin roots, “biped” combines “bi-” (meaning two) and “ped” (meaning foot or feet), essentially referring to any creature that walks on two feet. In biology, “biped” specifically describes humans and other animals, like birds, that have evolved to walk on two legs.

      This biped meaning isn’t just limited to a physical description; it often implies a certain evolutionary complexity. For instance, humans are considered highly developed bipeds because of our unique gait and upright stance, setting us apart from other animals.

      Now that we’ve established the original meaning, let’s move forward and explore how “biped” shifted from its scientific roots to become a slang term.

      Also Check Out: Understanding the Meaning of ‘Wish You a Very Happy Birthday’ in Hindi.

      Evolution of “Biped” into Slang

      Language constantly evolves, and technical terms often find new life in casual or humorous contexts. The journey of biped slang meaning is a fascinating example of how everyday language adopts scientific terms and reshapes them with fresh, informal connotations.

      So how did “biped” make this transition? Like many other slang words, “biped” likely began as a playful reference to humans, often in online communities or social media circles where users enjoy giving humorous or ironic names to ordinary things. For example, calling humans “bipeds” can feel amusingly distant, highlighting our physical traits in a way that’s almost scientific or alien. In some circles, using “biped” may even imply a sense of humor or self-awareness about human habits and behaviors.

      Current Slang Meanings of “Biped”

      Biped slang can mean:

      • Humorously referring to humans as two-legged creatures.
      • Highlighting human quirks in a self-aware or ironic way.
      • Adding a playful distinction between humans and animals.

      In its slang usage, biped meaning slang takes on a humorous or even slightly mocking tone. While the literal definition remains intact—a creature that walks on two legs—when used informally, “biped” often refers specifically to humans, sometimes with a hint of irony. For instance, people might refer to themselves or others as “bipeds” in a lighthearted way, emphasizing human quirks or behaviors from an outsider’s perspective.

      Here are a few examples to illustrate biped slang meaning in action:

      • “Look at all these bipeds at the coffee shop, glued to their phones.”
      • “As a biped, I sometimes feel out of place among all these four-legged friends.”
      • “Just another day in the life of a biped, stumbling through Monday.”

      These phrases highlight the playful, almost self-aware tone of the term when used in casual language. It allows people to view themselves with a little detachment, focusing on the physical nature of being human in a way that’s slightly comical or reflective.

      Also Check out: Wal Habibi meaning in Hindi – वल्लाह हबीबी का मतलब। ये क्या बोल दिया

      Why Certain Groups Use “Biped” as Slang

      The informal use of “biped” as slang is particularly popular in certain communities, especially online spaces like social media, gaming platforms, and forums where users embrace quirky or ironic terms to describe themselves. So, why do these groups use “biped” specifically? The biped slang meaning appeals to people in these spaces because it offers a fresh, slightly detached way to describe human beings, underscoring our traits with humor.

      For example:

      • Gamers and Sci-Fi Fans: In communities where people discuss non-human characters, extraterrestrial beings, or mythical creatures, referring to humans as “bipeds” can create a fun distinction. It’s as if humans are being observed by aliens, highlighting the peculiar nature of human life from an outsider’s perspective.
      • Animal Lovers and Pet Owners: Referring to themselves as “bipeds” adds a playful distinction between themselves and their four-legged pets, creating a humorous contrast that emphasizes the bond between humans and animals.
      • Social Media and Meme Culture: On social media, people often use terms like “biped” in a self-deprecating or ironic way to make light of human behaviors—whether it’s our fascination with technology, social habits, or the oddities of daily life.

      By using “biped” in these ways, different groups enjoy a way to detach slightly from everyday life, allowing humor and perspective to shine through.

      Connotations and Tone of “Biped” as Slang

      The biped slang meaning is often characterized by a tone that’s both humorous and slightly self-aware. When people use “biped” informally, it often comes with connotations that range from affectionate to mildly mocking, depending on the context. It’s a way to step back and view humans as simple, two-legged creatures—reminding us that while we may pride ourselves on intelligence and innovation, we’re ultimately just another species moving through the world on two feet.

      Here are a few of the nuanced tones “biped” can carry in slang:

      • Humorous: When used in a joking manner, “biped” becomes a lighthearted way to describe ourselves with a bit of ironic distance. For example, saying, “As a biped, I really don’t understand cats,” plays on the idea that humans can be as mysterious as other animals.
      • Self-Deprecating: By calling oneself a “biped,” a person might be poking fun at human limitations or quirks. It’s a reminder that we’re still creatures of habit, biology, and instinct, despite our technological advancements.
      • Affectionate or Playful: Some people use “biped” as an endearing term, especially among pet owners who see themselves as “bipedal companions” to their animals, contrasting their two-legged nature with the four-legged lives of their pets.

      These connotations allow “biped” to add a unique flavor to conversations, showing how slang terms can bring new layers of meaning and humor to language.

      Also Check out: Happy Diwali Wishes in Marathi: Heartfelt Greetings, Quotes, and Messages.

      Comparing “Biped” with Related Slang Terms

      The biped slang meaning has similarities to other slang terms that humorously or informally describe humans. Terms like “humanoid,” “two-legs,” and “Earthling” share a similar tone, often used to bring a playful or ironic perspective to the way we describe ourselves. Here’s a comparison of “biped” with these related terms, highlighting the unique connotations each one carries.

      TermDefinitionContext and ToneExample Usage
      BipedCreature that walks on two legs, often used to describe humansHumorous, self-aware, sometimes slightly mocking“Just a regular biped, trying to get through Monday.”
      HumanoidResembling a human in appearance or behaviorScientific, neutral, sometimes eerie or sci-fi“That robot looks almost humanoid—it’s kind of eerie.”
      Two-LegsPlayful term for humans, often used in animal-focused communitiesAffectionate, often used by pet owners or animal lovers“The two-legs finally came home and fed me.”
      EarthlingInhabitants of Earth, often used by sci-fi or alien perspectivesLighthearted, often humorous or in jest“As an Earthling, I really enjoy coffee.”
      HominidRefers to primates closely related to humans, like ancestors or cousinsScientific, historical, occasionally humorous“Sometimes I feel like a modern-day hominid, just foraging for food.”
      Comparing Biped with Related Slang Terms

      In this table:

      • Biped is distinct in its humorously detached way of describing humans.
      • Humanoid and Hominid lean more toward scientific or historical usage, occasionally used in informal settings for a quirky effect.
      • Two-Legs and Earthling take a playful approach, often used by pet owners or in sci-fi contexts.

      Each of these terms adds a unique twist, whether it’s humor, scientific flair, or a touch of irony. The biped slang meaning fits well among these words, offering a humorous, self-aware lens on human behavior and traits.

      Impact of Slang Like “Biped” on Language and Culture

      The biped slang meaning exemplifies how language is constantly evolving, with technical terms taking on new, informal uses that reflect cultural trends and attitudes. Slang terms like “biped” show the fluidity of language, as well as society’s fascination with humor and self-reflection. When people refer to themselves or others as “bipeds,” they’re not just using a funny term—they’re engaging in a playful form of self-awareness that’s very much a part of modern culture.

      The influence of slang like “biped” can be seen in a few key ways:

      • Language Adaptability: The adoption of “biped” in slang demonstrates how language adapts to meet the needs of social contexts. People often use language to explore identity, humor, and even self-deprecation, and the term “biped” fits this need perfectly.
      • Community Identity: By using terms like “biped,” different groups—whether pet owners, gamers, or online communities—create a shared language that fosters a sense of belonging. Calling humans “bipeds” sets a playful tone that connects people through humor.
      • Cultural Commentary: Using “biped” as slang can also serve as a subtle cultural commentary, reminding us that, despite technological advances, we’re still just creatures navigating the world on two legs. It’s a lighthearted acknowledgment of our place within the animal kingdom and the quirks of human nature.

      The impact of terms like “biped” in our language highlights how slang can deepen social connections and bring a fresh, humorous perspective to everyday life.

      Conclusion: The Journey of “Biped” from Science to Slang

      “The biped slang meaning captures the humorous shift of ‘biped’ from a scientific term to slang, playfully describing humans as two-legged creatures.”

      The journey of biped slang meaning is a testament to the adaptability and playfulness of language. What began as a straightforward scientific term describing creatures with two legs has evolved into a humorous, self-aware slang term that captures human quirks and behaviors in a lighthearted way. From online communities to casual conversations, “biped” has found new life, connecting people through shared humor and a subtle nod to our shared humanity.

      By embracing “biped” in informal language, people are not only adding a touch of humor but also engaging in a bit of cultural reflection, viewing themselves as both complex beings and simple, two-legged creatures. This transformation from science to slang exemplifies how language can break down traditional boundaries, turning formal terms into relatable expressions that resonate with a broad audience.

      As language continues to evolve, so too will our use of terms like “biped.” Who knows what other scientific terms might soon find their way into our everyday speech?

      Frequently Asked Questions (FAQ) about Biped Slang Meaning

      How did “biped” become a slang term?

      The term “biped” originated from its scientific use to describe two-legged creatures. Over time, it was adopted in informal language to refer to humans, often in a playful or self-aware manner.

      Can “biped” be used to describe animals other than humans?

      Yes, scientifically, “biped” describes any two-legged animal, such as birds or certain reptiles. However, in slang, it’s primarily used to refer to humans.

      Are there other slang terms similar to “biped”?

      Yes, terms like “two-legs,” “earthling,” and “hominid” are also used in slang to refer to humans, each carrying its own connotations and contexts.

      Categories
      Recipes

      How to Make Dhokla: A Delicious Guide to This Iconic Indian Snack

      Dhokla is more than just a snack; it’s a staple of Gujarati cuisine that has won hearts across India and beyond. Known for its fluffy texture, savory taste, and nutritional value, dhokla is both satisfying and light. This guide will walk you through everything you need to know about how to make dhokla at home, from understanding its history to mastering the perfect recipe.

      A Brief History of Dhokla

      Dhokla has its origins in Gujarat, a state in western India known for its vibrant and diverse culinary traditions. Traditionally made with a fermented batter of rice and chickpea flour, it was first popularized as a breakfast food. Over time, its versatile, easy-to-make nature led it to become a popular snack throughout the day, enjoyed with various chutneys and garnishes.

      Types of Dhokla: Exploring the Variations

      One of the best things about learning how to make dhokla is discovering the different varieties available. Here are some popular types:

      1. Khaman Dhokla: Made with chickpea flour, this is a softer and fluffier version, usually sweeter and often served with green chilies and mustard seeds.
      2. Rava (Sooji) Dhokla: A quick alternative made with semolina, often less time-consuming as it requires minimal fermentation.
      3. Khatta Dhokla: Prepared with a blend of rice and chickpea flour, giving it a slightly tangy flavor due to a longer fermentation process.

      These variations cater to different tastes and are enjoyed with different accompaniments, such as tamarind or green chutney. Each type of dhokla brings something unique to the table, so you can experiment and find your favorite.

      Choosing the Right Ingredients for Perfect Dhokla

      When learning how to make dhokla, the choice of ingredients plays a crucial role in achieving the ideal flavor and texture. Here’s a breakdown of the essential ingredients and some tips to select them for the best results.

      Core Ingredients Explained

      1. Besan (Chickpea Flour): The primary ingredient in classic dhokla, besan is responsible for the dish’s light, fluffy texture. Ensure you use fresh, good-quality besan to avoid any bitterness, as old flour can affect the taste and texture.
      2. Semolina (Rava/Sooji): Used in Rava Dhokla, semolina adds structure to the dhokla. It’s a great option when you want a quicker, non-fermented version of dhokla.
      3. Yogurt (Dahi): Yogurt provides the necessary acidity to help with fermentation, which is key for achieving a spongy texture. It also adds a slight tanginess to the batter.
      4. Eno or Baking Soda: A leavening agent like Eno (fruit salt) or baking soda is essential for that fluffy, spongy dhokla. Eno works faster and is the traditional choice, but baking soda is a suitable substitute if needed.

      Ingredient Variations

      If you’re looking to experiment, here are some alternatives:

      • Rice Flour: A common substitute for besan, especially in Khatta Dhokla, where it adds a subtle bite and a slightly different flavor profile.
      • Buttermilk: An excellent alternative to yogurt, buttermilk also provides a tangy flavor and aids in fermentation. It can create a softer texture, ideal for variations like Khaman Dhokla.

      Tips for Selecting Fresh Ingredients

      • Fresh Besan: Check the aroma of chickpea flour—it should smell nutty and fresh, without any mustiness.
      • Yogurt Quality: Opt for plain, unsweetened yogurt with a mild taste, as overly sour yogurt can impact the dhokla’s flavor.
      • Using Eno: Always add Eno just before steaming to keep the batter aerated. Expired or exposed Eno may not work effectively, so use a fresh pack for optimal results.

      Choosing the right ingredients sets the foundation for delicious dhokla, whether you’re going for a traditional or experimental take.

      Also Read: Simple Indian Thali: A Delicious Journey Through Traditional Flavors.

      Essential Equipment and Tools for Making Dhokla

      Having the right equipment can make a big difference when you’re learning how to make dhokla at home. While it is relatively simple to prepare, using the right tools ensures even cooking and a perfect texture. Here’s a list of essentials, along with some alternatives for those who may not have specialized kitchenware.

      1. Steamer

      • Traditional Steamer: The classic way to cook is in a traditional Indian steamer, which helps retain moisture and ensures even cooking. You can find multi-tiered steamers that allow you to cook several dhokla trays at once.
      • Instant Pot or Pressure Cooker: If you don’t have a traditional steamer, an Instant Pot or pressure cooker works well as an alternative. Just be sure to remove the whistle/pressure regulator if using a pressure cooker to prevent pressure buildup.

      2. Dhokla Trays or Thalis

      • Round or Square Trays: These shallow trays are typically used for steaming dhokla, allowing the batter to cook evenly and achieve the perfect thickness. Stainless steel trays are common, but glass or silicone baking dishes work too.
      • Alternatives: If you don’t have trays, any flat-bottomed, heat-safe dish that fits in your steamer can work. Just grease it lightly before pouring in the batter to prevent sticking.

      3. Whisk or Hand Mixer

      • Purpose: Whisking is key to achieving a light, airy batter. A hand whisk is effective, but an electric hand mixer can make the process faster and helps incorporate air into the batter.
      • Alternative: If you don’t have a whisk, you can use a fork. Just be sure to mix thoroughly and avoid overworking the batter, as this can make the dhokla dense.

      4. Ladle and Spoon Set

      • Using a Ladle: A ladle helps pour the batter smoothly into the tray, avoiding spills and maintaining an even layer of batter in the dish.
      • For Tempering: Once steamed, dhokla is often tempered with mustard seeds, curry leaves, and green chilies. A small tempering pan or ladle is ideal for this step to ensure even distribution of the hot oil and spices.

      Equipping yourself with the right tools enhances the dhokla-making experience and helps ensure perfect results every time.

      Also Check Out: 10 Easy Kodo Millet Recipes for Nutritious and Delicious Meals.

      Step-by-Step Process for Making Classic Dhokla

      This section will guide you through how to make dhokla from scratch, covering each step in detail to ensure perfect, fluffy results. Follow these instructions carefully, and remember to prepare all ingredients and tools beforehand to make the process seamless.

      Step 1: Prepare the Batter

      1. Combine the Ingredients: In a mixing bowl, add 1 cup of besan (chickpea flour), 2 tablespoons of semolina (optional for added texture), and a pinch of turmeric for color. Gradually add ½ cup of yogurt and ½ cup of water, stirring continuously to avoid lumps.
      2. Consistency Check: The batter should be smooth and slightly thick, with a pourable consistency. Add more water if necessary, but avoid making it too runny.

      Step 2: Rest the Batter

      1. Allow to Rest: Cover the batter and let it rest for about 15–20 minutes. This resting period helps the ingredients blend and allows the besan to absorb moisture, enhancing the texture.
      2. Check After Resting: After resting, stir the batter again. You may notice that it has thickened slightly; adjust with a little water if needed to keep the desired consistency.

      Step 3: Prepare for Steaming

      1. Add Eno or Baking Soda: Just before steaming, add 1 teaspoon of Eno or ½ teaspoon of baking soda to the batter. Stir gently but thoroughly to incorporate; you’ll see bubbles form, which is essential for a fluffy dhokla. Do not overmix after adding Eno, as this can reduce the aeration.
      2. Grease the Tray: Lightly grease your dhokla tray with oil to prevent sticking and pour the batter evenly into the tray, filling it about halfway to allow space for the dhokla to rise.

      Step 4: Steam the Dhokla

      1. Set Up the Steamer: Fill your steamer with water and allow it to come to a boil. Place a stand or trivet inside to hold the tray above the water level.
      2. Steam the Dhokla: Carefully place the tray in the steamer, cover, and steam for 15–20 minutes on medium heat. To check if it’s done, insert a toothpick in the center; it should come out clean when the dhokla is fully cooked.

      Step 5: Prepare the Tempering

      1. Heat Oil: In a small pan, heat 1–2 tablespoons of oil. Add 1 teaspoon of mustard seeds and let them splutter.
      2. Add Curry Leaves and Green Chilies: Add 5–6 curry leaves and 2 chopped green chilies, sautéing briefly until fragrant. Pour this tempering evenly over the steamed dhokla for an added layer of flavor.

      Step 6: Slice and Serve

      1. Slice the Dhokla: Allow the dhokla to cool for a few minutes, then use a knife to cut it into squares or diamond shapes.
      2. Garnish: Garnish with chopped coriander and, if desired, sprinkle with grated coconut for an authentic touch.
      3. Serve with Chutney: Dhokla pairs wonderfully with green chutney or tamarind chutney for a complete, flavorful snack.

      Following this step-by-step process ensures a light, fluffy, and flavorful dhokla every time.

      Also Check out: 12 Indian Breakfast Foods That Are Vegan And High In Protein.

      Secrets to Perfect Dhokla Texture

      Achieving the ideal texture—soft, spongy, and airy—is key to making delicious dhokla. Here are some essential tips and insights to help you master the texture of your dhokla every time.

      1. The Role of Eno and Baking Soda

      • Why Eno is Important: Eno or baking soda creates bubbles in the batter, helping it rise and become fluffy. Eno is preferred in traditional dhokla recipes as it reacts quickly, producing instant aeration. Add it only just before steaming to retain maximum fluffiness.
      • How Much to Use: Use 1 teaspoon of Eno for 1 cup of besan, or if using baking soda, reduce the amount to ½ teaspoon. Excess leavening agent can cause the dhokla to collapse or leave an aftertaste, so measure carefully.

      2. Consistency of the Batter

      • Smooth and Pourable: The batter should be smooth without any lumps and have a medium-thick consistency. If it’s too thick, the dhokla will turn out dense, and if it’s too thin, it may not rise well. Add water gradually to get the right texture.
      • Avoid Over-Mixing: Once you add Eno or baking soda, stir just enough to combine. Over-mixing can deflate the batter and lead to a less airy texture.

      3. Resting Time for Fermentation

      • Why Resting Helps: Allowing the batter to rest for 15–20 minutes before adding the leavening agent can enhance texture by giving besan time to absorb moisture. This step also supports natural fermentation, which contributes to the airy structure.
      • Fermentation for Authentic Taste: For a more authentic, slightly tangy flavor, let the batter rest for a longer period (about 2–3 hours) if you have time. This will make your dhokla softer and more flavorful.

      4. Perfect Steaming Technique

      • Setting Up the Steamer: Make sure your steamer is preheated before placing the batter inside. This ensures even cooking from the start and helps the dhokla rise properly.
      • Avoid Over-Steaming: Steam the dhokla for 15–20 minutes. Over-steaming can make it dry and tough. Test with a toothpick at the 15-minute mark to see if it’s done.

      5. Maintaining Moisture

      • Oil in the Batter: Adding a tablespoon of oil to the batter before steaming helps retain moisture, making the dhokla soft and avoiding dryness.
      • Tempering with Oil: Pouring tempered oil with mustard seeds and curry leaves over the steamed dhokla adds flavor and keeps the surface moist, enhancing the overall texture.

      With these tips, you’ll be able to consistently make dhokla that’s light, spongy, and packed with flavor.

      Also Check out: 12 Easy and Healthy Indian Lunch Box Ideas for School.

      Flavor Variations and Creative Twists

      Once you’ve mastered the classic recipe, exploring different flavors and creative twists can make your dhokla unique and cater to various tastes. Here are some popular and innovative ways to add a new dimension to your dhokla.

      1. Spiced and Herbed Dhokla

      • Adding Spices: Enhance the flavor of your dhokla by adding spices like crushed ginger, green chili paste, or even garlic paste to the batter. These spices will give your dhokla a savory, aromatic profile.
      • Herb Infusions: Freshly chopped herbs like coriander, mint, or curry leaves can be mixed into the batter for a refreshing twist. Herbs add color and a fresh aroma, making each bite more flavorful.

      2. Cheese-Stuffed Dhokla

      • Cheese Filling: For a fusion twist, try adding a layer of grated cheese or paneer (Indian cottage cheese) in the middle of the batter. Pour half the batter into the tray, sprinkle the cheese evenly, and then add the remaining batter on top.
      • Melting Delight: Once steamed, the cheese melts, creating a creamy center that pairs beautifully with the soft, spongy texture of dhokla. Serve immediately to enjoy the gooey cheese filling.

      3. Spinach or Beetroot Dhokla

      • Color and Nutritional Boost: For a colorful and nutritious variation, add puréed spinach or beetroot to the batter. Spinach purée gives a vibrant green color, while beetroot creates a striking pink hue.
      • Flavor Profile: These additions not only add color but also enhance the nutritional value of the dhokla. The flavors of spinach and beetroot are subtle, making them great options for adding vegetables without overpowering the dish.

      4. Sooji (Semolina) Dhokla

      • Alternative Base: For a quick and easy version, substitute besan with semolina (sooji). Rava (semolina) dhokla has a slightly firmer texture and doesn’t require long fermentation, making it an ideal choice for busy days.
      • Tangy Twist: Semolina dhokla pairs well with additional yogurt for a tangier taste, which enhances the flavor of this variation.

      5. Chocolate or Sweet Dhokla

      • Dessert Version: For a unique take, try a sweet dhokla variation by adding cocoa powder, sugar, and a touch of vanilla extract to the batter. Steam as usual and top with chocolate sauce or grated coconut.
      • Serve as Dessert: Sweet dhokla is a fun, unconventional twist that can be served as a dessert, offering a surprising and delightful flavor for anyone with a sweet tooth.

      6. Fusion Toppings and Garnishes

      • Tadka Variations: Experiment with different tempering ingredients—try sesame seeds, peanuts, or even cashews along with the usual mustard seeds and curry leaves for an added crunch.
      • Exotic Garnishes: Add pomegranate seeds or sprinkle chaat masala on top of the dhokla before serving. These garnishes enhance both the look and taste, adding a pop of flavor and color.

      By trying out these variations, you can bring new flavors to the classic dhokla and create something special for every occasion.

      Troubleshooting Common Issues In Dhokla

      Making dhokla can sometimes be tricky, especially if you’re new to the process. Here are solutions to some common issues people face when making dhokla, along with tips to help you avoid them.

      1. Dhokla Didn’t Rise Properly

      • Possible Cause: This usually happens if the leavening agent (Eno or baking soda) was old or inactive, or if it was mixed too vigorously.
      • Solution: Always use fresh Eno or baking soda and add it just before steaming. Stir gently to incorporate without overmixing, which can deflate the batter.

      2. Dhokla is Too Dense or Hard

      • Possible Cause: A thick batter or over-steaming can result in a dense, tough dhokla.
      • Solution: Make sure the batter has a smooth, pourable consistency before steaming. Use medium heat and steam for 15–20 minutes only, as over-steaming can dry it out. If the batter is too thick, add a bit of water to adjust the consistency.

      3. Dhokla is Sticky or Undercooked

      • Possible Cause: Sticky or undercooked dhokla is often the result of uneven steaming or a batter that was too thin.
      • Solution: Ensure your steamer is preheated and steaming evenly. Avoid adding too much water to the batter, as it should be thick enough to hold air bubbles without becoming watery.

      4. Dhokla Has a Bitter Aftertaste

      • Possible Cause: Excessive baking soda or Eno can cause a bitter aftertaste.
      • Solution: Stick to the recommended amount—1 teaspoon of Eno or ½ teaspoon of baking soda per cup of besan. Measure carefully to avoid bitterness.

      5. Dhokla Sticks to the Tray

      • Possible Cause: The tray wasn’t greased well, or the dhokla wasn’t cooled before removing.
      • Solution: Always grease the tray generously before pouring in the batter. After steaming, let the dhokla cool slightly before running a knife around the edges to ensure easy removal.

      6. Dhokla is Dry and Crumbly

      • Possible Cause: Over-steaming or insufficient oil in the batter can cause dryness.
      • Solution: Add a tablespoon of oil to the batter for moisture, and avoid overcooking. A quick tempering of mustard seeds and curry leaves in oil, poured over the steamed dhokla, can also help maintain moisture.

      Quick Troubleshooting Table

      ProblemPossible CauseSolution
      Didn’t riseOld Eno/baking sodaUse fresh Eno; add just before steaming
      Too dense/hardThick batter, over-steamingAdjust batter consistency; steam for 15–20 minutes
      Sticky/undercookedThin batter, uneven steamingMaintain thick batter; ensure steamer is preheated
      Bitter aftertasteToo much Eno/baking sodaUse recommended amounts and measure carefully
      Sticks to trayInsufficient greasingGenerously grease tray; cool before removing
      Dry and crumblyOver-steaming, no oil in batterAdd oil to batter; avoid overcooking
      Troubleshooting Table

      These tips and solutions should help you achieve the perfect dhokla, even if you encounter a few bumps along the way.

      Serving and Presentation Tips

      Dhokla is not only about taste but also about presentation. Serving it with the right accompaniments and garnishes can elevate its appeal and make it look as good as it tastes. Here are some tips to present your dhokla beautifully, whether it’s for a family snack or a special occasion.

      1. Slicing the Dhokla

      • Shape Matters: Once the dhokla is slightly cooled, slice it into uniform squares or diamond shapes using a sharp knife. Clean edges make it look more appealing, and diamond-shaped pieces give a traditional look.
      • Use a Non-Stick Knife: If the dhokla is sticking to the knife, lightly oil the knife or dip it in warm water for smooth, clean cuts.

      2. Garnishing for Visual Appeal

      • Coriander and Coconut: Top the dhokla with freshly chopped coriander and a sprinkle of grated coconut for a traditional garnish that adds both flavor and color.
      • Pomegranate Seeds: Add a handful of pomegranate seeds on top for a pop of color and a subtle sweetness that contrasts nicely with the savory dhokla.
      • Sev or Fried Curry Leaves: For added crunch, sprinkle some sev (thin, crispy chickpea noodles) on top, or garnish with fried curry leaves for a unique twist.

      3. Serving with Chutneys

      • Green Chutney: Serve dhokla with fresh green chutney made from coriander, mint, and green chilies. The vibrant color and tangy taste of green chutney complement the mild flavor of dhokla perfectly.
      • Tamarind Chutney: For those who enjoy a sweet and tangy contrast, tamarind chutney is a great addition. Its dark color and syrupy consistency add depth to the presentation.
      • Chutney Duo: Offering both green and tamarind chutneys lets guests mix and match flavors. Presenting the chutneys in small bowls or dipping trays makes it convenient for dipping.

      4. Plating Ideas

      • Platter Presentation: Arrange the dhokla pieces on a large serving platter, garnished with coriander, coconut, and pomegranate seeds. Place small bowls of chutneys alongside for an inviting display.
      • Individual Servings: If you’re serving dhokla as a snack at a party, place a few pieces in individual serving plates or bowls with a small drizzle of chutney on top and a sprinkle of sev for a restaurant-style presentation.
      • Layered Presentation: For a unique display, stack a couple of pieces of dhokla, garnishing each layer with chutney or a dash of garnish, creating a mini dhokla tower.

      5. Adding Tempering Just Before Serving

      • Fresh Tempering: Adding fresh tempering (tadka) with mustard seeds, curry leaves, and green chilies over the dhokla just before serving gives it an aromatic, glossy finish.
      • Serving Hot: If possible, serve dhokla warm with the tempering still fragrant and fresh. This makes it more appetizing and keeps the texture soft.

      6. Accompaniments for a Complete Experience

      • Tea or Coffee: Dhokla pairs wonderfully with hot tea or coffee, especially as a breakfast or evening snack.
      • Chai Pairing: For a traditional touch, serve dhokla with masala chai. The combination of warm spices from the chai enhances the dhokla’s mild, savory flavor.

      These serving tips and presentation ideas add the final touch to your dhokla, making it an inviting, visually appealing dish that’s perfect for any occasion.

      Health Benefits and Nutritional Insights

      Dhokla is not only delicious but also a nutritious option, making it a popular choice for health-conscious eaters. Here’s an overview of the health benefits of dhokla and why it’s a great addition to a balanced diet.

      1. High in Protein and Low in Calories

      • Protein-Rich: Made primarily from besan (chickpea flour), dhokla is a good source of plant-based protein. Protein is essential for muscle repair and growth, and it keeps you feeling full for longer, making dhokla a satisfying snack.
      • Low in Calories: Steamed instead of fried, dhokla is a low-calorie dish that’s lighter than many other snacks. A typical serving contains around 100–150 calories, making it an ideal choice for weight-conscious individuals.

      2. Aids in Digestion

      • Fermented Batter: The fermentation process for making dhokla not only improves its texture but also enhances its digestibility. Fermented foods contain beneficial bacteria that support gut health, helping in better digestion and nutrient absorption.
      • Rich in Fiber: Chickpea flour is high in fiber, which aids in digestion and helps prevent constipation. The fiber content in dhokla makes it filling and supports digestive health.

      3. Packed with Essential Nutrients

      • Vitamins and Minerals: Dhokla contains various essential nutrients, including B-vitamins, iron, magnesium, and folate. These nutrients are crucial for energy production, blood health, and overall well-being.
      • Good Source of Folate: Folate, present in chickpeas, is especially important for pregnant women and plays a role in cell growth and development.

      4. Low Glycemic Index

      • Blood Sugar Control: Dhokla has a low glycemic index, which means it causes a gradual rise in blood sugar levels rather than a spike. This makes it suitable for people managing blood sugar levels, such as those with diabetes.
      • Complex Carbohydrates: The fiber and complex carbs in dhokla help regulate blood sugar, providing a steady release of energy without sudden spikes or crashes.

      5. Heart-Healthy Snack

      • Cholesterol-Free: Dhokla is naturally cholesterol-free, which is beneficial for heart health.
      • Low in Saturated Fat: With minimal oil used in the preparation, dhokla is low in saturated fat, supporting cardiovascular health.

      6. Gluten-Free Option

      • For Gluten Sensitivity: Since besan is naturally gluten-free, dhokla is a safe option for those with gluten intolerance or celiac disease. Ensure all ingredients used are certified gluten-free if you’re catering to individuals with gluten sensitivities.

      With its high protein content, digestive benefits, and low-calorie count, dhokla is a well-rounded snack that combines taste with health. Enjoying dhokla regularly can be part of a balanced diet, offering both nutritional and flavor benefits.

      FAQ Section: Common Questions About How to Make Dhokla

      Here are answers to some frequently asked questions to help address any remaining doubts and ensure a smooth experience when making dhokla.

      Can I Make Dhokla Without Fermentation?

      Yes, you can skip the traditional fermentation by using instant leavening agents like Eno or baking soda. Simply mix these into the batter right before steaming to achieve a spongy texture without a long fermentation process.

      How Can I Make My Dhokla Spongier?

      To get a spongier texture, make sure to use fresh Eno or baking soda and add it just before steaming. Also, ensure the batter is smooth and of medium-thick consistency; avoid over-mixing after adding the leavening agent to retain the airiness.

      Can I Make Dhokla in the Microwave?

      Yes, dhokla can be made in the microwave for a quick option. Pour the batter into a microwave-safe dish, cover loosely, and microwave on high for about 4–5 minutes. The texture may differ slightly from traditional steaming, but it’s a convenient option for busy days.

      Exit mobile version