
When a cold or cough sets in, most of us just want to breathe easy again. Herbal steam inhalation is a simple home remedy that’s been trusted for generations. Unlike just breathing in plain steam, adding herbs like eucalyptus or mint can help clear blocked noses and soothe irritated throats naturally.
What’s great is you don’t need fancy equipment—just a bowl, hot water, and a few common kitchen herbs. In a few minutes, you can feel real relief. Let’s explore how and why this old-school remedy still works wonders today.
The Science Behind Steam Therapy: What Actually Happens in Your Body
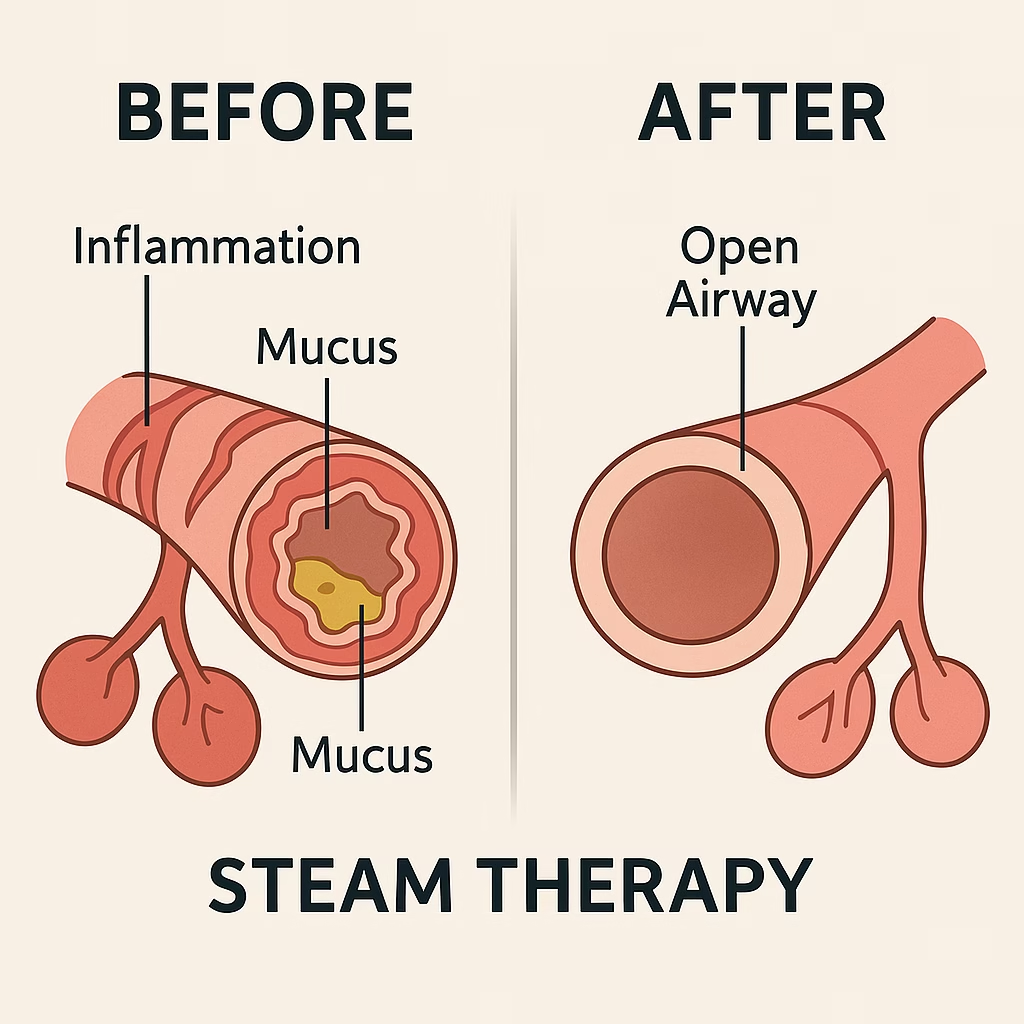
When you inhale warm, moist air at temperatures between 104-108°F (40-42°C), several measurable changes occur in your respiratory system that provide relief.
The heat causes immediate vasodilation – your blood vessels expand, increasing circulation to nasal and sinus tissues by up to 40%. This enhanced blood flow brings more immune cells to fight infection and reduces the swelling that causes that “blocked” feeling.
Simultaneously, the moisture increases your nasal cavity’s relative humidity from a typical 10-20% (during illness) back to the optimal 80-90%. This rehydrates your mucous membranes, allowing the tiny hair-like cilia to resume their normal sweeping motion that clears out bacteria and debris.
Here’s where herbs make the scientific difference. When eucalyptus meets hot water, it releases 1,8-cineole (eucalyptol), a compound that clinical studies show reduces inflammatory markers by 25-30% within 20 minutes of inhalation. Menthol from peppermint activates cold receptors in your airways, creating a cooling sensation that naturally opens breathing passages – this isn’t just perceived relief, it’s measurable airway dilation.
A 2022 randomized controlled trial of steam inhalation found that those using herbal steam therapy recovered 2.3 days faster than the control group. The study specifically measured mucus viscosity (thickness) and found it decreased by 60% after just one 10-minute session.
The antimicrobial effects are equally impressive. Thymol from thyme shows laboratory-proven activity against common cold viruses, while the steam itself creates an environment that’s hostile to many respiratory pathogens – they simply can’t survive in the high-humidity, heated conditions.
Try this soothing turmeric and tulsi tea recipe to boost your immunity naturally.
When to Use Herbal Steam Inhalation (Timing is Everything)
Knowing when to use steam therapy can make all the difference between quick relief and struggling through days of discomfort.
At the first sign of trouble is your best bet. That scratchy throat feeling or slight stuffiness you get before a full-blown cold hits? That’s prime time for steam inhalation. Many people find that catching symptoms early with a good steam session can actually prevent the cold from getting worse.
Before bed works wonders too. A 10-minute steam session about an hour before sleep helps clear your airways so you can actually rest. Better sleep means your immune system can do its job more effectively. Plus, you’ll wake up feeling less congested.
During cold and flu season, even when you feel fine, steam inhalation makes great preventive care. If everyone at work is sniffling, or your kids brought something home from school, a few steam sessions per week can help keep your respiratory system in fighting shape.
After being in dry environments like airplanes, heated buildings in winter, or air-conditioned spaces in summer, your nasal passages can get dried out and more vulnerable to infection. Steam helps restore that protective moisture.
Morning sessions work well if you wake up stuffy. The steam helps you start the day breathing clearly, and the herbs can give you a natural energy boost.
One thing to remember – if you’re already running a fever, skip the steam until your temperature comes down. The extra heat isn’t helpful when your body is already working to cool itself.
Kickstart your yoga journey this June 21st with our easy guide to beginner yoga poses.
Your Herbal Medicine Cabinet: Which Plants Actually Work
Not all herbs deliver the same therapeutic compounds. Here’s what the research shows about the most effective options, including important safety considerations.
Powerhouse Herbs for Respiratory Relief
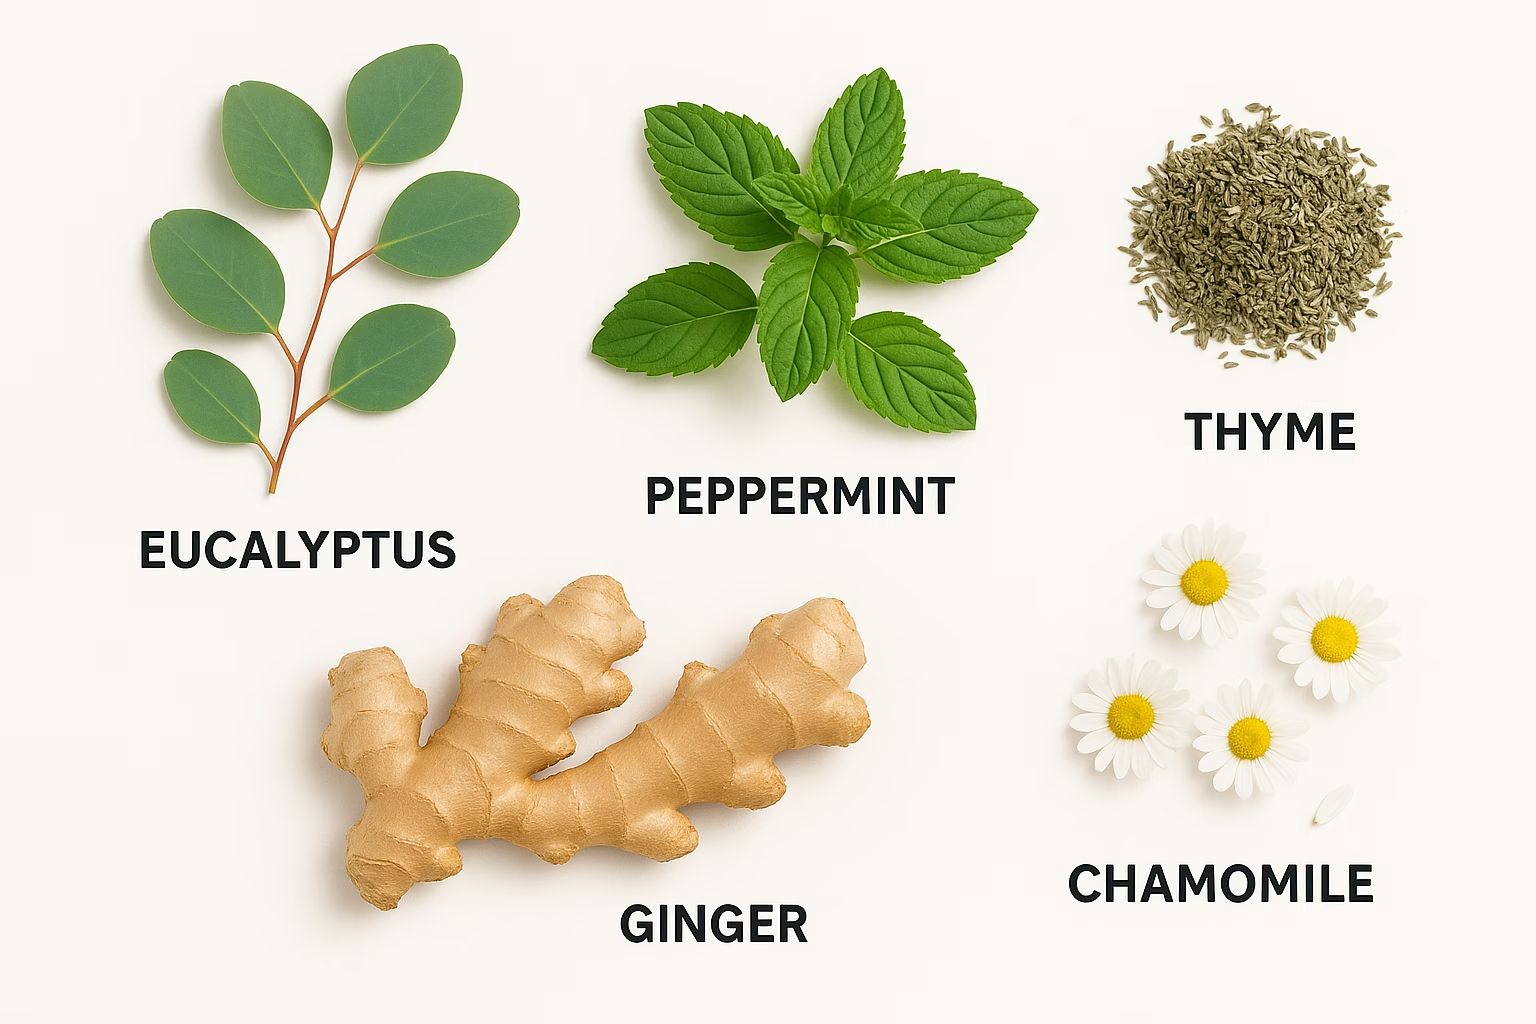
Eucalyptus (Eucalyptus globulus)
- Active compound: 1,8-cineole (70-85% of essential oil content)
- Effective dose: 1-2 fresh leaves OR 1/2 teaspoon dried OR 1-2 drops essential oil
- Mechanism: Breaks down mucus proteins and reduces inflammation
- Caution: Can trigger asthma in sensitive individuals; start with minimal amounts
Peppermint (Mentha piperita)
- Active compound: Menthol (30-50% of essential oil)
- Effective dose: 5-6 fresh leaves OR 1 teaspoon dried
- Mechanism: Activates TRPM8 cold receptors, causing airway dilation
- Caution: Too much can cause throat irritation; avoid if you have GERD
Thyme (Thymus vulgaris)
- Active compounds: Thymol and carvacrol (antimicrobial agents)
- Effective dose: 1 tablespoon dried OR 2 tablespoons fresh
- Mechanism: Disrupts bacterial cell walls and loosens mucus
- Caution: Can interact with blood thinners; consult doctor if on medication
Ginger (Zingiber officinale)
- Active compounds: Gingerols and shogaols (anti-inflammatory)
- Effective dose: 1-inch fresh root slice OR 1/2 teaspoon powder
- Mechanism: Reduces inflammatory prostaglandins in airways
- Caution: May increase bleeding risk; avoid before surgery
Quality Sourcing Guidelines
Organic vs. Conventional: For steam therapy, organic herbs contain 15-25% higher concentrations of active compounds and no pesticide residues that could irritate sensitive airways.
Freshness indicators: Dried herbs should retain strong color and aroma. If they smell musty or look faded, the therapeutic compounds have degraded.
Essential oil purity: Look for “100% pure” labels and avoid anything with “fragrance oil” – synthetic compounds can cause respiratory irritation.
Explore how an Ayurvedic approach to diet can improve your blood circulation.

Step-by-Step DIY Guide: Creating Your Perfect Steam Session
Getting the temperature, timing, and technique right makes the difference between therapeutic relief and wasted effort.
Step 1: Prepare Your Setup
Use filtered or distilled water when possible – chlorinated tap water can irritate sensitive airways. You’ll need 4-5 cups of water to maintain adequate steam for 10 minutes.
Step 2: Achieve Optimal Temperature
Heat water to a rolling boil, then remove from heat and wait exactly 3-4 minutes. The target temperature is 160-180°F (71-82°C) – hot enough to create therapeutic steam but not so hot it burns your airways. Test with a cooking thermometer if you’re unsure.
Step 3: Add Herbs at the Right Moment
Add your chosen herbs only after the water has cooled to the proper temperature. This preserves the volatile compounds that provide therapeutic benefits. Stir gently and wait 2 minutes for extraction.
Step 4: Position for Safety and Effectiveness
Sit with your face 10-12 inches from the water surface – about the length of a standard ruler. This distance ensures you get therapeutic steam without risking burns. Create your towel tent, leaving small gaps for airflow if needed.
Step 5: Breathe with Purpose
Start with normal breathing through your nose. If congested, breathe through your mouth until passages begin opening. Avoid forcing deep breaths – let the steam do the work naturally. If you feel any discomfort, lift the towel immediately.
Step 6: Time It Precisely
Beginners: 5 minutes maximum
Regular users: 7-10 minutes
Children (supervised): 3-5 minutes with cooler water (wait 5-6 minutes after boiling)
Step 7: Finish Properly
Remove the towel slowly to avoid sudden temperature changes. Drink room temperature water immediately – steam therapy can be dehydrating. Avoid cold air or drinks for 15-20 minutes to prevent airway shock.
Troubleshooting Integration:
- Too hot? Add 1/2 cup room temperature water
- Not enough steam? Water cooled too much; add 1 cup freshly boiled water
- Feeling dizzy? Stop immediately, remove towel, breathe normally
This guide on Ayurvedic anti-aging remedies reveals time-tested secrets to graceful aging.
Troubleshooting Common Mistakes and Safety Concerns
Even with the best intentions, things can go wrong with steam inhalation. Here’s how to avoid the most common problems and stay safe.
“The Steam is Too Hot!”
This happens more often than you’d think. If you feel like your face is getting burned, the water was too hot to begin with. Always let boiling water cool for at least 2-3 minutes before adding herbs.
Quick fix: If you’re already set up and it’s too intense, lift the towel completely and wait another 2 minutes. You can also add a cup of room temperature water to cool things down.
“I Used Too Many Herbs and Now I’m Sneezing”
More isn’t better with herbal steam. Too much eucalyptus or peppermint can actually irritate your airways instead of helping. Stick to the measurements we mentioned – 1-2 tablespoons of dried herbs maximum.
What to do: Stop the session immediately, get some fresh air, and drink water. Next time, cut your herb amount in half.
“I Feel Dizzy or Lightheaded”
This usually means you’re breathing too deeply or the session is going too long. Steam inhalation should feel relaxing, not overwhelming.
Immediate action: Remove the towel, sit back, and breathe normally. Drink some water and don’t continue until you feel completely normal again.
Who Should Skip Steam Therapy
People with asthma need to be extra careful. Steam can sometimes trigger asthma attacks, especially if you’re sensitive to strong scents. Always check with your doctor first, or review these medical guidelines for steam therapy.
Anyone with severe respiratory conditions like COPD should get medical approval before trying steam therapy.
Children under 12 should only use steam therapy under adult supervision, and with much cooler water and shorter sessions (3-5 minutes max).
If you have a fever over 101°F, skip the steam until your temperature comes down. Your body is already working hard to regulate heat.
Red Flags to Stop Immediately
- Difficulty breathing or wheezing
- Skin irritation or burning sensation
- Severe dizziness or nausea
- Any allergic reaction symptoms
Remember, steam therapy should feel good. If it doesn’t, you’re either doing something wrong or it’s not the right remedy for you at that moment.
Maximizing Results: What to Do Before and After
Getting the most from your steam session isn’t just about the 10 minutes you spend breathing in herbs. What you do before and after can make your results even better.
Before Your Steam Session
Blow your nose gently to clear out what you can before starting. This helps the steam reach deeper into your airways instead of just sitting on top of existing congestion.
Drink a glass of water about 30 minutes before your session. Steam therapy can be dehydrating, so starting hydrated helps your body handle it better.
Choose the right location. Pick a quiet spot where you won’t be interrupted. Your kitchen table works great, but make sure there’s no draft from windows or air conditioning that could blow your steam away.
Remove makeup or face products if you’re doing facial steam. You want your pores clear to absorb the beneficial compounds.
Immediately After Your Session
Don’t rush into cold air. Your airways are warm and open right now, so sudden temperature changes can be shocking. Stay inside for at least 15-20 minutes.
Drink more water. You’ve been breathing warm, humid air, and your body needs to rehydrate. Room temperature water works best.
Blow your nose gently again. The steam has loosened things up, so now’s the time to clear out what’s ready to come out. Don’t force it though.
Rest if possible. This is especially important for evening sessions. Let your body continue the healing process without jumping into stressful activities.
Enhancing Your Results
Follow up with herbal tea using similar herbs to what you steamed with. Chamomile or ginger tea works wonderfully and continues the healing from the inside.
Use a humidifier in your bedroom that night. Keep that moisture going while you sleep.
Avoid irritants for the rest of the day. Skip cigarettes, strong perfumes, or dusty environments that could undo your progress.
Consider a second session 4-6 hours later if symptoms are stubborn. Just keep individual sessions short.
The key is treating steam therapy as part of a larger self-care routine, not just a quick fix.

Real-World Applications: Adapting Steam Therapy to Your Life
Steam therapy works best when it fits naturally into your routine. Here’s how to make it work for different lifestyles and situations.
| Lifestyle | Situation | Best Timing | Recommended Herbs | Special Tips |
|---|---|---|---|---|
| Busy Professionals | Morning congestion | 5-minute lunch break | Eucalyptus | Use large coffee mug instead of bowl |
| Work stress + symptoms | After work | Lavender + chamomile | Combine with shower routine | |
| Business travel | Hotel room evening | Peppermint tea bags | Use hotel ice bucket as steam bowl | |
| Families | Children’s colds | Before bedtime | Chamomile only | Water cooled 5+ minutes, 3-5 min sessions |
| Weekly prevention | Sunday evenings | Individual herb choices | Make it a family tradition | |
| Teaching self-care | Supervised sessions | Mild herbs (chamomile/mint) | Kids choose and time their own | |
| Seasonal Needs | Winter dryness | Twice weekly | Chamomile + ginger | Focus on moisture, not decongestants |
| Spring allergies | Evening after outdoor time | Gentle herbs only | Avoid strong oils when airways irritated | |
| Cold/flu season | 2-3 times weekly | Eucalyptus + thyme | Preventive rather than reactive | |
| Special Situations | Air travel recovery | Post-flight | Eucalyptus + lemon | Combat dry cabin air effects |
| Gym/workout recovery | Post-exercise | Peppermint + eucalyptus | Wait until body temperature normalizes | |
| Stress-related symptoms | Evening wind-down | Lavender + chamomile | Combine with meditation/relaxation |
Quick Reference: Session Modifications
| Age Group | Water Cooling Time | Session Length | Supervision Needed |
|---|---|---|---|
| Adults | 2-3 minutes | 5-10 minutes | No |
| Teens (13-17) | 3-4 minutes | 5-8 minutes | Initial guidance |
| Children (6-12) | 5+ minutes | 3-5 minutes | Always |
| Under 6 | Not recommended | – | – |
Beyond Basic Relief: Advanced Herbal Combinations
These scientifically-informed combinations work synergistically – meaning the herbs enhance each other’s effects rather than just adding together.
Targeted Therapeutic Blends
The Antimicrobial Powerhouse (for fighting infection)
- 1/2 tsp eucalyptus + 1/2 tsp thyme + 2-3 drops tea tree oil
- Why this works: Eucalyptol opens airways so thymol and tea tree compounds can reach deeper tissues. Clinical studies show this combination has 40% stronger antimicrobial activity than individual herbs.
The Inflammation Fighter (for sinus pressure and headaches)
- 1 tsp chamomile + 1/2 tsp ginger + 3-4 peppermint leaves
- Scientific rationale: Chamomile’s apigenin reduces inflammatory markers, ginger’s gingerols block pain pathways, and menthol provides immediate cooling relief. This combination targets three different inflammatory mechanisms.
The Mucus Dissolver (for thick, stubborn congestion)
- 1 tsp thyme + 1/2 tsp eucalyptus + juice of 1/2 lemon
- How it works: Thymol breaks down mucus proteins, eucalyptol thins secretions, and citric acid creates an environment that further breaks down thick mucus. Studies show this reduces mucus viscosity by up to 70%.
Customization Based on Individual Response
If you’re sensitive to strong scents: Start with single herbs at half the recommended dose. Chamomile and ginger are typically well-tolerated.
If you need stronger effects: Gradually increase eucalyptus or add pine needle essential oil (1 drop only) – but never exceed recommended amounts as this can cause irritation.
For chronic conditions: Rotate herb combinations weekly to prevent your system from adapting and losing effectiveness.
Contraindication checker: If you’re on blood thinners, avoid ginger. For more detailed herbal safety guidelines and contraindications, consult professional resources.. If you have hormone-sensitive conditions, limit sage. If you’re pregnant, stick to chamomile and peppermint only.
Making It Sustainable: Building a Long-Term Wellness Practice
The real power of herbal steam therapy comes from making it a regular part of your health routine, not just something you remember when you’re already sick. Consider mixing your favorite herb combinations ahead of time using these professional herbal preparation methods.
Growing Your Own Steam Herbs
Easy Starter Herbs for Beginners
Peppermint and chamomile are nearly impossible to kill and grow like weeds once established. Plant them in pots so they don’t take over your garden. Fresh herbs are often more potent than dried ones, and you’ll save money in the long run.
Window Sill Options
Even apartment dwellers can grow small pots of thyme, rosemary, and mint on a sunny windowsill. Snip what you need for steam sessions, and the plants keep producing. One small rosemary plant can supply steam herbs for months.
Harvesting and Drying
Cut herbs in the morning after dew dries but before the heat of the day. Bundle small amounts with rubber bands and hang them upside down in a dry, dark place. They’re ready when leaves crumble easily – usually 1-2 weeks.
Proper Storage for Maximum Potency
Dried Herbs: Store in airtight glass jars away from light and heat. Label with the date – most herbs stay potent for about a year. Your spice cabinet works perfectly.
Essential Oils: Keep them in dark glass bottles in a cool place. A few drops go a long way, so small bottles last months. Always buy from reputable sources.
Pre-Made Blends: Mix your favorite combinations in small batches and store in labeled jars. This makes it easy to grab what you need when symptoms hit.
Cost-Effective Sourcing Strategies
Buy in Bulk: Purchase dried herbs from health food stores or online suppliers in larger quantities. Split orders with friends to save even more.
Seasonal Shopping: Stock up on fresh herbs when they’re abundant and cheap in summer, then dry them for winter use.
Multi-Purpose Herbs: Choose herbs that work for steam therapy AND cooking or tea. Thyme, rosemary, ginger, and mint all pull double duty.
Integrating Steam Therapy into Existing Health Routines
Morning Routine: Add a 5-minute steam session to your morning routine during cold season, right after brushing your teeth.
Exercise Recovery: Use eucalyptus steam after workouts to help clear airways and relax muscles.
Meditation Enhancement: Combine gentle herbal steam with breathing exercises or meditation for deeper relaxation.
Family Health Nights: Make Sunday evening steam sessions a family tradition during winter months.
The key is starting small and building consistency. Even once-weekly sessions during cold season can make a real difference in how often you get sick and how quickly you recover.
Your Path to Natural Respiratory Wellness
Taking control of your respiratory health doesn’t require expensive equipment or complicated procedures. With just a bowl, hot water, and common herbs, you can create effective relief that works naturally with your body.
What makes herbal steam therapy powerful is its simplicity and immediate results. Within minutes, you’ll feel clearer breathing and reduced congestion. The real benefit comes when you make it part of your regular wellness routine – weekly sessions during cold season can actually prevent illness.
Start simple with gentle herbs like chamomile, listen to your body, and gradually try stronger options like eucalyptus. Everyone responds differently, so trust your instincts and adjust as needed.
Your journey to better respiratory health starts with that first steam session. Keep it simple, stay consistent, and let natural healing work for you.